| KIT #: | 32572 |
| PRICE: | $37.00 SRP |
| DECALS: | Three options |
| REVIEWER: | Jonathan Prestidge |
| NOTES: |
| HISTORY |
From the kit
instructions: “During WWII, the British Army fielded slow, heavily armored tanks
developed to support infantry advances. The Matilda built by Vulcan Foundry was
the second such infantry tank. Made from thick cast metal and rolled steel
components, it was formidably protected with 78mm frontal armor and
 side armor
that covered the suspension. It had a crew of four, was armed with a 2-pdr.
(40mm) main gun, had a “Japanese” bogie type suspension for good low-speed
performance, and two AEC diesel engines that gave it a top speed of 24 km/h (15
mph). The Mk.II, which featured an air-cooled coaxial machine gun, followed the
initial Mk.I variant. 95hp Leyland diesel engines powered the Mk.III introduced
in 1940, and the Mk. IV featured further improved engines.
side armor
that covered the suspension. It had a crew of four, was armed with a 2-pdr.
(40mm) main gun, had a “Japanese” bogie type suspension for good low-speed
performance, and two AEC diesel engines that gave it a top speed of 24 km/h (15
mph). The Mk.II, which featured an air-cooled coaxial machine gun, followed the
initial Mk.I variant. 95hp Leyland diesel engines powered the Mk.III introduced
in 1940, and the Mk. IV featured further improved engines.
Matildas first saw major combat in May 1940 near the French town of Arras, where shells from the German tanks and anti-tank guns simply bounced off their thick armor as they disrupted the German advance. The Matilda was also sent to North Africa, where it swept aside Italian opponents and was respectfully called ‘Queen of the Desert’ by German forces. During Operation Battleaxe to lift the siege of Tobruk in June of 1941, German forces famously used their 88mm AA guns in the anti-tank role since they were the only effective counter against Matildas. The Matilda was the British Army’s main tank in North Africa until mid-1942. Production continued until August 1943, with many of the 2,890 examples produced given to countries such as Russia, where they served until the end of the war.”
| THE KIT |
 Wow, what
a gem! Tamiya’s 1/48th Matilda is kit No. 72 in their Military
Miniatures series. The instructions are well printed and easy to follow. The
engineering of the Tamiya Matilda is superb, resulting in beautiful detail
without difficult construction or an excessive parts count. For example, the
twenty-wheeled bogie assemblies consist of just 2 nicely molded pieces per side!
The kit is crisply molded in tan plastic. There is almost no flash on the kit
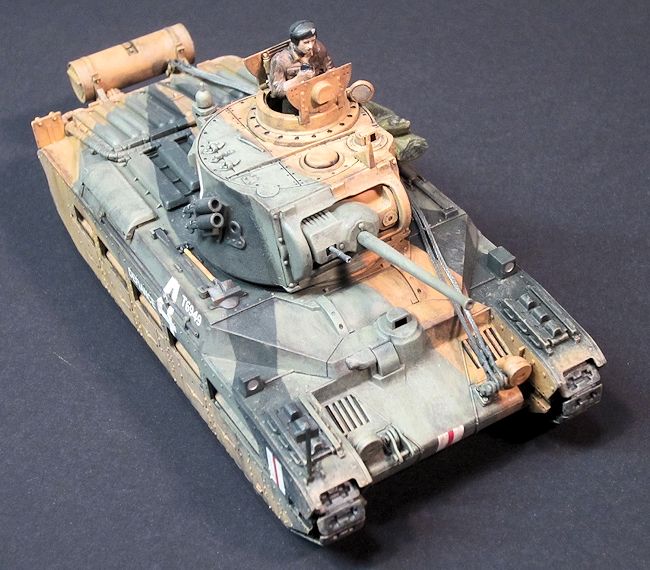
parts. One commander figure is included. The molding of the figure is mediocre –
not up to the excellent standard of the rest of the kit parts. The kit decals
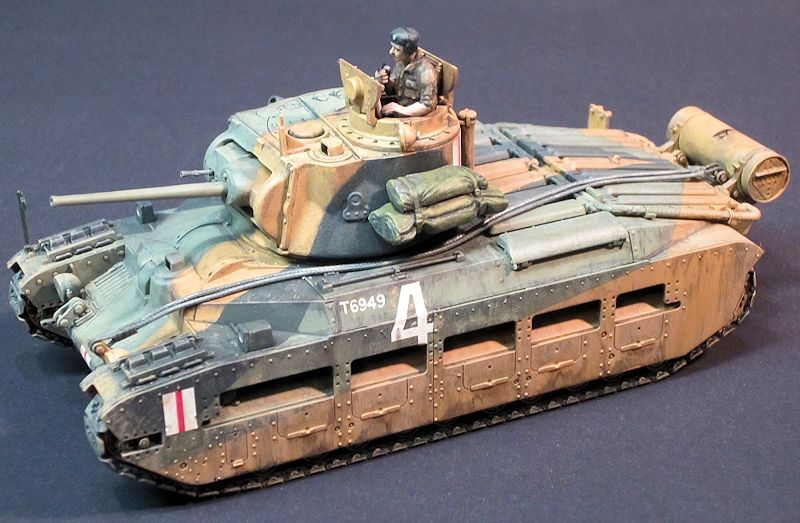
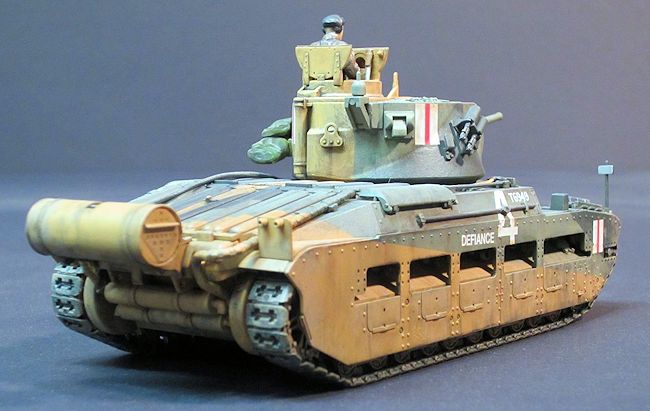
are thin, in register, and provide markings for three tanks - two in the North
African Caunter three-color scheme and one two-tone brown tank based in England.
The only inaccuracy that was readily apparent was the color callouts for the
Caunter three-color scheme (more on this later).
Wow, what
a gem! Tamiya’s 1/48th Matilda is kit No. 72 in their Military
Miniatures series. The instructions are well printed and easy to follow. The
engineering of the Tamiya Matilda is superb, resulting in beautiful detail
without difficult construction or an excessive parts count. For example, the
twenty-wheeled bogie assemblies consist of just 2 nicely molded pieces per side!
The kit is crisply molded in tan plastic. There is almost no flash on the kit
parts. One commander figure is included. The molding of the figure is mediocre –
not up to the excellent standard of the rest of the kit parts. The kit decals
are thin, in register, and provide markings for three tanks - two in the North
African Caunter three-color scheme and one two-tone brown tank based in England.
The only inaccuracy that was readily apparent was the color callouts for the
Caunter three-color scheme (more on this later).
| CONSTRUCTION |
 This was my
first tank build. I started by carefully reviewing the kit instructions, keeping
in mind the Caunter paint scheme that I wanted to incorporate. I decided to
follow the kit instructions to the letter up thru step 8, assembling the chassis
& tracks followed by the upper hull. I skipped step 9 (attaching the upper hull
to the chassis) to more easily facilitate painting and weathering. Steps 10 thru
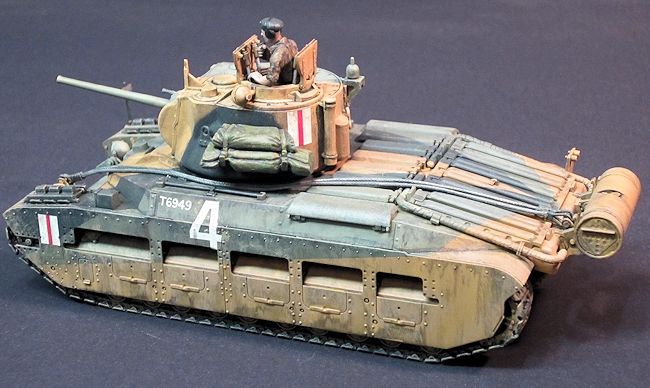
14 were then completed. In step 12 there were two tow cables and a reference for
the length (105mm) which I missed at first. In step 14 I only tacked the side
armor in place with a small amount of glue since it needed to be removed and
re-attached after the upper hull was glued to the chassis. The turret was then
assembled per the instructions. I only deviated from the instructions by leaving
off the cupola hatch doors, tow cables and canvas sheet until final assembly.
The superb fit of the parts, minimal cleanup and excellent engineering really
made for a rewarding and painless build. After about six hours of building, I
had the three main components (chassis, upper hull and turret) ready for paint.
This was my
first tank build. I started by carefully reviewing the kit instructions, keeping
in mind the Caunter paint scheme that I wanted to incorporate. I decided to
follow the kit instructions to the letter up thru step 8, assembling the chassis
& tracks followed by the upper hull. I skipped step 9 (attaching the upper hull
to the chassis) to more easily facilitate painting and weathering. Steps 10 thru
14 were then completed. In step 12 there were two tow cables and a reference for
the length (105mm) which I missed at first. In step 14 I only tacked the side
armor in place with a small amount of glue since it needed to be removed and
re-attached after the upper hull was glued to the chassis. The turret was then
assembled per the instructions. I only deviated from the instructions by leaving
off the cupola hatch doors, tow cables and canvas sheet until final assembly.
The superb fit of the parts, minimal cleanup and excellent engineering really
made for a rewarding and painless build. After about six hours of building, I
had the three main components (chassis, upper hull and turret) ready for paint.
| COLORS & MARKINGS |
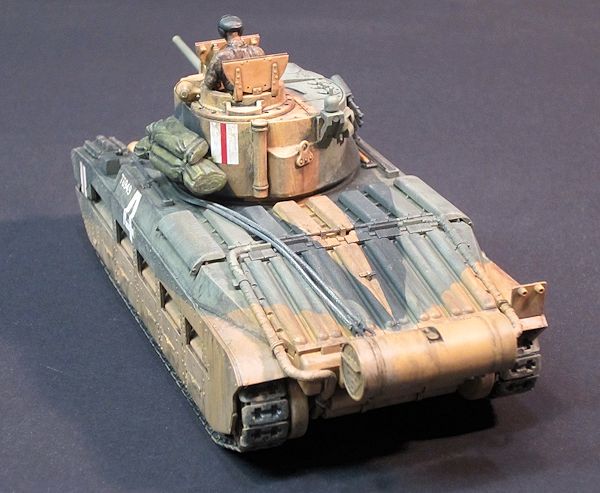
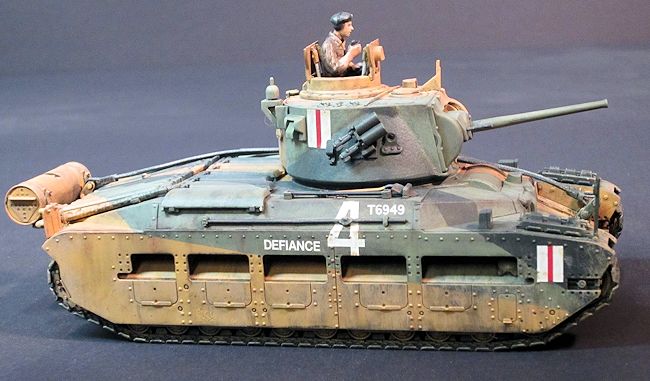
I chose
marking selection “B”, a Matilda with the 32nd Army Tank Brigade in
Libya, 1941. As I mentioned earlier in this review, the color call outs in the
instructions are incorrect. The correct colors for the Caunter three-color
scheme are: Light Stone, Silver Gray and Slate. After an hour or so of
researching the correct
 olors I
came up with some close equivalents. Being an aircraft modeler, I used the Poly
Scale acrylic paints I had on hand. For the Light Stone, I used Deck Tan. For
the Silver Gray I used British interior Green (RLM 02 is also very close). For
the Slate, I used RLM73 Green.
olors I
came up with some close equivalents. Being an aircraft modeler, I used the Poly
Scale acrylic paints I had on hand. For the Light Stone, I used Deck Tan. For
the Silver Gray I used British interior Green (RLM 02 is also very close). For
the Slate, I used RLM73 Green.
| FINAL CONSTRUCTION |
| CONCLUSIONS |
February 2014
If you would like your product reviewed fairly and quickly, please contact the editor or see other details in the Note to Contributors.