Airfix 1/76 Saladin Armoured Car
|
KIT #: |
02325 |
|
PRICE: |
HK$55.00
|
|
DECALS: |
Several options |
|
REVIEWER: |
Richard F |
|
NOTES: |
|
 Armoured cars go back to the very beginning of last
century. They really matured in World War Two, where they were used for
reconnaissance and a range of other tasks short of full on combat against
enemy tanks. Armoured cars were valued not so much for their firepower as
for their speed, reliability (compared to tanks), their ability to go cross
country and act independently.
Armoured cars go back to the very beginning of last
century. They really matured in World War Two, where they were used for
reconnaissance and a range of other tasks short of full on combat against
enemy tanks. Armoured cars were valued not so much for their firepower as
for their speed, reliability (compared to tanks), their ability to go cross
country and act independently.
That said, some armoured cars ended up with some pretty heavy weaponry. The
post-war Saladin was one of them. It replaced the British AEC Armoured Car,
which had served in WW2 and carried a 75 mm gun.
The Saladin carried a 76mm cannon and two machine guns. It could truck along
at 70 km/h and had a range of 400 km/h. Despite being a Cold War era
vehicle, it didn't have NBC protection for its crew.
According to Wikipedia, "The Saladin was used by B sqn 16/5 Lancers during
their defence of Nicosia airport in 1974 and subsequent armed recce
operations under the banner of the UN". The Saladin was replaced in British
service by the Scorpion light tank, but it saw many decades of service in
other places like Indonesia and Sri Lanka.
The Australian military took the gun turrets from Saladin armoured cars and
put them on top of M113 tracked armoured personnel carriers to create the
Fire Support Vehicle during the 1960s.
 This little gem was originally made by a company called JB, which was bought
out by Airfix. In 2008 Airfix released this and a few other JB kits.
This little gem was originally made by a company called JB, which was bought
out by Airfix. In 2008 Airfix released this and a few other JB kits.
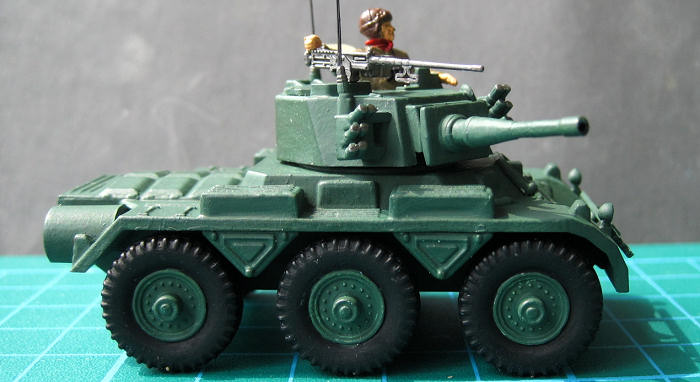
It's a neat and basic kit. Nicely moulded, with simple detail. I guess for
serious armour modelers, it may not be up to scratch (considering what you
can get these days). But in this scale, and of such a relatively obscure
vehicle, I suspect it is quite popular anyway.
It doesn't have much detail behind the wheels, nor are there many smaller
parts to give it the busy appearance military vehicles really have (lots of
grab handles, attachments, etc).
There are some sink marks or depressions on the stowage boxes on the top of
the hull. I didn't bother trying to fix these.
The pintle mounted machine gun is pretty awful and I recommend replacing it
or just leaving it off.
I haven't built a tank or anything similar since I was a kid. This was a
quickie build for fun.
There's no interior, so I built the turret first. Be sure not to glue the
gun on if you want it to move. While that was drying, I put together the
hull (two parts - didn't take long) and made the smaller components (the two
smoke grenade launchers).
At this point I painted the whole thing - see below.
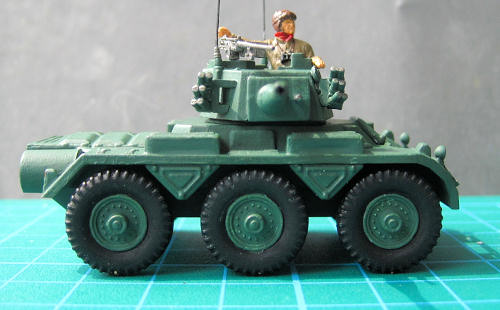
 After the paint was dry, I moved to the final stages of construction. First,
I enlarged the hole where the turret attaches to the hull. It was a tight
fit and I wanted to be able to move my turret without applying too much
force. I added the smoke cannisters, and the two antenna mounts. I cut off
the thick kit antennae and replaced them with stretched sprue.
After the paint was dry, I moved to the final stages of construction. First,
I enlarged the hole where the turret attaches to the hull. It was a tight
fit and I wanted to be able to move my turret without applying too much
force. I added the smoke cannisters, and the two antenna mounts. I cut off
the thick kit antennae and replaced them with stretched sprue.
The kit's machine gun is really weird looking so I took a .50 cal gun from
my Italeri M-20 kit and used that instead. I doubt it is the right gun for
this vehicle, but that didn't bother me.
The 6 wheels are attached to a generic suspension component which then goes
onto the hull. Be sure to align your wheels carefully so they are all
touching the ground.
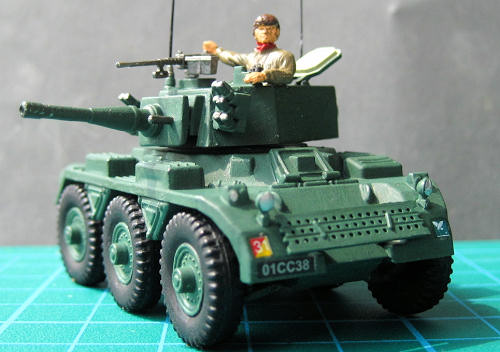
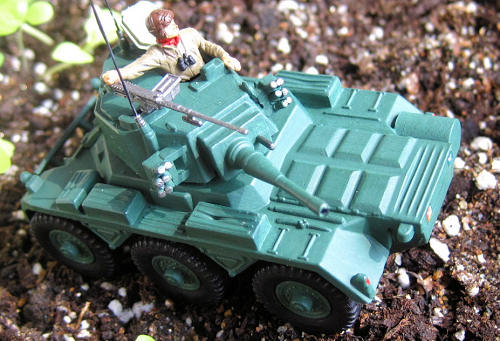
In the excellent Italeri US Army figure set number 6120 released in 2008
there is a tank commander. I took him, cut off his legs and head, and cut
the pistol out of his hand. I bent his other arm around a bit, put the head
back on at a different angle, and rested the pistol hand on top of the
machine gun. I gave him a red scarf to hide the surgery scars. This guy
would actually be the gunner, based on the hatch he is sitting in. The
commander sat on the other side.
And that was that. An easy build of a cool looking armoured car.
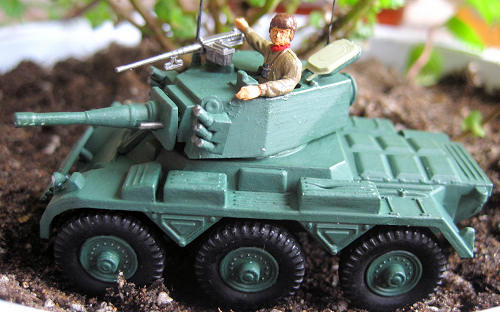
 I painted my car using Tamiya Deep Green XF-26. I read somewhere of the
unusual combination of Humbrol paints you need to achieve the bronze green
that these cars were supposedly painted, and just decided to go with what I
had. The Saladin served widely and there are many suitable paint schemes
apart from overall green or overall sand. There are two on the wikipedia
page alone.
I painted my car using Tamiya Deep Green XF-26. I read somewhere of the
unusual combination of Humbrol paints you need to achieve the bronze green
that these cars were supposedly painted, and just decided to go with what I
had. The Saladin served widely and there are many suitable paint schemes
apart from overall green or overall sand. There are two on the wikipedia
page alone.
The kit comes with a small decal sheet containing number plates and small
unit/regiment badges.
I might get around to weathering this little
armoured car some day.
In summary, nicely moulded but basic indeed. A fun build out of the box and
if you had the inclination, a good basis for further detailing. Great for a
weekend build or a quick recharge from a
 project that's bogged down.
Richard F
September 2011
If you would like your product reviewed fairly and fairly quickly, please contact the editor or see other details in the
Note to
Contributors.
Back to the Main Page
Back to the Review
Index Page