Lion Roar 1/35th
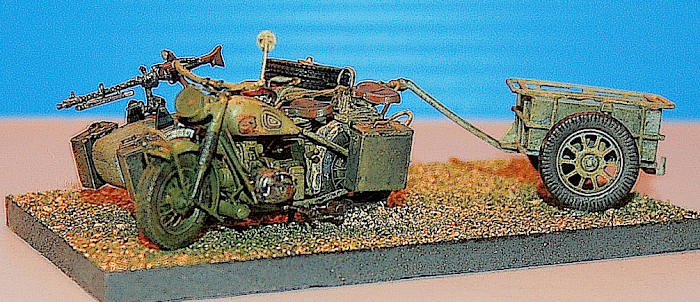
BMW R75 with Sidecar
| KIT: | Special Hobby 1/48 Focke-Achgelis Fa-223 |
| KIT #: | 3510 |
| PRICE: | $45.00 MSRP |
| DECALS: | Several options |
| REVIEWER: | Greg Ewald |
| NOTES: | Very fiddly build, not for the faint of heart. Dubious location points. |
| HISTORY |
The
motorcycle with its sidecar was used by the German Army throughout every theatre
of war in the 30’s and 40’s. Rugged, able to take a beating and continue to haul
quite a lot, the BMW R-75 was a
favourite among the ground troops invading, and then retreating, from foreign
soil. It could get you out of a
mess quickly, although somewhat noisily. Unlike most cycles, this model actually
had a reverse setting, though I can’t imagine trying to control the bloody thing
going backwards under fire. Maybe they used it to pull Kubelwagens out of the
mud?
 The
746cc engine gave a lot of torque, and a fair bit of power to the rather light
frame, and the cycle could easily handle a sidecar as well as tow other things,
like trailers, small guns, and ice cream carts. O.K. I am making up the ice
cream cart thing, but it would have been easy enough to do on the eastern front,
and more than welcome in Africa. Rommel certainly adored the beasts, it’s hard
to find a photo of the action there without a 75 in it.
The
746cc engine gave a lot of torque, and a fair bit of power to the rather light
frame, and the cycle could easily handle a sidecar as well as tow other things,
like trailers, small guns, and ice cream carts. O.K. I am making up the ice
cream cart thing, but it would have been easy enough to do on the eastern front,
and more than welcome in Africa. Rommel certainly adored the beasts, it’s hard
to find a photo of the action there without a 75 in it.
The sidecar was not just sitting there for good looks. The rear drive was
engaged to the wheels of the attached side sled, rendering the motorcycle as a
somewhat miniature car of which the Europeans are so fond. The cross country
mobility was astounding, and the bike could race through sand, mud, blood,
brick, ticks, peasants, logs, and almost anything else you can think of.
If you put an MG 34 on it, you have a wildly mobile machine gun platform,
though looking at the suspension of the sidecar, hitting anything whilst riding
about would have been through sheer luck. Bouncy as a car on prom night.
In fact, the R75 was so highly sophisticated, some speculate that Harley Davidson “borrowed” some of the design, and it is quite true that the Russians, irritated at losing the rocket projects, made quite a number of copies of the fantastic cycle, renaming it the “M72”.
| CONSTRUCTION |
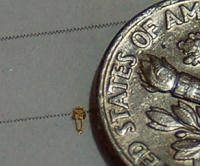 You know
you are in for it when assembling the engine (more than fifteen parts) can take
you over an hour, using fast setting superglue, to end up with something about
the size of a pea. There are a lot of photoetch bits and pieces that you will
need to attach during the build, in some cases, I substituted wire or styrene
for the kit parts when I felt they were out of scale (in most cases, because the
PE was too thin).
You know
you are in for it when assembling the engine (more than fifteen parts) can take
you over an hour, using fast setting superglue, to end up with something about
the size of a pea. There are a lot of photoetch bits and pieces that you will
need to attach during the build, in some cases, I substituted wire or styrene
for the kit parts when I felt they were out of scale (in most cases, because the
PE was too thin).
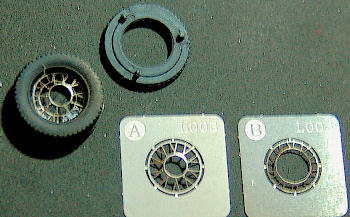 The Wheels: O.K. I like
details too, but this almost pushes the limit. Each wheel is made up of 5 bits
of styrene and two PE. I was worried that I might have to make a scale
compressor and inflate the tires ! While complaining, I have to admit that the
end result is absolutely amazing in realism. Be careful to remove the locating
points of the hubs before you try to attach them to the spokes, as the spokes
bend easily. Glue and wait.
The Wheels: O.K. I like
details too, but this almost pushes the limit. Each wheel is made up of 5 bits
of styrene and two PE. I was worried that I might have to make a scale
compressor and inflate the tires ! While complaining, I have to admit that the
end result is absolutely amazing in realism. Be careful to remove the locating
points of the hubs before you try to attach them to the spokes, as the spokes
bend easily. Glue and wait.
The Frame:
Well, once you have your miniature engine done, it is time to attach it
to the frame. Do not drink anything caffeinated prior to this step. I would
recommend using a slow setting glue, as you have to finagle the assembly
together, and the pieces are so thin, there is no way you could clamp or even
tape it together. One bit at a time, attach the points together, and let it sit
to dry. This is l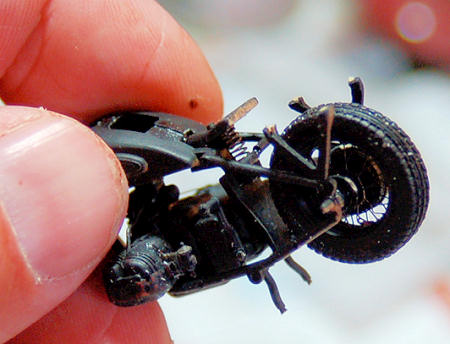 ike
fly fishing for modelers, or learning how to become a Jedi Knight…patience.
ike
fly fishing for modelers, or learning how to become a Jedi Knight…patience.
The PE mud/gravel flaps are a bit of a bugger to get on.
In this case, I would use a fast setting super glue to attach the main
bar to the frame, and then put on the flaps after it has set up. No matter what,
it is not the easiest thing to do, but luckily, the metal flaps were often
dinged up in combat use, so if you bend them a bit, you will be safe with the
jmn’s. Some cycles didn’t even have them on.
I would also recommend leaving the little road pegs off until you have gotten
the bulk of the bike built. (that’s a lot of b’s), as they have a tendency to
fly off when you are man-handling the cycle itself. Yeah, it’s a big bike in
real life, but in 1/35th, this thing is tiny.
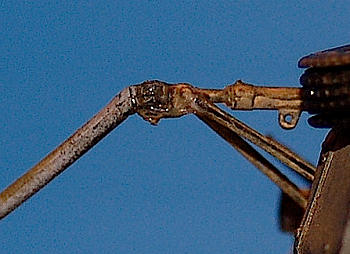
The Front Forks: If you have
watched any episodes of “American chopper”, you will notice that they spend a
lot of time on the front of the bike. Well, so will you. Be very careful
separating the pieces from the
sprue, as the molding is thick, and the plastic is very, very brittle. I had to
remake the lower flange of the fork system out of metal after I cut the styrene
part too short. This assembly is not easy at all to do, but is quite convincing
when completed. It is easier to
glue the headlight to the forks, and then the lower flange, as I found out the
hard way. I did not put any of the clear parts or decals at this time, of
course.
Attaching the fender struts will require a fair amount of dexterity. Once again,
the location points are minimal at best, and you need to refer to the box art or
the web for angles and such (unless you own a BMW from WW2). The fender itself
is hard to position, just breathe evenly and take your time, padawan.
Now, you can glue the front fork
assembly to the main frame. I used a slow setting super glue, and let it really
sit for a while (overnight). I left the handlebars off for the time being, as I
wanted to do the base painting and still be able to hit the tires as necessary
with black.
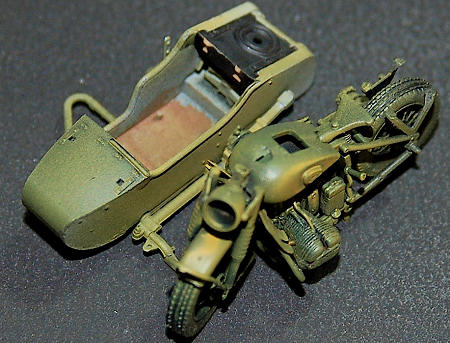 The
Sidecar: Glue the port side, that
is “left” to you landlubbers, on from the rear to about midway. Set it aside to
dry. Do the same for the starboard side
(from the Scandinavian “steering board, the paddle that guided the boat).
Once the rear bits are on and in place, you can gently push the front of the
sides into the frame of the sidecar, and using an accelerator, get them fixed in
place. A note to those who use superglue…vinegar and water make a superb
accelerator , if you happen to run out of the commercial stuff, and the hobby
shop is closed.!
The
Sidecar: Glue the port side, that
is “left” to you landlubbers, on from the rear to about midway. Set it aside to
dry. Do the same for the starboard side
(from the Scandinavian “steering board, the paddle that guided the boat).
Once the rear bits are on and in place, you can gently push the front of the
sides into the frame of the sidecar, and using an accelerator, get them fixed in
place. A note to those who use superglue…vinegar and water make a superb
accelerator , if you happen to run out of the commercial stuff, and the hobby
shop is closed.!
The leaf springs of the sidecar are on the outside, it must have been a very
unpleasant ride. Attach the lower frame onto the upper gondola, and let it set
up. You can now put on the wafer-thin handlebars too, but don’t sneeze or even
breathe too hard.
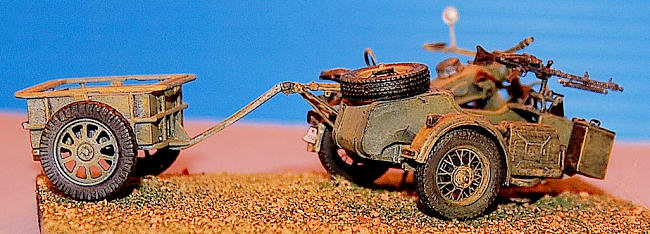
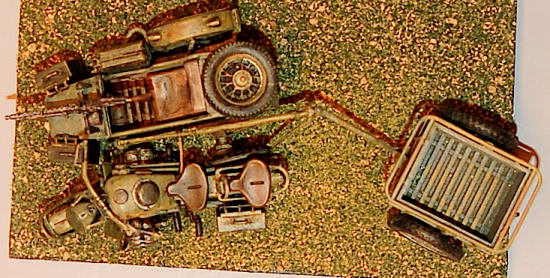
The Trailer. This is possibly the
easiest part of the kit to assemble,
 though the
locating points for some of the attachments seem to be merely hinted at in the
instructions. I wonder if they are
supposed to be actually three dimensional illustrations, as sometimes the
locating arrows go around the back of the drawing?
though the
locating points for some of the attachments seem to be merely hinted at in the
instructions. I wonder if they are
supposed to be actually three dimensional illustrations, as sometimes the
locating arrows go around the back of the drawing?
When it comes to attaching the trailer to the odd hitch system, you are on your
own. There were a few different ways that the hitch was made, I chose the one I
could find photographic evidence of (see links).
With all of the sub-assemblies in hand, it is time to spray and pray. I did not attach everything together yet, as I wanted to be able to hit the tires with satin black. The painting sequence is below.
| COLORS AND MARKINGS |
I
recommend the standard armor base painting, that being spraying the whole thing
flat black on the sprue. More on the after painting later.
After painting it all black ( I just use Krylon rattlecan
flat black), I like to go back and hit
the whole thing with a light
 olive
drab, working your way out from the middle to the edges.
olive
drab, working your way out from the middle to the edges.
I used a sand colour next, once again, spraying from the middle out, and heavily
thinned. Thin layers of paint build up into an interesting pattern, that looks a
“rode hard and left wet” sort of bike.
The decals went on without a fuss, they are perfectly transparent, perfectly
thin, heck, they are perfect. Of course, they are all about a millimeter in
size, so if you want to admire them, break out the goggles. Once they had
settled in ( no microsol or anything required), the kit was given a loving spray
of clear satin and then flat. No
lark’s vomit was used at all.
| CONCLUSIONS |
If you really
want a truly accurate 1/35th BMW from WW2, then this kit is for you.
I think it is overly detailed, and quite unnecessarily complex for the average
diorama. It is certainly not a weekend kit, nor a particularly fun build. As far
as realism goes, it is perhaps the acme.
| REFERENCES |
http://www.motorcycle.com/events/bikes-of-the-blitzkrieg-66581.html
Good Photos here:
http://www.flickr.com/photos/thwphotos/3346587183/in/photostream/
June 2009
If you would like your product reviewed fairly and quickly, please contact me or see other details in the Note to Contributors.