Dragon 1/35 SdKfz 181 Pzkpfw VI (P)
| KIT #: | 6210 |
| PRICE: | $30.00 |
| DECALS: | One option |
| REVIEWER: | Dale Rannals |
| NOTES: | New Tool Kit |
| HISTORY |
German combat
experience with the French Somua S35 cavalry tank and Char B1 heavy tank, and
the British Matilda I and Matilda II infantry tanks in June 1940 showed that the
German Army needed better armed and armored tanks. Superior tactics had overcome
superior enemy armor, but the Germans did take notice.
On 26 May 1941, at an armaments meeting,
Henschel and Porsche were asked to submit designs for a 45 ton heavy tank, to be
ready by June 1942. Porsche worked to submit an updated version of their
VK3001(P) Leopard tank prototype while Henschel
 worked to develop an improved
VK3601(H)tank. Henschel built two prototypes. A VK4501(H) H1 which used the 88mm
L/56 cannon and a VK4501(H) H2 which used the 75mm L/70 cannon.
worked to develop an improved
VK3601(H)tank. Henschel built two prototypes. A VK4501(H) H1 which used the 88mm
L/56 cannon and a VK4501(H) H2 which used the 75mm L/70 cannon.
On
Porsche and
Henschel submitted prototype designs, both essentially using the same
Krupp-designed turret on different hulls, and they were compared at Rastenburg
before Hitler. The Henschel design was accepted, especially because of the
problem-burdened Porsche gasoline-electric hybrid power unit and its use of
large quantities of copper, a strategic war material. Production of the
Panzerkampfwagen VI
Ausf. H began in August 1942.
Awaiting an order for his tank, Porsche had built 100 chassis, using some for
his Tiger prototypes. After losing the contract, they were used for a new
turret-less, casemate-style tank destroyer; ninety-one hulls were converted into
the
Panzerjäger Tiger
(P) in spring 1943. The vehicle was also known as
Ferdinand, and after Hitler's orders
of 1 and
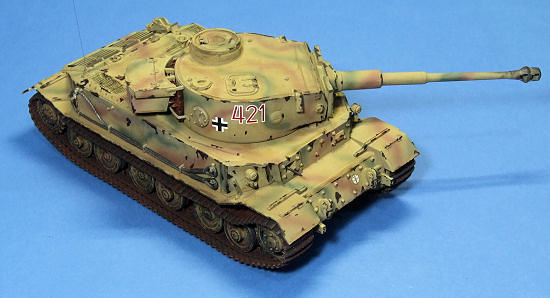
 The Porsche was a squat,
forward mounted turret design, more heavily armored than it's Henschel
competitor.
It had six road wheels
per side mounted in paired bogies sprung with short longitudinal torsion bars
that were integral to the wheel pair; this saved internal space and facilitated
repairs.
It had two
gasoline-electric hybrid power systems (gasoline engine / electric generator to
electric motor / drive sprocket), one per side of the tank.
This added further complication to an already highly complex machine.
Add the fact that it was unreliable and that the copper used in the
motors and generators was needed elsewhere in wartime
The Porsche was a squat,
forward mounted turret design, more heavily armored than it's Henschel
competitor.
It had six road wheels
per side mounted in paired bogies sprung with short longitudinal torsion bars
that were integral to the wheel pair; this saved internal space and facilitated
repairs.
It had two
gasoline-electric hybrid power systems (gasoline engine / electric generator to
electric motor / drive sprocket), one per side of the tank.
This added further complication to an already highly complex machine.
Add the fact that it was unreliable and that the copper used in the
motors and generators was needed elsewhere in wartime
| THE KIT |
 Well, with
325 parts (302 in gray
styrene, 16 etched nickel, 4 etched brass, 2 in tan cementable vinyl, 1 section
of steel cable), the box is literally packed full of parts, with the sprues in
individual plastic bags. You will have a lot of spares for the bin, as one whole
sprue is from Dragons Elephant kit and only a few parts are used from it.
The moldings are crisp and exhibited no flash that I could find. The weld
joints are very well depicted, and detail everywhere is superb.
The kit has two photo-etch frets, one of brass that contains screen
coverings for the intakes, and one of steel that has hold-down brackets for the
towing cables.
A section of
steel cable is included, but, for those so inclined, the towing cables are also
represented in plastic.
The choice
is yours.
One piece vinyl
tracks are included, and these react well to normal plastic cement.
Well, with
325 parts (302 in gray
styrene, 16 etched nickel, 4 etched brass, 2 in tan cementable vinyl, 1 section
of steel cable), the box is literally packed full of parts, with the sprues in
individual plastic bags. You will have a lot of spares for the bin, as one whole
sprue is from Dragons Elephant kit and only a few parts are used from it.
The moldings are crisp and exhibited no flash that I could find. The weld
joints are very well depicted, and detail everywhere is superb.
The kit has two photo-etch frets, one of brass that contains screen
coverings for the intakes, and one of steel that has hold-down brackets for the
towing cables.
A section of
steel cable is included, but, for those so inclined, the towing cables are also
represented in plastic.
The choice
is yours.
One piece vinyl
tracks are included, and these react well to normal plastic cement.
| CONSTRUCTION |
Not a whole lot to say, to tell the
truth.
Construction is pretty
straight forward.
One area to note
is the road wheels.
Be sure to note
which wheels go where, and where each wheel pair assembly goes.
Nothing difficult, mind you, you just need to pay attention to the
instructions here.
A box assembly
that makes up the hull, and the additional armor plates for the front, all fit
well.
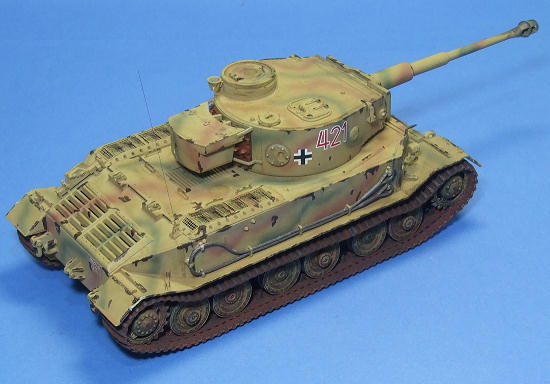
The engine intakes are neat
little 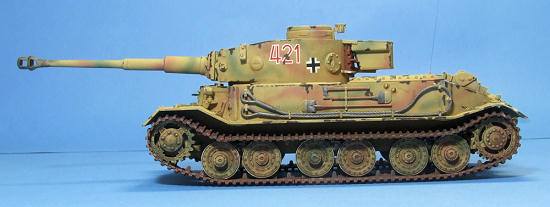 assemblies that consist of a cover to which several angled plates are
added underneath. On top of these sits the brass photo-etch screens.
Very nice looking in the end!
The exhaust grille is another matter entirely.
You can look straight thru it to see a very empty tank inside.
I added a blanking plate made of evergreen sheet to the underside and
painted it black.
Even that looks
better than nothing.
assemblies that consist of a cover to which several angled plates are
added underneath. On top of these sits the brass photo-etch screens.
Very nice looking in the end!
The exhaust grille is another matter entirely.
You can look straight thru it to see a very empty tank inside.
I added a blanking plate made of evergreen sheet to the underside and
painted it black.
Even that looks
better than nothing.
The Commanders
cupola is an area where I wasted some time. It is quite an assembly in itself,
containing
about a dozen
pieces. Not being a tread-head…….well, yet…..I duly assembled this and then
realized it all gets covered up if you close the hatches, which I did.
Bummer.
I couldn’t force myself to bend all the little hold down brackets for the metal towing cables, so I opted instead to use the plastic ones. I brush painted the cables Metalizer Magnesium; this gives it a very nice used dull gray-metallic look.
| COLORS & MARKINGS |
If you want
your Tiger P based on reality, you have one choice, and that is depicted in the
kit …..the one Tiger P sent to the Russian front, number 003.
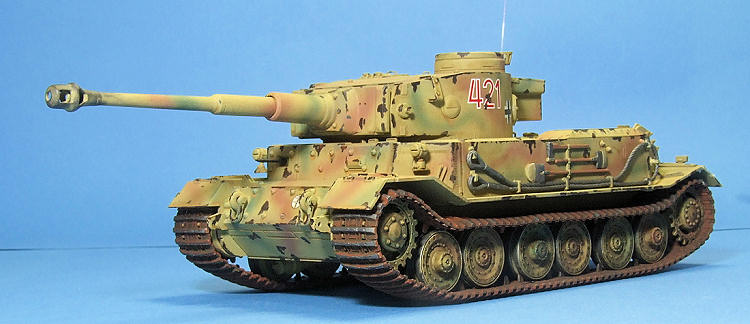
I decided to do a ‘whiffer and so I first sprayed everything Panzer
Yellow.
Over this I free-handed
 Panzer Green and Panzer Red stripes randomly.
I then went over the model with small areas of dark brown (Testors
Rubber, to be exact) to depict rusty areas of chipped paint. I did this on plate
corners and any areas that I thought may get chipped.
I added the German crosses and vehicle number from a Tamiya Panther sheet
that I had left over.
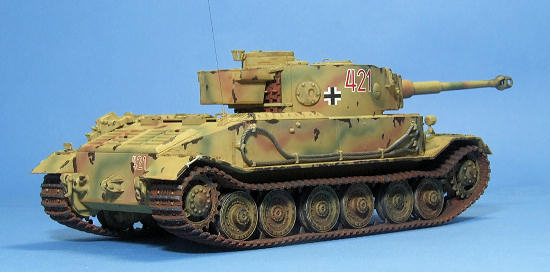
Over all this
I slathered thin washes of dark brown and black to dirty things up and pop out
some detail.
Panzer Green and Panzer Red stripes randomly.
I then went over the model with small areas of dark brown (Testors
Rubber, to be exact) to depict rusty areas of chipped paint. I did this on plate
corners and any areas that I thought may get chipped.
I added the German crosses and vehicle number from a Tamiya Panther sheet
that I had left over.
Over all this
I slathered thin washes of dark brown and black to dirty things up and pop out
some detail.
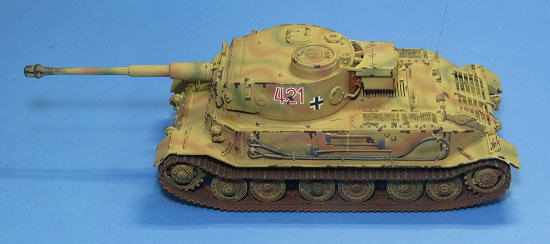
I painted the tracks a rust color, and then dry brushed some Testors Steel on them. To this I added washes of black and browns to try to dirty things up. I then went back over them with another light dry-brushing of Steel. I rubbed a #2 pencil lead across the tracks to give them more of a worn metallic look. I still need to work on my tracks, as I think I probably should be making them dirtier ….. but getting out of aircraft weathering mode is harder than I thought.
| FINAL CONSTRUCTION |
A very nice kit from Dragon.
Well designed plastic and enough photo-etch parts to bring out some
detail.
The one-piece tracks may
put off the dedicated tread-heads out there, but I was glad to see them in the
box as putting individual track links together is my mini version of Hell.
| CONCLUSIONS |
All in all, this is a very
nice rendition of Ferdinand Porsche’s just-a-bit-too-complicated design.
It looks pretty cool sitting next to the production Tiger.
| REFERENCES |
The Internet
Kit Instructions
April 2012
If you would like your product reviewed fairly and fairly quickly, please contact the editor or see other details in the Note to Contributors.