| KIT #: | SS-004 |
| PRICE: | $100.00 SRP |
| DECALS: | Three options |
| REVIEWER: | Donald Zhou |
| NOTES: |
Advantages: Extremely detailed,
contain full interior with Bradley Power Pack, includes latest details
for the M2A3 with CITV, Bradley enhanced viewer, air condition units
etc. Disadvantages: M242 Bushmaster missing its breech, TOW reload
rounds missing, wrong radio outfit, missing some electronic units.
|
| HISTORY |
By the time the tank entered battle into World War II,
it soon became apparent that infantry were hard pressed to keep up. In the
beginning, infantry simply followed up on trucks, motorcycles or other
mechanical means, even riding bare on the tanks themselves (see Russians and
their tank desants. Unfortunately, as can be imagined, tank desants are
vulnerable to just about everything harmful on the battlefield. One good machine
gun burp usually will kill just about every one of them. In fact, the average
life of a tank desant was about three days and they were usually given enough
food and ammo for just that amount of time. If they survived, they can always go
back and get more. One amazing book about a certain Russian tank desant survivor
describe this daily life in absolute detail. He should know, he was one of the
few that beat the odds all the way to Berlin!). However, as the firepower on the
battlefield grew bolder and meaner, trucks and motorcycles just does not have
the armor and protection to survive long. Later on, both sides started to use
half-tracks to carry infantry to the front. However, despite the fact they were
an improvement, half-tracks are still vulnerable since most of them are open
toped and still cannot keep up with the tanks in a break through.
After the war, Americans eventually developed a
classic, the M113 APC or armored Personnel Carrier. Produced in the thousands,
used by over dozens upon dozens of countries and still in service today, the
M113 is the classical armored infantry support vehicle. Carrying almost a dozen
or so infantry and their equipment under armor designed to repel .50 cal bullets
and with a single .50 cal of its own as its weapon, this vehicle was a no frill
“battlewagon” designed to get infantry to where they belonged, under armor,
following tanks to achieve a breakthrough and support them if the needs arises.
The M113, along with the Huey helicopter, became an indelible image during the
Vietnam War.
But even when it was just entering service, people
were already asking if there is a better option out there than the M113. In
1967, that answer was found when on November 7, during a parade to commemorate
the Great October Revolution, the Russians paraded out their first BMP-1. More
than a derivative of the APC, the BMP-1, the world’s first IFV or Infantry
Fighting Vehicle, could not only carry a squad of infantry to the front under
armor protection, but could support them with its short barreled 100mm cannon,
the troops can shoot their weapons out from small portholes, and in a pinch
could also fight tank with its AT-2 Sager missile. It was quite a shock for
Western viewers and NATO scrambled to develop an answer. Of course, as with many
things, especially first things, BMP-1 had a lot of faults. It was so short that
any guys over 6ft will find the fit extremely uncomfortable, it’s main weapon
was not stabilized and if you want to reload another AT-2, you have to climb
half way out of the hatch, somehow get the missile on the rail, which is on top
of the cannon barrel, and unfold the fins with a stick. But still, Western
nations scrambled for an answer.
The first Western IFV was the (W) German Marder. For
the U.S. the answer that eventually led to the Brad was started in 1972. In
November of that year, FMC corp.’s (later United Defense before finally sold to
BAE and is now BAE Land Defense) prototype was chosen as the winner. In 1976,
the XM723 was tested and improvements were ordered, mostly replacing the turret
because new weapons, including adding a launcher for the TOW missiles were
ordered. In 1978, the XM2 was tested and the following year, 6 pre-production
vehicle was ordered. In 1980, this vehicle was officially christened as the M2
Bradley IFV, in honor of the 5 star general Omar N. Bradley. Full production
picked up in 1981. A similar vehicle (same on the outside but different on the
inside) was also produced, the M3A3 CFV, or Cavalry Fighting Vehicle, basically
a fancy term for a recon unit. The major difference is the inside. The M3 only
carried two scout troopers and more TOW missiles, 11 reload rounds instead of 5
(later 4) on the regular M2 IFV.
The M2 had a wielded aluminum hull capable of
defeating .50 cal rounds and shrapnel. It was initially powered by a 500 hp
Cummings VTA-903 diesel engine with an HMDT-500 automatic transmission. It has a
2 man turret including a M242 Bushmaster Chain Gun as its main armament with a
co-axil M240C .30 machine gun. On the turret left side, a box 2-round TOW
launcher was also included. Further reload rounds were carried in the hull and
an infantry man can reload it through a roof hatch. However, to fire its TOW,
the Brad has to stop in order to launch it. The initial Bradley also feature the
fact that its 6 infantry men can also fire a special M-16 out of six firing
ports, 2 on the left, 2 on the right and 2 to the rear. Along with a driver, the
vehicle has a crew of 3 and a squad of 6 infantry soldiers (there is also a seat
for an observer right behind the driver but this is hardly used when in
operation).
As soon as it was in production, question about its
armor, survivability, costs etc (especially compared to the “Cheap and superior”
Russian vehicles) were thrown at the new vehicle. Just before “Operation Desert
Storm”, CBS 60 Minutes did a scathing report on the Bradley and wondered in no
small uncertain terms, whether it’s a weapon of war or death trap. Question
about the Brad lingered on all the way before the Gulf War started.
Even before the Gulf War started, efforts were
underway to improve the Brad’s survivability. These eventually resulted in the
M2A2. The biggest difference is the side armor. The A2 version had slab armor
capable of defeating 30mm armor piercing cannon rounds, specially designed to
defeat the main weapon of the BMP-2. These armor can also be attached with ERA
armor modules designed by General Dynamics to defeat portable anti-armor weapons
like the RPG. This raised the vehicle weight to over 30 tons and thus, a more
powerful engine, a 600hp Cumming was added. Ironically, two of the vehicle’s
original requirements, the ability to swim and having its infantry firing from
the inside were eliminated. The ability to swim, although included in the basic
Brad was hardly if ever used since it made the heavy set vehicle barely able to
swim. Not only that, the preparation needed, by first pumping air into the side
plastic floatation skirts, water proofing it, and then then adding a floatation
basket takes over 20 minutes and would next to impossible to do under real life
conditions. And now with the vehicle weighting over 30 tons, whatever little
extra buoyancy the vehicle had left was gone so it wasn’t missed. The left and
right firing port was eliminated because in real operation, it was soon
discovered it was hardly ever used since the vehicles powerful 25mm cannon,
co-ax machine gun and TOW’s were more than up to the job. The two rear ones were
kept just so the vehicle has something to defend the rear in a pinch.
All questions about the Brad survivability etc was
settled after the Gulf War, in which the Brad destroyed more vehicles than tanks
and was even more versatile than expected (There was at least one incident in
which a Brad, which kept on firing its 25mm cannon was able to eventually to
penetrate the front armor of a T-55). However, there were some really hard
lessons too, not the least of which was the Brad was exceedingly vulnerable to
friendly fire incidents, several which killed more allied soldiers than the
entire ground assault. By 1994, all M2’s were upgraded to the M2A2 version, with
1423 of them upgraded to the “ODS” or Operation Desert Storm variant. These
vehicles includes an eye-safe laser rangefinder unit (ELRF), a tactical
navigation system (TACAV) including a precision Lightweight GPS Receiver (PLGR,
say “Plugger”), the Digital Compass System (DCS) and the Force XXI Battle
Command Brigade and Below (FBCB2) Battlefield Command Information System. 4
thermal imagers were also installed. Lastly, 3-man foldable bench seats replaced
the original fixed seats since it was found these interfered with the passenger
disembarking from the vehicle.
The FBCB2 system especially was considered critical
since it is considered to be a critical piece of equipment for the Army’s Force
XXI program. Every vehicle installed with this system becomes a node in the
information network with each node having the ability to download and upload all
of its information to the network and also to download all pertinent battlefield
intelligence and information as well. This system not only upgrade and improve
each Brad’s individual performance, but it’s also a critical guard against
friendly fire incidents, or at least reduce them.
In 1995, ODS variants started to receive new upgrades
to bring them up to the M2A3 standards. The most obvious outside differences is
the A3 have a CITV (Commander Independent Thermal Viewer). Other additions
includes the Driver’s Vision Enhancer. Inside, there is a new CO2 Laser
Rangefinder, a new digital fire control system and improved Bradley Acquisition
System (IBAS).
By the time “Gulf War II” was done, M2’s eventually
found themselves doing something they had not done when initially designed.
Fighting in urban combat situation against insurgents, gorillas, and other ad
hoc enemies. IED’s or Improvised Explosives Devices, RPG’s and other such
homemade bombs became the greatest threat. To deal with these, the BUSK, or
Bradley Urban Survival Kit program was started to provide Brads with protection
in an urban setting, much like the MBT counterpart, TUSK.
The BUSK program was initiated even before Iraqi
Freedom. The first version of the BUSK, which eventually became BUSK I,
contained a series of ERA blocks. These did not prove satisfactory. BUSK II was
an improvement, but felt better options could be added still. These additions
eventually became the BUSK III. These include. Blocks of modular ERA blocks for
the side skirts, turret faces and the front glacis plate. Better improved
engines and transmissions to deal with the heavier weight. Sand screens for IBAS
and other vision devices to provide protection against sand. Better
survivability seats, improved fire extinguishers, and a hot box restraining
kits. Additional protection for the commander and gunner when they are out of
their turret to protect them against snipers. And finally, improved air
conditioning units for both crew comfort and to cool down the electronics inside
the vehicle.
With these improvements, the Brad quickly proved to be an extremely hard nut to crack. Their smaller size also help them to better move around in more confine spaces such as an urban setting. The BUSK III are continuously provided to frontline units, with a large number of them already in service.
| THE KIT |
 So,
I got this kit a while ago. But just could not find the time to even get started
on it…or write a preview, what with that USS MISERY and now a 1/350 scale
NCC-1701-A USS Enterprise tying me up….DOH!!! What is it with me and large
things?!?!?!?
So,
I got this kit a while ago. But just could not find the time to even get started
on it…or write a preview, what with that USS MISERY and now a 1/350 scale
NCC-1701-A USS Enterprise tying me up….DOH!!! What is it with me and large
things?!?!?!?
Anyways, when the box arrived, I had to do a double
take. Now, from on top, it does not look any bigger than your average joe armor
model box. It’s from the side that you will get a clue just how extensive this
kit is. It’s deep. Just how deep? Well, putting against my Polar Lights 1/350
scale NCC-1701-A USS Enterprise kit, the two are almost the same depth! That is
deep! The reason why is obvious, the box itself says “Full Interiors Included”!
And trust me, they are not kidding with that!
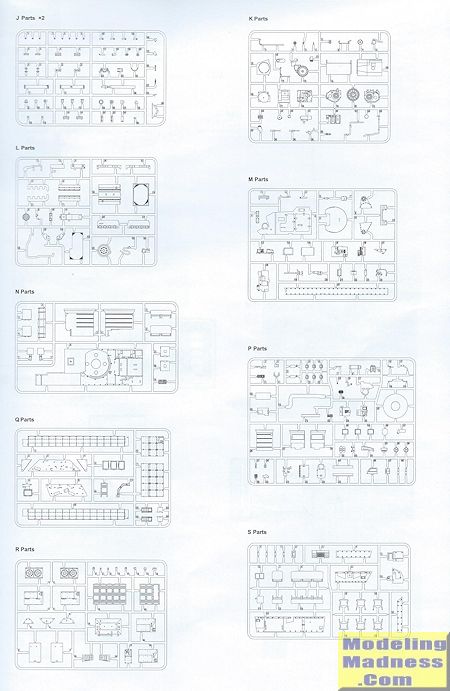
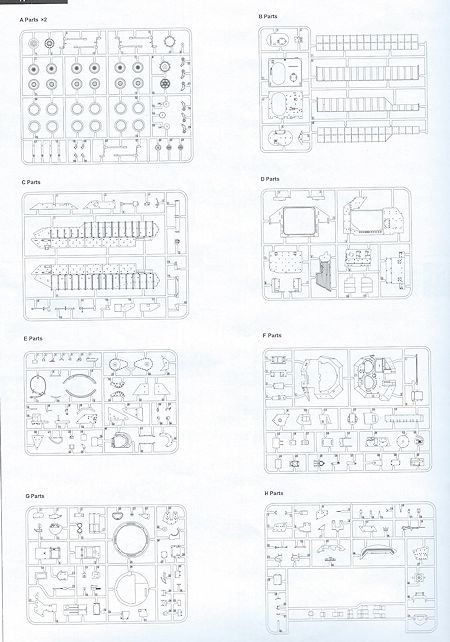
Upon opening the box, God knows how many sprues greets
you. They are in three colors. Your average joe tan color ones for the vehicle
itself and these are the most numerous and extensive, for both the inside and
mostly outside. The “sea foam green” ones (remember this color as it is the
color used on most if not all inside of the US armored vehicles these days. The
closest substitute is Tamiya’s Sky) are obviously for the interior and let me
tell you, when they say interior included, they are not kidding! The seats,
inside of the turret, driving station and god knows what else is all in there.
It’s complete but for some minor things. First of all, the TOW reload rounds
under the bench seats are not there. The holders are there but the rounds
themselves are missing. Two missiles are provided but they are meant for the box
launcher. 2. Some of the radio equipment and electronics (specially the TOW
guidance boxes) are missing. 3. The M240 Bushmaster breech is missing also. It’s
obvious that Meng examined an empty vehicle with some sensitive equipment
removed (since all the internal extra ammo storage boxes are also not provided)
and was not able to view the 25mm breech also. No big deal. The electronics and
radios can be scratched build if that’s your thing. Extra TOW’s can be easily
sourced if you have the old Tamiya M2 and the breech is really not gonna be seen
once the turret is assembled.
To complete the detailed interior, the next color, the
very dark grey sprues, contain a very very complete Bradley Power Unit with the
cooling unit, detailed exhaust, the Cumming engine, transmission, and air
intakes. This assembly takes a big chunk out of the interior spaces too. The
only things missing are the pipes and wires that usually festoon these things.
The assembly begin with of course, the road wheels,
idlers and sprockets. Now, the suspension units are designed to move. But if
experience proves, they are probably going to be weak so it’s best to assemble
them shut unless you are putting the Brad on a diorama, which is tempting, what
with that interior…..You might want to save the wheels for later.
Next are the interior. And ohh boy are there a lot of
steps. Steps 6 to 24 are needed to diagram just how extensive these are. The
hardest part would be to draw out and decide what to build first, what to get
put into the hull first and how to make everything easier as there are quite a
few decals needed to place on various objects and putting everything in there
first would definitely mean a PITA to get the decals on later.
 The next
step are all the hull exterior assemblies. Details such as the air conditioning
units, with their gorgeous photo-etch fan blades, boarding ramp, roof hatch,
exhaust outlets, NBC inlet, driver enhancement device etc are all here and they
are well detailed. Now the tracks, the tracks are numerous but thankfully, they
are all in one piece, rather than track + shoe (the only reason why I did not
get started on Hobbyboss’s AAVP-7 was the tracks…Every time I look at the model
and want to get started, one look at those pesky tracks, one link, two shoes,
one on each side drove me away). They are snap tight and are designed to move.
Now of course, due to the fact they are indeed one piece, on the photo etch, a
shoe template is provided to provide easier painting! Great consideration by
Meng here! Just a tip on tracks, do not rust them. Not only are modern tracks
are made from rust resistant materials, but also, constant operation, especially
in sand ensure the sand and dirt “sandblast” any rust right off!
The next
step are all the hull exterior assemblies. Details such as the air conditioning
units, with their gorgeous photo-etch fan blades, boarding ramp, roof hatch,
exhaust outlets, NBC inlet, driver enhancement device etc are all here and they
are well detailed. Now the tracks, the tracks are numerous but thankfully, they
are all in one piece, rather than track + shoe (the only reason why I did not
get started on Hobbyboss’s AAVP-7 was the tracks…Every time I look at the model
and want to get started, one look at those pesky tracks, one link, two shoes,
one on each side drove me away). They are snap tight and are designed to move.
Now of course, due to the fact they are indeed one piece, on the photo etch, a
shoe template is provided to provide easier painting! Great consideration by
Meng here! Just a tip on tracks, do not rust them. Not only are modern tracks
are made from rust resistant materials, but also, constant operation, especially
in sand ensure the sand and dirt “sandblast” any rust right off!
Hull ERA blocks are next. Now, you have your choice.
The ERA blocks are separate from their mountings so you can show them without
the blocks. A lot of pieces goes in here but it’s not all that difficult.
 Finally, at
step 44, construction of the turret begins with the interior. The radio, co-ax
machine gun, ammo holder, turret basket and the Bushmaster’s barrel holder are
all assembled. Once the turret halves are assembled, it’s not over yet. The
outside is festooned with armor, details, hatches, ERA blocks (again, you have
your choice to leave them on or off), smoke grenade launchers (with or without
grenades), the Bradley sighting unit, CITV, commander and loader screen, and
rear ammo storage boxes (with your choice of filled or empty containers).
Finally, a nice TOW box launcher assembly, with your choice of either filling
the launcher or leaving it empty round out the assembly. Three markings are
provided for vehicles ranging from the buildup in Kuwait in 2003 to 2005.
Finally, at
step 44, construction of the turret begins with the interior. The radio, co-ax
machine gun, ammo holder, turret basket and the Bushmaster’s barrel holder are
all assembled. Once the turret halves are assembled, it’s not over yet. The
outside is festooned with armor, details, hatches, ERA blocks (again, you have
your choice to leave them on or off), smoke grenade launchers (with or without
grenades), the Bradley sighting unit, CITV, commander and loader screen, and
rear ammo storage boxes (with your choice of filled or empty containers).
Finally, a nice TOW box launcher assembly, with your choice of either filling
the launcher or leaving it empty round out the assembly. Three markings are
provided for vehicles ranging from the buildup in Kuwait in 2003 to 2005.
| CONCLUSIONS |
WHEW!!!! Finally done. Sorry if I had to rush it in the end. This is one monster extensive of a kit and it needs a detailed description. Like the Hobbyboss AAVP-7 kit, this kit beats the pants so off its ancient Tamiya (and its copycats) brethren it’s not even funny! The extensive interior alone is worth the price of admission. Seriously, go out and get this kit. You will not regret it. And on top of that, Meng recently came out with the M3A3 Cavalry version (although the interior is separate) so here is hopping Meng will eventually back date this kit to a M2A2 and eventually the original M2 version. This kit is so seriously recommended it’s not even funny cause for a guy like me, it will probably keep me entertained for at least year…Provided I can get around to it one of these days!
April 2015
If you would like your product reviewed fairly and fairly quickly, please contact the editor or see other details in the Note to Contributors.