| KIT #: | 00310 |
| PRICE: | $24.00 SRP |
| DECALS: | One option |
| REVIEWER: | Dan Lee |
| NOTES: | J Works mask set used |
| HISTORY |
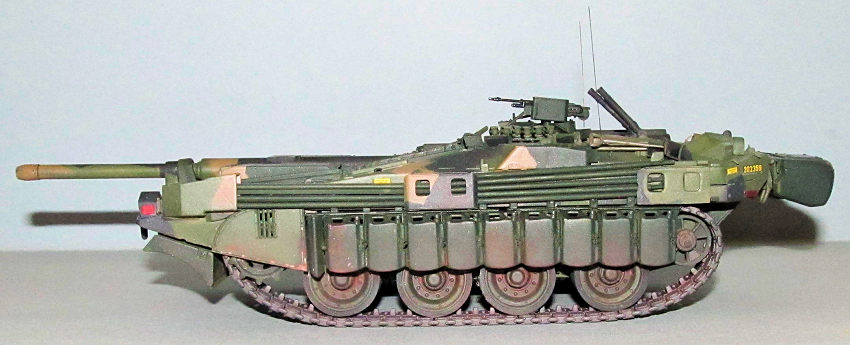
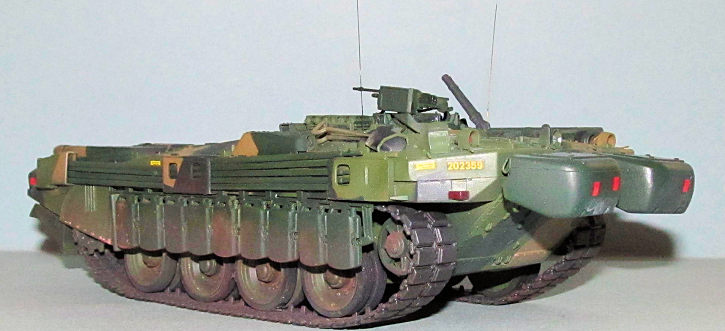
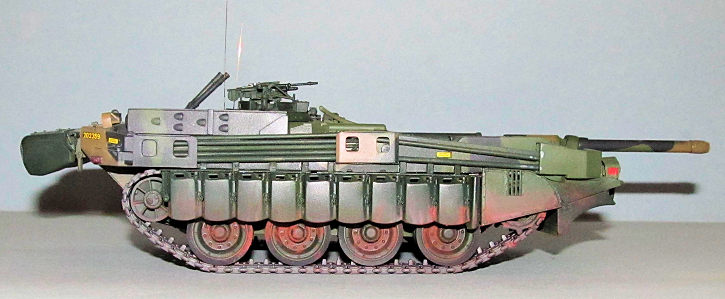
The Stridsvagn 103 (strv 103), also known as the S-Tank, was a Swedish post-war main battle tank. It was known for its unconventional design: it was turretless with a fixed gun traversed by engaging the tracks and elevated by adjusting the hull suspension. While turretless armoured fighting vehicles are usually classified as assault guns or tank destroyers, despite its unique gun laying process the Strv 103 is considered a tank because its designated combat role matched those of other tanks within contemporary Swedish doctrine. It is the only tank of any kind since World War II to dispense with a turret.
 The Strv 103 was designed and manufactured in
Sweden. It was developed in the 1950s and was the first main battle tank to use
a turbine engine. The result was a very low-profile design with an emphasis on
survivability and heightened crew protection level. Strv 103s formed a major
portion of the Swedish armoured forces from the 1960s to part of the 1990s,
when, along with the Centurions, it was replaced by the Stridsvagn 121 and the
Stridsvagn 122 (the Swedish variants of the Leopard MBT.)
The Strv 103 was designed and manufactured in
Sweden. It was developed in the 1950s and was the first main battle tank to use
a turbine engine. The result was a very low-profile design with an emphasis on
survivability and heightened crew protection level. Strv 103s formed a major
portion of the Swedish armoured forces from the 1960s to part of the 1990s,
when, along with the Centurions, it was replaced by the Stridsvagn 121 and the
Stridsvagn 122 (the Swedish variants of the Leopard MBT.)
Stridsvagn 103C
An upgrade programme was started in 1986 to fit all vehicles with improved fire control systems. Also, each Strv 103 was fitted with a dozer blade, rather than just one per platoon. A further upgrade in 1987/88 replaced the Rolls-Royce engine with a newer 290 hp (216 kW) Detroit Diesel with additional fuel cans placed along the sides to functions as applique armour, and added a new laser rangefinder.
The 103 was destined to be retired when it was discovered that the latest Soviet/Russian tank rounds could easily penetrate through the extremely sloped frontal armor all the way into the magazine of the tank which was located in the rear. The last units were retired in 1997.
| THE KIT |
 In 2003/2004, Trumpeter produced kits for the Strv
103B and Strv 103C in 1/35 and 1/72 which are pretty much the only game in town
for this unique tank. It came with two main hull pieces and four sprues of light
olive green plastic that have some flash (not bad, but not great either), one
polycap sprue and two vinyl tracks.
In 2003/2004, Trumpeter produced kits for the Strv
103B and Strv 103C in 1/35 and 1/72 which are pretty much the only game in town
for this unique tank. It came with two main hull pieces and four sprues of light
olive green plastic that have some flash (not bad, but not great either), one
polycap sprue and two vinyl tracks.
The parts are laid out in reasonable order. The instruction booklet is clear and easy to follow. It comes with a color guide in greyscale which can make things quite confusing when trying to recreate the Swedish splinter camouflage. The color guide is for Gunze Sanyo colors which can easily be converted to whatever paint line you use.
This kit is missing the formerly secret fence which acted as additional protection for the front hull during years in service. I don't know if there is an aftermarket representation for it, but I opted not to make one to simplify construction.
| CONSTRUCTION |
The road wheels and drive sprockets were cut off
the sprue and sanded smooth. I added the correct supplied polycap into each road
wheel and glued them together. The gun barrel parts were cut off and glued
together. The assembled gun barrel was thrown back into the box to let the glue
cure before fi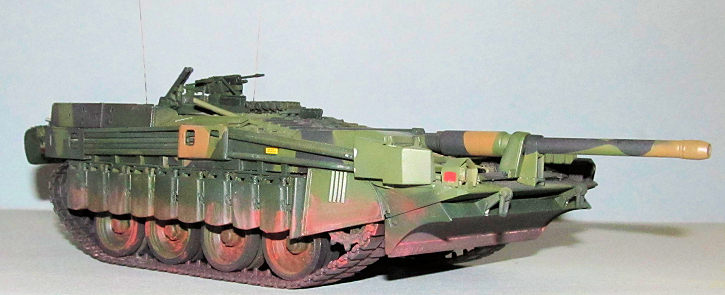 lling and sanding to eliminate the dreaded phantom seam. I filled
the seams with CA glue and sanded them smooth before adding the nozzle and the
gun mount.
lling and sanding to eliminate the dreaded phantom seam. I filled
the seams with CA glue and sanded them smooth before adding the nozzle and the
gun mount.
Trumpeter has you remove extra plastic due to the larger size of the C model hatches. This was done and various holes for C model parts were drilled out. I then added most of the major sub components of the upper hull except all the fine detail parts so I could paint the tank using Sweden's famous/infamous splinter pattern which works pretty well in the heavily wooded areas of Sweden. The various underside parts were added but the bulldozer blade was assembled and not installed till after painting.
I did not glue the upper hull and bottom hulls till just before I painted the main hull. The bottom hull, sprockets and road wheels was sprayed Tamiya XF-11 IJN Green. I added all the tie down mounts and assembled the rear storage bins.
The side “armor” was removed from the sprue, the nubs were sanded smooth and the fuel cans were glued together onto the frame. All the minor bits required some clean up as the mold marks and flash were rather prominent.
| COLORS & MARKINGS |
Painting
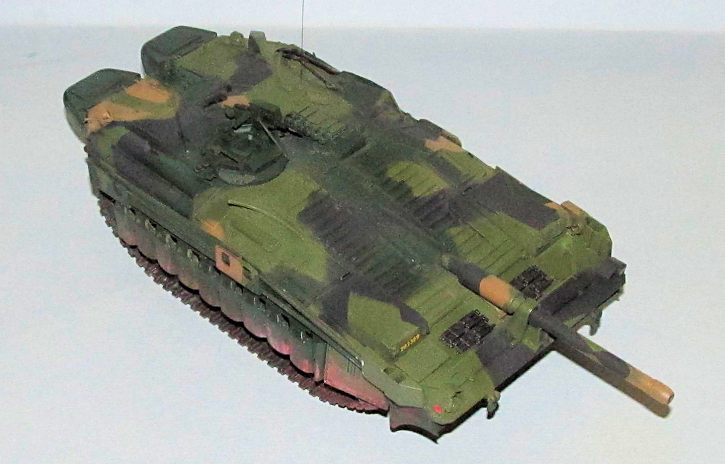
I wanted to paint the Strv 103C in the famous Swedish splinter camouflage (Trumpeter provides color pattern, but it is a greyscale chart which is almost worthless.) I looked around the internet to gather any information I could about the tank and the colors.
 After an hour or two of searching, I found a list
of similar colors. Based on the information I had gleaned from the Internet I
used Tamiya NATO Black for the black, Tamiya IJN Green (olive green is also an
option) for the dark green, Gunze Earth Brown for “sand” and NATO Green for the
light green.
After an hour or two of searching, I found a list
of similar colors. Based on the information I had gleaned from the Internet I
used Tamiya NATO Black for the black, Tamiya IJN Green (olive green is also an
option) for the dark green, Gunze Earth Brown for “sand” and NATO Green for the
light green.
The mere thought of making my own masks gave me the shivers. Fortunately there is a reasonably priced alternative to spending hours cutting shapes from masking tape from J's Work Models. They make a number of laser cut masking sheets made from Kabuki tape for armor and aircraft which are available from various online retailers.
The road wheels were first painted Tamiya Flat Black and then rubber portions were masked off (J's Work sheet also contains masks for the road wheels) so that the rims could be painted IJN Green. I also painted the undersides with IJN Green.
I followed the instructions and painted on the darkest color first (NATO black) let it dry for 15 minutes then masked off the areas that were to remain NATO black. I sprayed the Earth Brown next and masked off the Earth Brown areas. Continued all the way to NATO Green. One thing I learned was that the applique “armor” aka fuel cans and rear containers weren't always painted in the splinter scheme especially with field tanks and not the museum tanks on display. Being the lazy sort to reduce the amount of work I wanted to do (not really sure if this bit of information was true) I opted to paint the side “armor”, bulldozer blade and rear storage containers IJN green.
 Thanks all the bumps and lumps on the tank, I
ended up having the masks lift or not able fully snug down to the surface. Not
exactly the fault of the mask as there were some modeler created issues as well.
I was fortunate that I only had five areas where I had to do some touchups due
to overspray.
Thanks all the bumps and lumps on the tank, I
ended up having the masks lift or not able fully snug down to the surface. Not
exactly the fault of the mask as there were some modeler created issues as well.
I was fortunate that I only had five areas where I had to do some touchups due
to overspray.
I sprayed various locations with Tamiya Gloss coat in preparation for the decals. Once dry, I added the 13 decals which are for a museum tank. I ended up having to hand paint the rear signal lights red and the front lights silver.
I used MIG (iron oxide and sand) powders to weather the road wheels, tracks and the bulldozer blade. Q-Tips were used to rub it into the paint and flat coat. Due to the dark colors of the tank, I declined to use a wash. Tamiya Flat Coat was sprayed to seal everything in.
| CONSTRUCTION CONTINUES |
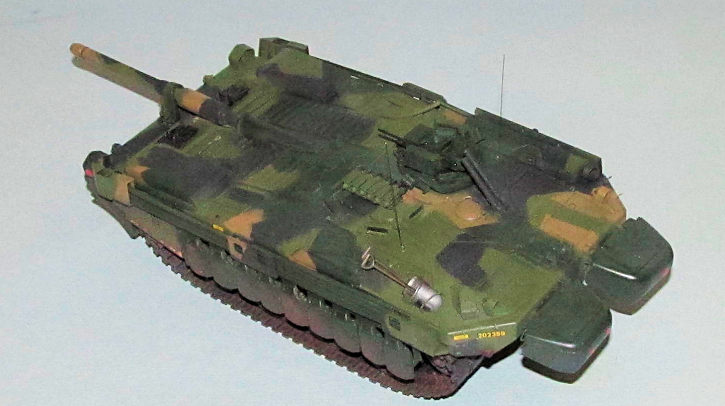
The various hand holds, weapons, camo equipment,
tools, lights and tiedowns were added and either hand painted or airbrushed
their various colors then added to the Strv 103C—to make things easier I p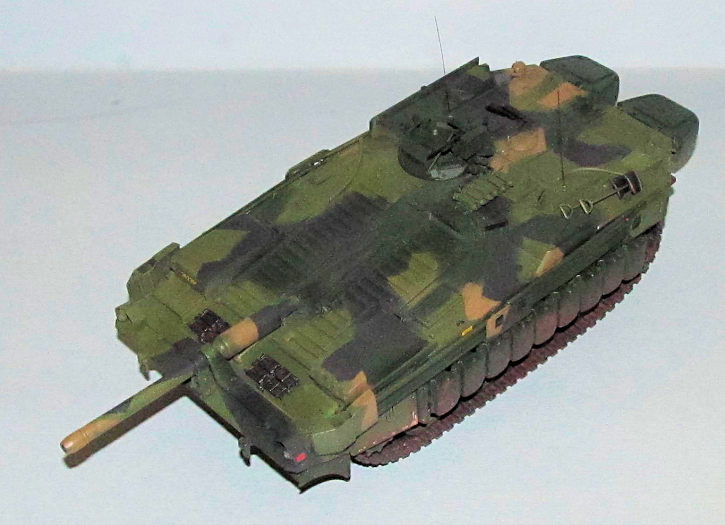 ainted
all the stuff stored on the sides IJN green. Trumpeter provides two different
exhausts including a lengthy corrugated tube, but I lost most of the detail
filling and sanding it so I decided to use the short exhaust instead.
ainted
all the stuff stored on the sides IJN green. Trumpeter provides two different
exhausts including a lengthy corrugated tube, but I lost most of the detail
filling and sanding it so I decided to use the short exhaust instead.
The storage bins proved to be a pain in the rear. I did not use the plastic mounting pins as I discovered that I did not align the lids properly so that the pin holes would line up. Instead I used thin brass wire to mount the bins. This was more durable but it also let the bins flop about. I ended up gluing some plastic card along the hull underneath the bins to hold the bins in the proper position.
I found out the vinyl tracks are actually too long. I ended up super gluing the tracks to the road wheels and pulling the excess into the top of the road wheels were it was hidden by the side armor.
Lastly, I cut 2 1/2” lengths of brass wire to act as antenna, super glued them into the antenna sockets and then hand painted them flat black.
| CONCLUSIONS |
It wasn't as easy as I originally imagined when I started building the Strv 103C. The kit assembly is straight forward, but a complex build due to the paint scheme and the need for aftermarket paint masks to deal with it. If you paint it as in its early dark green camouflage and avoid the splinter pattern then it is an extremely easy build.
I am intrigued by oddball armor designs so building an Strv 103C was high on my list. I'm glad I built it.
26 June 2017
Copyright ModelingMadness.com
If you would like your product reviewed fairly and fairly quickly, please contact the editor or see other details in the Note to Contributors.
Back to the Main Page Back to the Review Index Page Back to the Previews Index Page