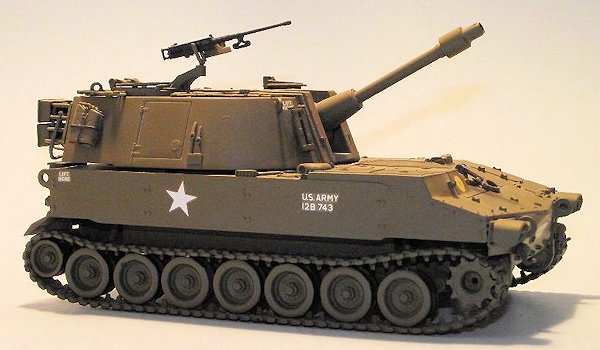
Italeri 1/35 M-108 SPG
|
KIT #: |
238 |
|
PRICE: |
$20-40.00 on the 'used kit' market |
|
DECALS: |
US and West German options |
|
REVIEWER: |
Robert
Myers |
|
NOTES: |
I built the Italeri M108, M109A2 and M109A6 at the same time, with
very different paint jobs. The kits use the same hull and turret with
just a few add-on modifications and different decal options. |
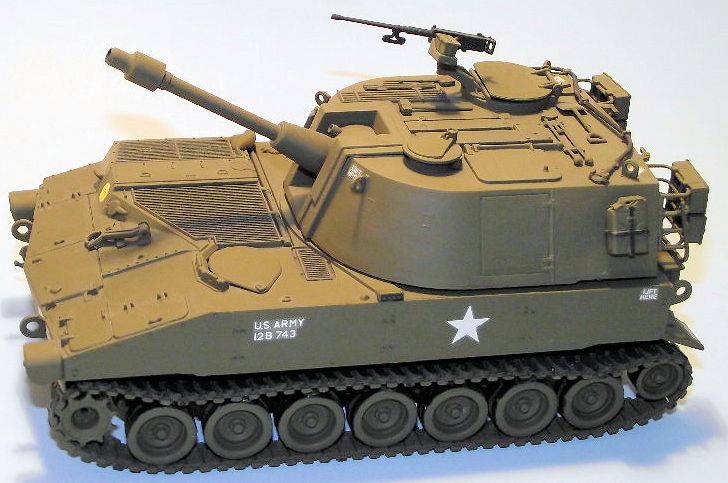
The M108 Howitzer
was an American armored self‑propelled howitzer developed by the US
government Rock Island Arsenal, Illinois, first introduced in the early
1960s.
It was armed with a 105mm‑caliber gun barrel mounted on a
rotating turret, the M108 had a maximum effective range of 7 miles (11.5km),
using 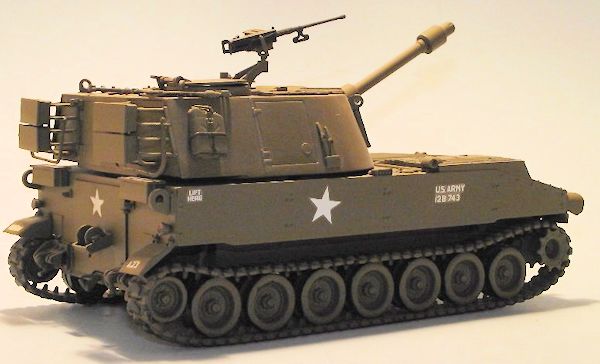 conventional
High Explosive shells, and 10 miles (15km) when it fired High‑Explosive
Rocket Assisted (HERA) ammunition. It was operated by a crew of 5 men and
had a rate of fire of 4 rounds per minute.
conventional
High Explosive shells, and 10 miles (15km) when it fired High‑Explosive
Rocket Assisted (HERA) ammunition. It was operated by a crew of 5 men and
had a rate of fire of 4 rounds per minute.
The M108 was used
in Vietnam. Although it was a dependable and well‑protected self‑propelled
artillery piece, the M108 was too heavy to be transported by helicopter
because it weighed 22 tons. So, in the jungle of Vietnam its operation as a
support weapon was limited to fire support bases it could reach by road. The
M108 was phased out soon after the American intervention in Vietnam, as the
M109's 155 mm caliber was considered better fitted for the modern war.
The vehicle was
powered by a General Motors 8V71 T diesel engine, that generated 425
horsepower. It had a maximum speed of 37 miles per hour (60 km/h).
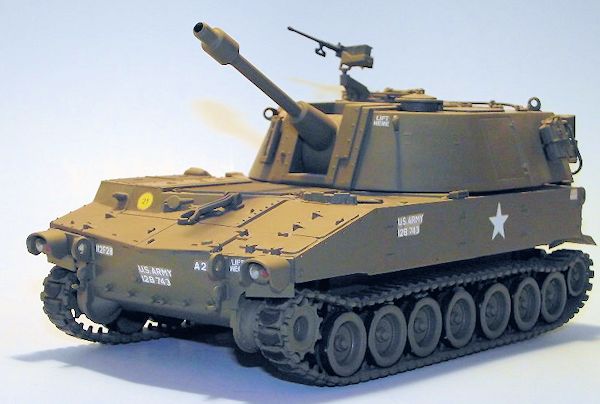
This is a nice
older kit, so there is no photo etch.
It does show its age with sink holes, injector pin
marks and little lumps for door handles. You purists should check the bottom
of the hull. The Italeri logo and “made in Italy” are molded on to the
outside-bottom. I think the detail is ok for the era this kit came from.
Sanding off the handles and replacing them with wire handles would really
add to the kit, as would a photo etch set to add the small tie down points.
 The
hull and turret have some couple major inaccuracies, but they would be easy
to fix. The rear door on the hull is a one piece door. It should be two
pieces, with a split in the middle of the door and hinges on each outside
edge. I didn't update the door, I just noticed it looking at pictures of the
real thing on-line. The next is the gun mantelet. The turret was made for
the larger gun on the M109. So the mantelet needs some shims around it to
fill the gaps, I put them in.
The
hull and turret have some couple major inaccuracies, but they would be easy
to fix. The rear door on the hull is a one piece door. It should be two
pieces, with a split in the middle of the door and hinges on each outside
edge. I didn't update the door, I just noticed it looking at pictures of the
real thing on-line. The next is the gun mantelet. The turret was made for
the larger gun on the M109. So the mantelet needs some shims around it to
fill the gaps, I put them in.
The tracks are the rubber band type.
There are plenty of extra tools and small handles to
glue on for detail, but not enough to become fiddley. There is no extra crew
equipment to fill the bustle stowage. There is not enough detail on the
interior to leave the hatches open; that is not totally true, there is
no
detail in the interior. There are decals for
different units. All of them are for an olive green
vehicle. (I believe the M108 was phased out before the U.S. Army started
wide spread use of camo paint jobs).
I started building the turret, first.
(I know I said that in my M106A6 built, but I built this one at the same
time.) It has a lot of detail and pieces. The instructions are clear and the
fit is very good. The only problem areas were the barrel and mantlet. There
is a major visible seam on top of both. I used a little excess glue to join
them. When it dried, I sanded it the excess off. The bustle racks on the
back of the turret were easy to install. They are multi piece, but fit
together very well, if you take your time. The
 hatches
do open, but since this M108 has no interior I keep them closed.
hatches
do open, but since this M108 has no interior I keep them closed.
The machine gun was painted gunmetal
with OD wood handles. Painted or natural wood would be appropriate for the
handles. We were still using a lot of older 50 calibers with plain wood
handles during this era.
The hull was next. I just glued it
together, carefully. The seams all match seams on the real M108 hull. No
putty or sanding was needed. I have seen builds that putty the seam along
the front of the hull. There should be a seam there. If you look closely,
there are doors on the top front of the hull that open. At this point, if
you want to correct the rear door, all you would have to do is scribe a line
down the middle of the big door and use some 20 thousands card to make new
hinges for the left side of the door. They are very simple. I left the
wheels off so I could paint them separately.
I glued all of the pioneer tools, small
bits and hatches in place. As a side note, some pioneer tools had the
natural wood handles and steel parts, some were painted, some were a
combination natural and paint and some were issued in OD. It just depended
on the unit the vehicle was attached to.
In our unit, everything was painted and the tools
even matched the camo even if a change of color line crossed them. New issue
tools had to be painted before they were placed on a vehicle.
The paint is simple late 1950s-early 1960s olive
green, with a slight sheen.
Everything was painted.
The track has the rubber pads in place, so I brush
painted each one with model Masters rubber. After the track had dried I gave it
and the road wheels a spray coat of clear flat. I wanted the track and wheels to
be flat coated to show wear. And provide a little contrast with the rest of the
vehicle. As I said, this olive green has a slight sheen. The paint of this era
was not totally flat for a while after it was f irst
applied.
irst
applied.
On to the decals. The
decal sheet has plenty of markings for this era howitzer. The decals themselves
are just right, for my taste. They are thick enough for the white to cover the
paint and thin enough not to break as I moved them around. As to which unit
markings to use; I just chose one and went with it. You can also do a West
German vehicle. Yes, it is now Germany, but it was West Germany when this kit
was issued. I decided to apply the decals without my usual coat of Future. That
was a mistake. Some of them didn't bond well with the surface and show
silvering. The bright light taking the pictures really brings it out. I think it
is interesting the vehicle weight to the M108 is 22 tons, but the yellow weight
plate marking shows decal 21 tons. (?)
Final assembly was
pretty simple. I added the machine gun and tow cable. They had previously been
brush painted a gunmetal color. The road wheels were slipped in place with no
problems. I stretched the rubber band track around them, put the drive sprocket
in the track and slipped in on its mounting
 shaft.
This way of mounting the track can break the join, so I always put a couple of
staples across the join and touch them up with paint. If you place the staples
close to the center and under a road wheel they are out of sight. The last item
was placing the turret on the hull, at about 1:00 am.
shaft.
This way of mounting the track can break the join, so I always put a couple of
staples across the join and touch them up with paint. If you place the staples
close to the center and under a road wheel they are out of sight. The last item
was placing the turret on the hull, at about 1:00 am.
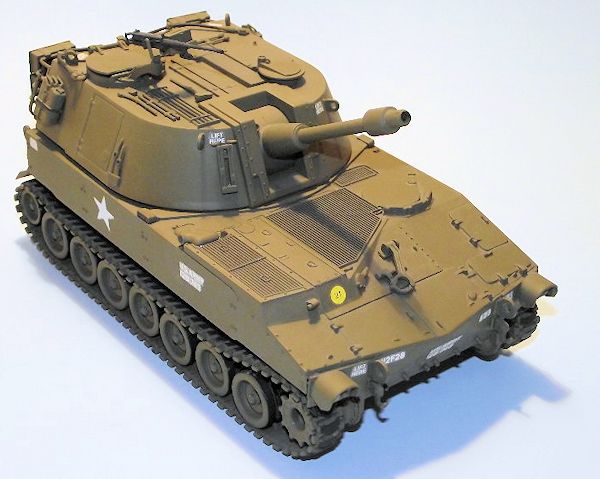
At this point, I was
finished, I thought. The next day when I took a good look at it, I was rather
disappointed. It just looked blah! So I gave it a flat black wash, painted the
lights, put a dot of flat black on the tip of the exhaust, painted fuel can
straps, went over the tow cable with a dry brush of uneven gloss to make it look
like it had a coat of grease and added few other small details. Now, other than
the decals I am happy with it.
This is a simple older
model. I enjoyed the build. There were no major problems or frustrations. It
builds into a nice shelf piece. As with a lot of the older Italeri kits, there
was no crew or extra stowage, but that can be added from the parts stash or
after-market. The prices are still reasonable on the secondary market, if you do
a little shopping. This is definitely a good kit for a beginner, it won't
frustrate them.
Google Images
Robert Myers
October 2013
If you would like your product reviewed fairly and fairly quickly, please
contact
the editor or see other details in the
Note to
Contributors.
Back to the Main Page
Back to the Review
Index Page