| KIT #: | 3624 |
| PRICE: | $15.00 (second hand) |
| DECALS: | Two options |
| REVIEWER: | Robert Myers |
| NOTES: | This was built from the older 1/35 'Yukon Jack' and Thunderbolt version. Yukon Jack was a test tank sent to Alaska for winter evaluation and testing. It was not stationed there. Thunderbolt was the 1st production M1. |
| HISTORY |
 The M1
Abrams is a turbine powered American third-generation main battle tank
produced by the United States. It is named after General Creighton Abrams.
The M1 Abrams was developed during the Cold War as a successor to the
canceled MBT-70. It was built by Chrysler Defense and was the first vehicle
to adopt Chobham armor. The M1 Abrams entered U.S. service in 1980, as a
replacement for the M60 series tanks. It served for over a decade alongside
the improved M60A3, which had entered service in 1978. The M1 was armed with
the 105mm main gun.
The M1
Abrams is a turbine powered American third-generation main battle tank
produced by the United States. It is named after General Creighton Abrams.
The M1 Abrams was developed during the Cold War as a successor to the
canceled MBT-70. It was built by Chrysler Defense and was the first vehicle
to adopt Chobham armor. The M1 Abrams entered U.S. service in 1980, as a
replacement for the M60 series tanks. It served for over a decade alongside
the improved M60A3, which had entered service in 1978. The M1 was armed with
the 105mm main gun.
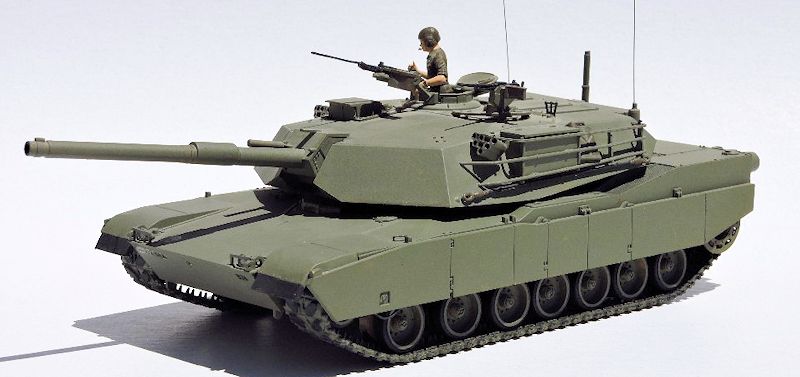
A quick
visual reference to identifying an early production M1 tank is the lack of a
bustle rack on the rear of the turret, short storage boxes on the turret,
smaller fume extractor (bore evacuator) on the barrel, and (sometimes) full
side skirts over the track. Remember these tanks were modified and may not
always be the same as built or re-built at the depot.
| THE KIT |
 This
is the oldest version of the M1 Abrams that I know of. The decals were
questionable for use do to age. So, why bother with it when you can get
newer versions? I like Tamiya, it was in the stash and I wanted an M1. The
parts count is reasonable, the tracks are Tamiya's standard rubber band
tracks and the pars are big enough for me to handle without tweezers. This
kit included 2 crew members!
This
is the oldest version of the M1 Abrams that I know of. The decals were
questionable for use do to age. So, why bother with it when you can get
newer versions? I like Tamiya, it was in the stash and I wanted an M1. The
parts count is reasonable, the tracks are Tamiya's standard rubber band
tracks and the pars are big enough for me to handle without tweezers. This
kit included 2 crew members!
The plastic was molded in Tamiya's shade of tan. The molding was crisp with no flash. The parts on the trees were solid enough to clip off with out breaking them. This is the kit was designed to have an electric motor, so there are cutouts on the bottom of the hull that can be filled. I chose not to fill them because I intended to install the motor and switches but, during assembly changed my mind. Last but not least, there is no photo etch to add.
| CONSTRUCTION |
 stuck
the ends together with a dab of superglue. It held, but I didn't trust it.
So I used a stapler and put a couple of stables across the join. Since this
tank has skirts, the staples are easy to hide.
stuck
the ends together with a dab of superglue. It held, but I didn't trust it.
So I used a stapler and put a couple of stables across the join. Since this
tank has skirts, the staples are easy to hide.
Next I
moved on to the hull assembly. One of the reasons I like Tamiya kits is that
the suspension is simple, robust and aligns so easily. The road wheels and
drive sprocket were assembled and set aside while I built up the rest of the
lower hull, and attached the upper hull per the instructions. The side
skirts were not attached and set aside for later painting. The driver's
hatch was just set in place and held with a piece of tape on the inside.
Time to
move on to the turret. The assembly of the turret is pretty straight
forward. It is not complicated to install the side racks or small parts. I
set them in place then just used a drop of Tamiya thin glue and let it run
along the join. The floor of the turret fits up into the top with no visible
seam. Again, thin Tamiya glue was touched to the seam and let run around it
with the capillary action to glue it in place with no mess.
| COLORS & MARKINGS |
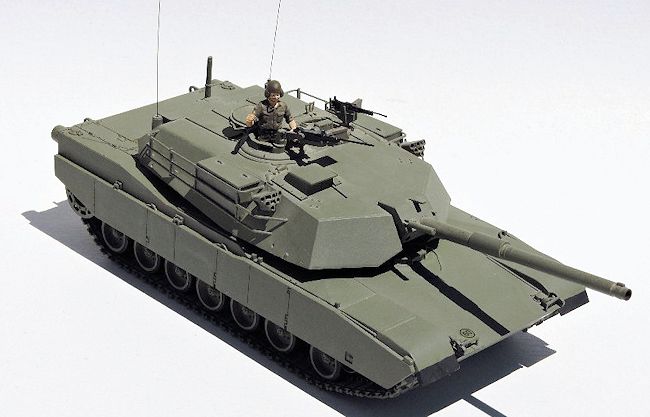
 Since
I decided to do an early production version (delivered in Forest Green), I
used Model Master (MM) OD because that is what I had on hand. At this point
the hull, turret and small parts were ready to paint. First, I sprayed
everything with Krylon black primer, After that had dried overnight I
sprayed re-sprayed everything with MM OD. I brush painted the rubber wheels
with MM flat black, the machine guns and tow cable with gunmetal; then set
everything aside to dry for a week or so while I started a new project. I
prefer a long drying time so my washes don't damage the fresh paint. After
everything had dried, I gave the whole model a coat of Model Master gloss in
prep for the decals.
Since
I decided to do an early production version (delivered in Forest Green), I
used Model Master (MM) OD because that is what I had on hand. At this point
the hull, turret and small parts were ready to paint. First, I sprayed
everything with Krylon black primer, After that had dried overnight I
sprayed re-sprayed everything with MM OD. I brush painted the rubber wheels
with MM flat black, the machine guns and tow cable with gunmetal; then set
everything aside to dry for a week or so while I started a new project. I
prefer a long drying time so my washes don't damage the fresh paint. After
everything had dried, I gave the whole model a coat of Model Master gloss in
prep for the decals.
The
decals were too old to use the large graphics, so for the sake of a build
review on an old kit, I decided to try the small unit markings. They stayed
together, but didn't stick real well. They silvered and the edges lifted a
bit. I think that after I take the pictures for this review, I'll soak them
off and see what I have in the parts box.
| FINAL CONSTRUCTION |
After a
break of a week, I got started
on the final assembly and detailing of this one. The road wheels were
slipped in place. Next I wrapped the assembled track over all of the wheels
and inserted the sprocket teeth into the track. The track was stretched just
a bit and the sprocket was slipped into place.
The side skirts were glued in place with no problem and the hull was
assembled.
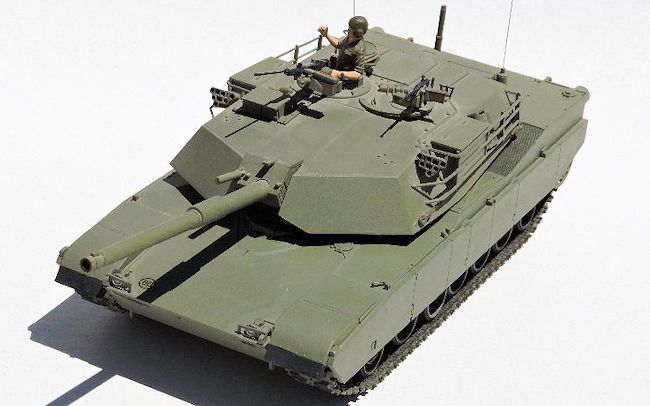
 At this
point the turret was attached to the hull. It was starting to look like a tank.
I cut two radio antennas out of guitar sting, dipped the tips in super glue gel
and painted them black. You will note they are different lengths. That is
correct for the types of radio used.
The flat black paint came out to paint the vision blocks, rubber parts on
the front fenders, inside the main gun tube and tips of the machine gun barrels.
A drop of aluminum paint was put on for the headlights and tail lights.
Each tail light was given another drop of turn signal amber after the aluminum
had tried. Finally, each of the grates on the rear deck were given a light wash
of flat black to add a little depth. At this point I made a major mistake: I
sprayed the tank with MM flat coat. It looks good, but I forgot I was going to
soak the decals off. Now I am pretty much stuck with the poor decals.
At this
point the turret was attached to the hull. It was starting to look like a tank.
I cut two radio antennas out of guitar sting, dipped the tips in super glue gel
and painted them black. You will note they are different lengths. That is
correct for the types of radio used.
The flat black paint came out to paint the vision blocks, rubber parts on
the front fenders, inside the main gun tube and tips of the machine gun barrels.
A drop of aluminum paint was put on for the headlights and tail lights.
Each tail light was given another drop of turn signal amber after the aluminum
had tried. Finally, each of the grates on the rear deck were given a light wash
of flat black to add a little depth. At this point I made a major mistake: I
sprayed the tank with MM flat coat. It looks good, but I forgot I was going to
soak the decals off. Now I am pretty much stuck with the poor decals.
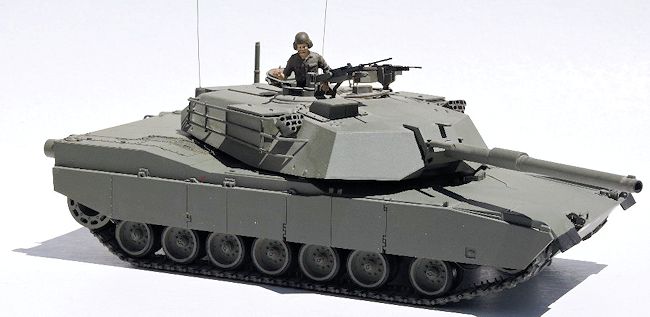
Part of the
final assembly was the tank commander. It is a good figure. I used my limited
ability to paint him. I'm not good at it. I did add a piece of thread to look
like his microphone boom.
| CONCLUSIONS |
As usual, I enjoyed building this Tamiya kit. It was an easy 5 to 6 hour build. I spent the most time painting the black rubber on the road wheels. There were no unpleasant surprises or problems on this model. The small parts like the headlight guards are sturdy enough to cut from the sprue with no damage. I would recommend it to young or advanced modelers, although the advanced modeler may want to add lot more detail. The molding is crisp and sharp with a lot of molded on detail. It doesn't rank up there with the best of what is available today; but then it won't take a year to build. Even better is that these show up on ebay or vendor's tables cheap!
June 2015
If you would like your product reviewed fairly and quickly, please contact the editor or see other details in the Note to Contributors.