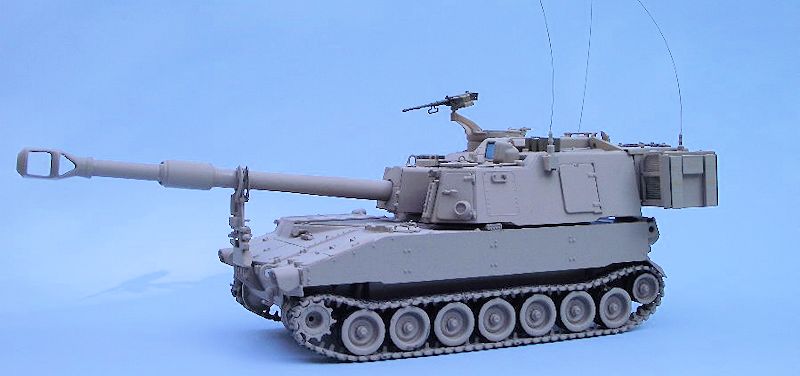
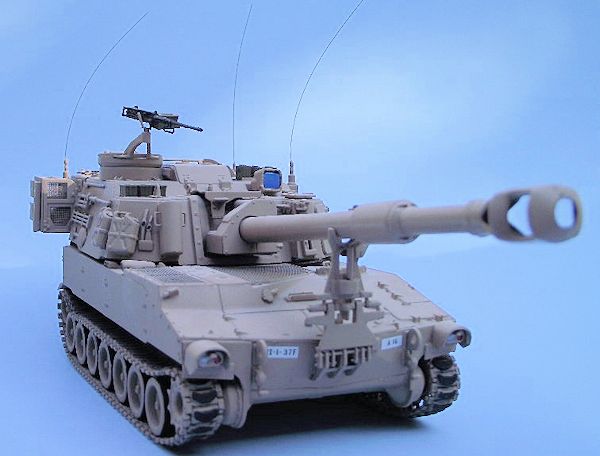
Italeri 1/35 M109A6 'Paladin'
| KIT #: | 372 |
| PRICE: | $47.70 |
| DECALS: | Two options |
| REVIEWER: | Robert Myers |
| NOTES: | Reissue |
| HISTORY |
 Introduced
in the early 1960s, the M108/109 marked the transition from open‑topped to
fully enclosed self‑propelled artillery. The M109 went from experimental to
'standard' classification in July 1963. The early M109s saw service in
Vietnam. Various modifications were introduced in subsequent years, and in
the mid‑1980s the M109 family was upgraded to include nuclear, chemical, and
biological protection. In February 1990, a version incorporating enlarged
turret, improved armor and armament, increased ammunition stowage, NBC
protection and microclimate (heating/airconditioning) for the crew became
available under the designation M109A6, the 'Paladin,' a thoroughly modern
weapon able to go from road march to firing in less than 60 seconds. The
capability to stop, fire and move was referred to as “shoot and scoot.”
Introduced
in the early 1960s, the M108/109 marked the transition from open‑topped to
fully enclosed self‑propelled artillery. The M109 went from experimental to
'standard' classification in July 1963. The early M109s saw service in
Vietnam. Various modifications were introduced in subsequent years, and in
the mid‑1980s the M109 family was upgraded to include nuclear, chemical, and
biological protection. In February 1990, a version incorporating enlarged
turret, improved armor and armament, increased ammunition stowage, NBC
protection and microclimate (heating/airconditioning) for the crew became
available under the designation M109A6, the 'Paladin,' a thoroughly modern
weapon able to go from road march to firing in less than 60 seconds. The
capability to stop, fire and move was referred to as “shoot and scoot.”
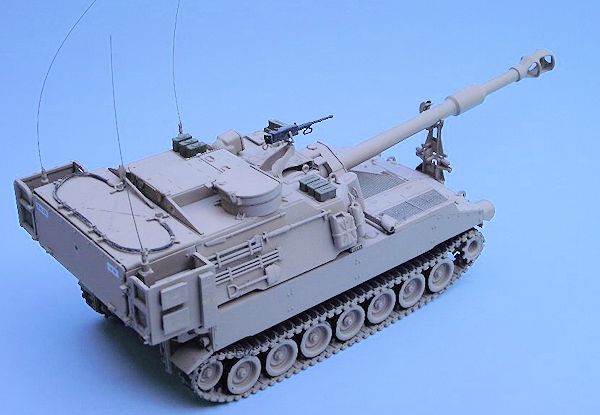
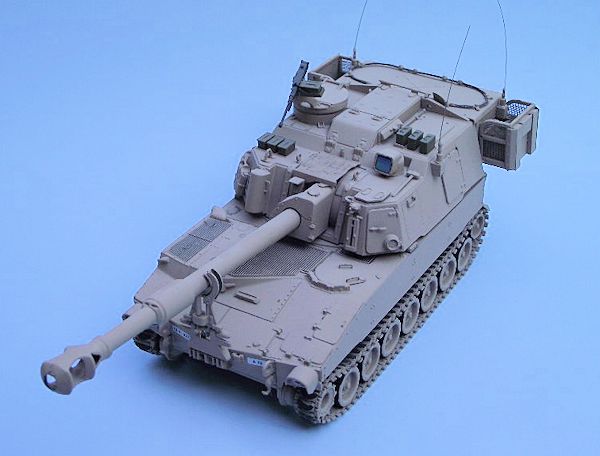
| THE KIT |

Squadron describes the re-issue kit as having
fully rendered running gear, vinyl track lengths, separately molded
on‑vehicle tools and equipment, optional position crew hatches and firing
spades, basic main gun breech detail, commander's cupola with M2 machine
gun, turret side bustles, pivoting travel lock and mesh for bustle screens.
Decals and painting notes for 2 US Army Paladin schemes: tricolor camouflage
in Germany, 1991 and overall sand.
| CONSTRUCTION |
Sometimes when I build armor, after I get the
hull done I kind of burn out on building. So I started building the turret,
first. It has a lot of detail and pieces. The instructions are clear and the
fit is very good. The screen for the bustle rack was making me a little
nervous. You have to cut each piece out from the larger metal sheet.
Luckily, I didn’t have a brain fart and ignore the instructions, as usual.
They have a template to cut out and place on the screen for cutting. I used
a pair of sharp scissors and just cut the screen as instructed. No problems!
The only problem is that the main gun is barrel heavy. When it is not in the
travel lock it tends to droop. Which would be fine if you are shooting
gophers.
If you want it to
 elevate,
you will have to slide a small shim or something under it to hold it in
place or put some weight inside to balance it.
elevate,
you will have to slide a small shim or something under it to hold it in
place or put some weight inside to balance it.
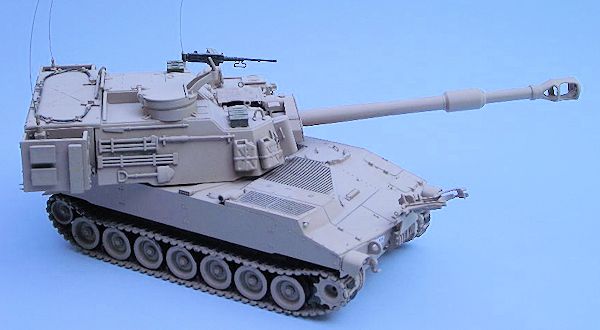
The hull was next. I just glued it together,
carefully. The seams all match seams on the real Paladin. No putty or
sanding was needed. The gun lock/support is a complicated looking piece.
Again, I took my time and actually followed the
instructions. It went together with no problems and works just fine. Next
were the spades at the rear. They were simple and slipped right into place.
They even work, if you are careful with the glue. (Mine work)
The tracks are the rubber band type. I fitted
the ends together and put a couple of staples across the join. The staples
don’t show if you install the tracks to hide them.
The rubber band tracks have plenty of length to make
them droop in the middle. However, my super glue would not stick to them to
glue them to a road wheel. Thread to the rescue. I used a sewing needle to
insert the thread thru the track to tie the track down to the road wheel. It
doesn’t show and the wife doesn’t know she is missing a needle.
| COLORS & MARKINGS |
Next was painting and decals. Before painting,
I went and looked a real M109A6 our National Guard had in the shop. The
mechanic told me that when they were painted sand (local non-depot paint
jobs), a lot of the exterior equipment was painted in place. To prove it he
showed me the green under a fuel can. Also, the tow cable and lights had
just been covered in a thick coat of grease. The grease was power washed off
after the paint job.
 I
sprayed everything with Model Master modern US sand. Since this was supposed
to represent a newly painted vehicle that had just been issued for use in
Iraq, I left the sand color on the sides of the road wheels and just painted
the “face” of the wheel where it would wear off as the track moved. The
track has the rubber pads in place, so I brush painted each one with rubber
to show minimum wear. The inside of the track has rubber pads for the road
wheels to roll on. After everything dried I slipped the tracks on.
I
sprayed everything with Model Master modern US sand. Since this was supposed
to represent a newly painted vehicle that had just been issued for use in
Iraq, I left the sand color on the sides of the road wheels and just painted
the “face” of the wheel where it would wear off as the track moved. The
track has the rubber pads in place, so I brush painted each one with rubber
to show minimum wear. The inside of the track has rubber pads for the road
wheels to roll on. After everything dried I slipped the tracks on.
I let the paint gas out for a couple of weeks.
(That is painter talk for I got lazy and didn’t work on it for a couple of
weeks) The whole thing was given a coat of Future for a gloss coat, before
decals. The unit making decals were applied over a little wet dot of Future.
The decals are just right. They are thick enough for the white to cover the
paint and thin enough not to break as I moved them around. Again a drying
period, then a black wash and a Model Master dull coat.
| FINAL CONSTRUCTION |
The final construction was to glue on the ammo
cans, antenna, nicely detailed machine gun and a piece of blue prism plastic
on the turret.
Each antenna was made from stretched kit sprue,
which was green. You may notice my antenna are not straight. Well, in my
world, the models have to fit on a shelf under a shelf.
| CONCLUSIONS |
 This was
a relaxing enjoyable build. Granted there were no crew or extra stowage, but
that can be added from the parts stash or after-market. The prices are still
reasonable, if you do a little shopping. This is simple enough that I would let
a younger modeler build this one, but I have also seen them on the table at
contests. It is not difficult and the parts count is reasonable. I liked this
one enough to build more of the M108/M109 family. As a side note: My nephew is a
Captain in the U.S. Army Field Artillery, who has been assigned to the M109A6.
He inspected this build, it passed muster for accuracy.
This was
a relaxing enjoyable build. Granted there were no crew or extra stowage, but
that can be added from the parts stash or after-market. The prices are still
reasonable, if you do a little shopping. This is simple enough that I would let
a younger modeler build this one, but I have also seen them on the table at
contests. It is not difficult and the parts count is reasonable. I liked this
one enough to build more of the M108/M109 family. As a side note: My nephew is a
Captain in the U.S. Army Field Artillery, who has been assigned to the M109A6.
He inspected this build, it passed muster for accuracy.
| REFERENCES |
Our local National Guard Armory had one in the repair shop. My retired military ID card helped provide limited, very escorted, access.
September 2013
If you would like your product reviewed fairly and fairly quickly, please contact the editor or see other details in the Note to Contributors.