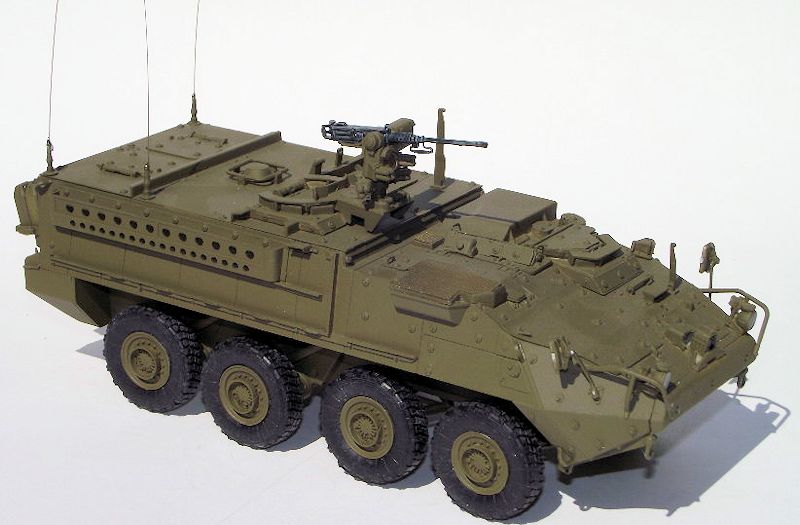
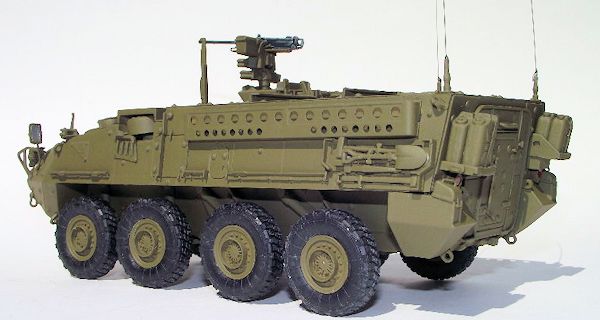
Trumpeter 1/35 M1126 Stryker (ICV)
| KIT #: | 00375 |
| PRICE: | $39.95 MSRP |
| DECALS: | Two options |
| REVIEWER: | Robert Myers |
| NOTES: |
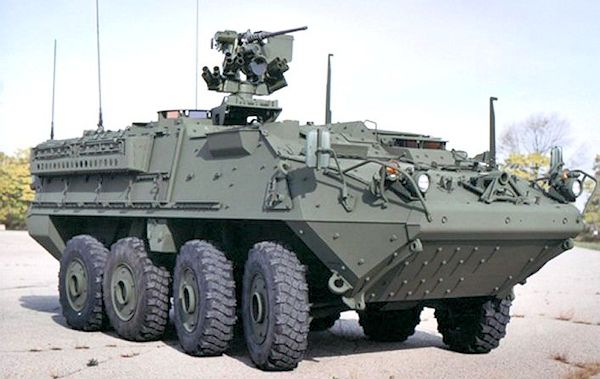
| HISTORY |
The
M1126 Infantry Carrier Vehicle (ICV) is an armored personnel carrier and
part of the Stryker family of vehicles (derived from the Canadian LAV
III/Swiss MOWAG Piranha IIIH 8x8) used by the United States Army.
The Infantry Carrier Vehicle provides protected transport and, during
dismounted assault, supporting fire for the infantry squad. The Stryker is a
full time four‑wheel drive, selectively eight‑wheel drive, armored vehicle
weighing approximately 19 tons which carries an infantry squad with their
equipment. The vehicle can attain speeds of 62 mph on paved roads.
The
basic Stryker ICV provides armored protection for the two‑man crew and a
squad of nine soldiers. It has a Protector remote weapon station with a
universal soft mount cradle, which can mount either
 a
.50 caliber M2 Browning machine gun, a 40mm MK19 grenade launcher or a 7.62
M240 machine gun. It is also armed with four M6 smoke grenade launchers.
a
.50 caliber M2 Browning machine gun, a 40mm MK19 grenade launcher or a 7.62
M240 machine gun. It is also armed with four M6 smoke grenade launchers.
Now for
some personal family history of the Stryker. My nephew is a Captain in the
US Army. He was in the first deployment of the Stryker vehicles from Fort
Lewis, Washington to Iraq. When he saw this model he told me a couple of
stories. He remembered seeing a Stryker come back to Post, under it's own
power, with only 4 wheels/tires left on it. The rest had been blown off.
This is so impressive because the vehicle came home and because the
enemy tactic was to disable a vehicle and kill the passengers when they had
to get out. Instead, this vehicle returned fire and came home with all
aboard safe.
His
other story made me appreciate the Stryker even more! He was out on the road
and saw a white Toyota pickup truck gaining on them, he ducked down as low
as he could and still observe the truck. The last thing he remembered was
seeing the driver raise what looked like a cell phone to his face. The truck
bomb detonated right at the back of the Stryker. My nephew was the only one
of his squad injured. It was a closed head injury from being bounced around.
He is still serving in the Army. So, the Stryker may be a lightly armored
vehicle, but it saved the lives of all of the men on board. They continued
the mission and drove home.
| THE KIT |
The
molding in this kit is sharp and nicely detailed. However, I was surprised
to see flash on several of the sprues. It cleans up easily, but I am just
not used to seeing it on a newer tool kit.
There were mold
 lines
on some of the smaller parts. It was rather tedious to sand them off due to
the part size. I didn't count the parts, but I would guess at a little over
300.
lines
on some of the smaller parts. It was rather tedious to sand them off due to
the part size. I didn't count the parts, but I would guess at a little over
300.
The
tires are a soft vinyl. They have nicely detailed treads and sidewalls.
There is no manufactures name on them. It doesn't detract from the overall
look of the tire and I guess it saves Trumpeter from have to pay a royalty.
This kit
contains nice photoetch screens, straps, cable cutters and a few other
parts. It seems to be a little thicker than most photoetch. I like it
because it is easy to cut, form and use with less chance of ruining the
part. The decal sheet has
markings for several units, but no information on the units themselves.
There is a very good color page to show where to put the markings.
The instructions are straight forward and walk you thru building the
model in a orderly process with no real surprises.
| CONSTRUCTION |
The
suspension and hull were next. I started with the 8 wheel drive. Each part
fits in very well and builds up to a detailed and realistic looking drive
train. The parts are big and easy to handle. There were seams on a lot of
them, but they are easily sanded off or hidden. I left off the wheels and
tires so that I could paint the wheels with the rest of the build.
Since my
building was a little out of sequence with the instructions, decided just to
start building up the hull and top as shown on the instructions.
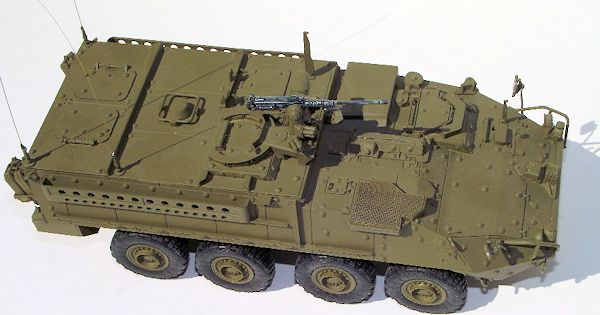
This is the part I found impressive.
The hull is made up of multiple larger pieces. I am guessing that
each version of the kit will use the basic hull and just change these
plates. Each one glued in place very well. The fit was great. If there is a
seam, it is either covered or in the same place as a seam on the real
vehicle. The engraving is deep on the molded parts. I kind of reminds me of
the old Airfix trenching, but after everything was in place it looked fine.
After
the large plates were glued on I started on the small stuff. There are a few
small handles and other stuff to glue on. I used tweezers and super glue. I
got most of them in place with no drama, except the horn. Only the carpet
monster knows where it went. What surprised me the most is that the small
pieces went together so well. The drivers hatch is a good example. It has a
dozen parts that I figured I
 would
really screw up. No way I could be careful enough with the glue that it
would open. I followed the instructions and took my time and applied the
glue with a thin wire dipped in a puddle of glue that I had made on a piece
of glass. When it was all finished, looks very delicate, but is sturdy and
makes me think...wow...I did that. The hatch opens. It would be great if
there was any interior.
would
really screw up. No way I could be careful enough with the glue that it
would open. I followed the instructions and took my time and applied the
glue with a thin wire dipped in a puddle of glue that I had made on a piece
of glass. When it was all finished, looks very delicate, but is sturdy and
makes me think...wow...I did that. The hatch opens. It would be great if
there was any interior.
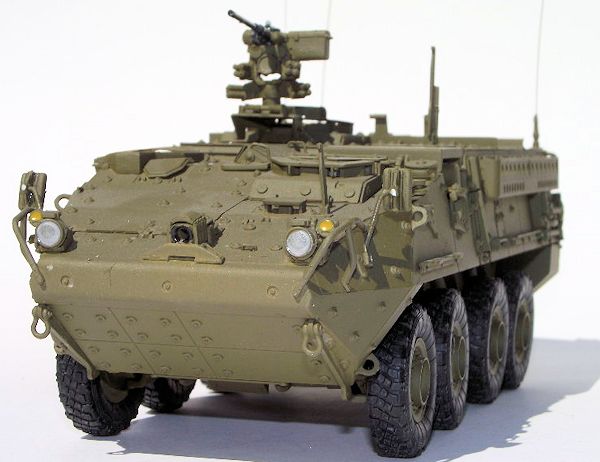
The
headlights, guards and assembly around them are usually where I do poor
work. These are easy to assemble and get lined up. Again, I used super glue
so they wouldn't move as I worked on each side. Adding rearview mirrors to a
US armored military vehicle is new to me. Luckily, these didn't present too
much of a problem. The mounting arms are thin and delicate. I figured they
would be like a pitot tube on my aircraft and break off before I was thru.
They did, but it was my fauld. More on that later in painting.
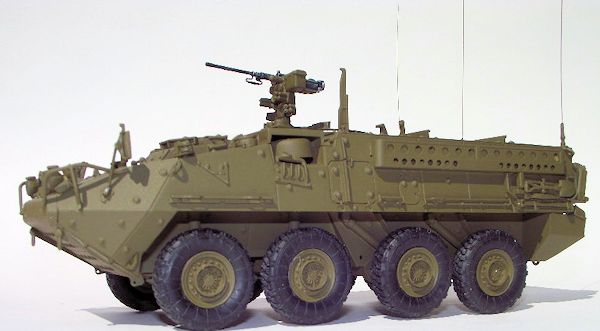
The last assembly was to add the weapons station. I glued it in place, set everything aside and started to research the paint color.
| COLORS & MARKINGS |
 The
Stryker has it's own green(FS34094) [See photo below. Ed] .
Vallejo has a paint in this shade, but me being cheap, I just added a
little Model Master OD to MM Forest Green. The problem is that I really like
these Strykers and want to build more but since I used my own mix, the paint
won't match from vehicle to vehicle. I sprayed everything but the tires.
There are no markings on my Stryker, so I can't comment on the decal
quality. I wanted it to look like the test vehicles at Fort Lewis. As for
the decal assortment, it looks pretty good. You can do multiple US Army
units and add generic markings and numbers.
The
Stryker has it's own green(FS34094) [See photo below. Ed] .
Vallejo has a paint in this shade, but me being cheap, I just added a
little Model Master OD to MM Forest Green. The problem is that I really like
these Strykers and want to build more but since I used my own mix, the paint
won't match from vehicle to vehicle. I sprayed everything but the tires.
There are no markings on my Stryker, so I can't comment on the decal
quality. I wanted it to look like the test vehicles at Fort Lewis. As for
the decal assortment, it looks pretty good. You can do multiple US Army
units and add generic markings and numbers.
| FINAL CONSTRUCTION |
 The
tail lights and front yellow lights were painted buy dipping a fine wire in
the paint, then touching the wire to the light. There is enough of a ridge
around each light that the paint just flows in and fill it nicely. After
they had dried I put a little drop of clear glue on each one. Last for
painting were the headlights. Since they don't have any clear parts, I used
the wire trick to fill the lense area with aluminum paint. After it dried I
put a real light transparent coat of flat white over the aluminum.
Again some drying time and a coat of clear glue to look a little more
like glass. A little stretched sprue for the antennas and the end was in
sight.
The
tail lights and front yellow lights were painted buy dipping a fine wire in
the paint, then touching the wire to the light. There is enough of a ridge
around each light that the paint just flows in and fill it nicely. After
they had dried I put a little drop of clear glue on each one. Last for
painting were the headlights. Since they don't have any clear parts, I used
the wire trick to fill the lense area with aluminum paint. After it dried I
put a real light transparent coat of flat white over the aluminum.
Again some drying time and a coat of clear glue to look a little more
like glass. A little stretched sprue for the antennas and the end was in
sight.
Remember
those rear view mirrors? Well I decided to use metal foil for the reflective
side. I got it on ok, but when I tried to trim it off, I broke both of the
mounting arms. After a few choice words I trimmed the foil and glued the mirrors
back on. I like the foil effect. So, on the next Stryker build, I will paint and
foil the mirrors before I install them. DUH!
| CONCLUSIONS |
| REFERENCES |
Wikipedia
Google Images
October 2013
If you would like your product reviewed fairly and fairly quickly, please contact the editor or see other details in the Note to Contributors.