Hobby Boss 1/48 M4A4 Sherman (mid-production)
| KIT #: | 84802 |
| PRICE: | $15.00 |
| DECALS: | Two options |
| REVIEWER: | Jonathan Prestidge |
| NOTES: | Includes Photo Etch |
| HISTORY |
The M4
Sherman was a U.S. medium tank based on the U.S. M3 Lee/Grant line of tanks. It
was mass produced on such a grand scale that it became the most numerous single
type of tank made during WWII. To meet production goals, the Sherman was built
by at least nine different manufacturers.
It was made with both cast and welded hulls, myriad engine and armament
installations, multiple transmission housing types, differing suspension types,
etc. Consequently, there is a bewildering assortment of types and sub-types of
the M4.
| THE KIT |
Hobby Boss
released their line of 1/48th Shermans in the mid 2000’s. They were
derided for their inaccuracies which included slightly off-angle frontal armor,
elongated front hatches, a misshapen transmission housing, etc. To add insult to
injury, Tamiya had just released their own 1/48th scale Sherman
 ine,
setting the standard for M4s in quarter scale.
ine,
setting the standard for M4s in quarter scale.
I first saw
this kit at the local hobby shop where the owner had a built example on display.
He had done a stunning job on what he said was a “weekend” build. I was awed by
the fine detail and it certainly looked like a Sherman. The low price was
impressive as well – about half that of the Tamiya, so I plunked the money down
for my first armor purchase.
Upon opening the box, I was a bit overwhelmed by the high parts count of 263 pcs. (All you armor guys stop laughing, I’m an aircraft guy and not used to counting that high!). Looking further, I found that the parts were well molded with very petite detail. Included was a nice photo-etched fret as well as a slew of stowage, additional armor for one of the versions, and markings for a couple of Olive Drab Shermans. There was a mold seam and minor flash on most of the parts but it was not noticeable until I started the build. The instructions were well-printed and appeared perfectly clear at first glance (more on this later).
| CONSTRUCTION |
This was the
first ever tank that I started, though not the first I completed. As such, I
started by carefully reviewing the kit instructions. The first three steps were
confusing. I later realized that step one covers the suspension for the tank I
modeled while steps two and three cover the suspension for the tank with
 additional
armor. At this point, I skipped steps one through three and then followed the
kit instructions to the letter up thru step 10, assembling the lower hull
followed by the upper hull. I skipped step 11 (attaching the upper hull to the
lower hull) to more easily facilitate painting and weathering. The turret was
then assembled per steps 12 and 13 in the instructions (I had to take care to
get the correct options for the tank I was building). The fit of the parts was
O.K. but not great. Mold seam cleanup on every part and indecision on whether to
paint-then-assemble or assemble-then-paint the suspension finally exhausted my
limited attention span. Back in the box it went. Round one went to the Hobby
Boss Sherman!
additional
armor. At this point, I skipped steps one through three and then followed the
kit instructions to the letter up thru step 10, assembling the lower hull
followed by the upper hull. I skipped step 11 (attaching the upper hull to the
lower hull) to more easily facilitate painting and weathering. The turret was
then assembled per steps 12 and 13 in the instructions (I had to take care to
get the correct options for the tank I was building). The fit of the parts was
O.K. but not great. Mold seam cleanup on every part and indecision on whether to
paint-then-assemble or assemble-then-paint the suspension finally exhausted my
limited attention span. Back in the box it went. Round one went to the Hobby
Boss Sherman!
After a
couple of years and two completed Tamiya 1/48th scale armor kits, I
decided to finish the Sherman. I decided to build the suspension first then
paint it. After about two additional hours of building, I had the three main
components (lower hull, upper hull and turret) ready for paint.
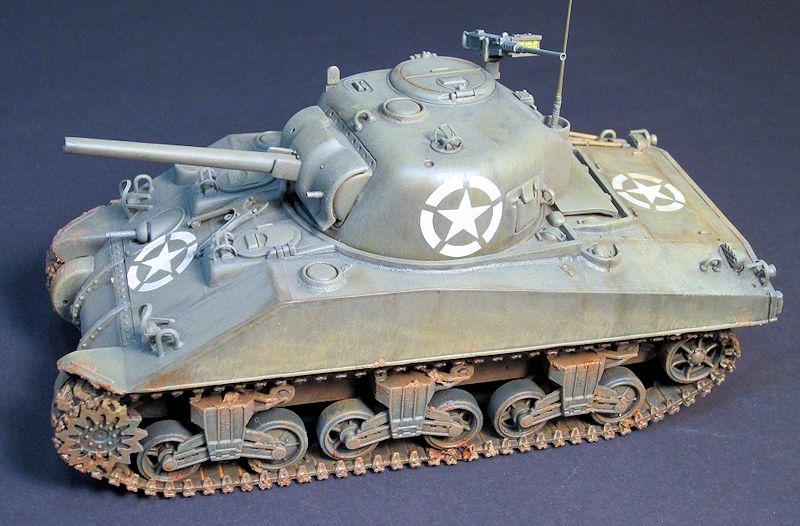
| COLORS & MARKINGS |
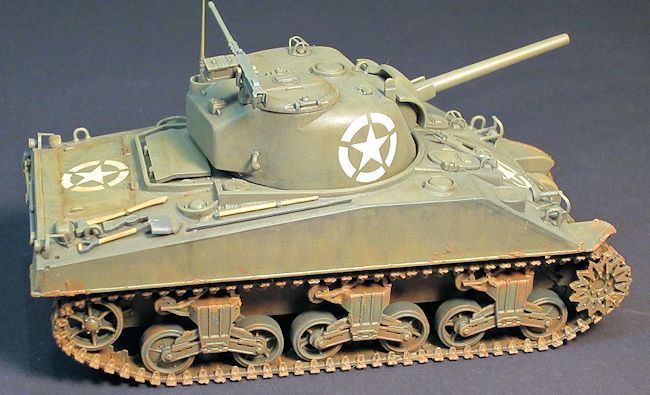
It is
difficult to find a color scheme for the Sherman that is anything other than
Olive Drab. I went with the most colorful of the kit markings - option “B”, a
Sherman with white stars and surrounds. First, everything was airbrushed
PolyScale acrylic Olive Drab thinned with Future. Thinning with Future helped
the paints spray better and the satin finish was better suited to
washes/filters. Once the entire model had been sprayed, I added some PolyScale
Israel Khaki to the Olive Drab and sprayed various panels on the upper surfaces
of the upper hull and turret. I did this to give some tonal variation to the
monotone paint scheme.
The tracks
were brush-painted dark gray next. They were dry-brushed with Testors oil-based
silver prior to weathering.
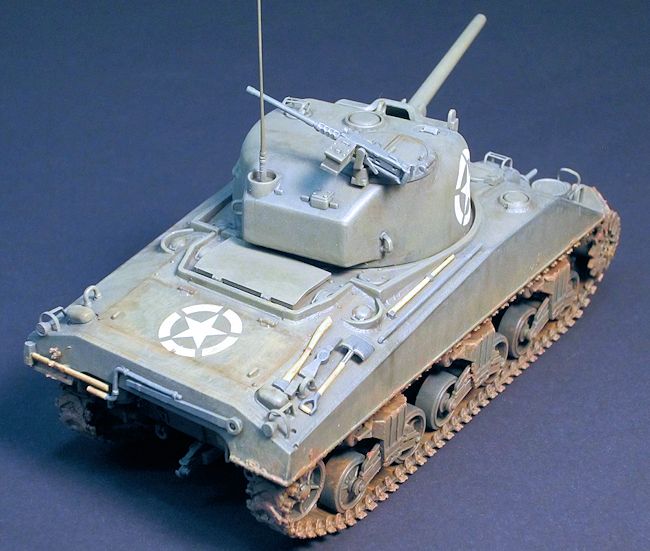
 Next came
the fun part – weathering! I have always enjoyed seeing dirty, muddy, stained
and faded armor models. I started the weathering process by applying a thin,
black, soapy water filter/wash. I went section by section, using a Q-tip to
remove some of the wash and to streak it unevenly. I then dry-brushed some
thinned, lightened Olive Drab to accent detail and further vary tone. The tracks
and lower hull were strategically dry brushed with several layers of differing
shades of brown and tan paint to approximate dusty, muddy European conditions in
which these tanks operated. Good pictures of actual Shermans proved invaluable
during the weathering process.
Next came
the fun part – weathering! I have always enjoyed seeing dirty, muddy, stained
and faded armor models. I started the weathering process by applying a thin,
black, soapy water filter/wash. I went section by section, using a Q-tip to
remove some of the wash and to streak it unevenly. I then dry-brushed some
thinned, lightened Olive Drab to accent detail and further vary tone. The tracks
and lower hull were strategically dry brushed with several layers of differing
shades of brown and tan paint to approximate dusty, muddy European conditions in
which these tanks operated. Good pictures of actual Shermans proved invaluable
during the weathering process.
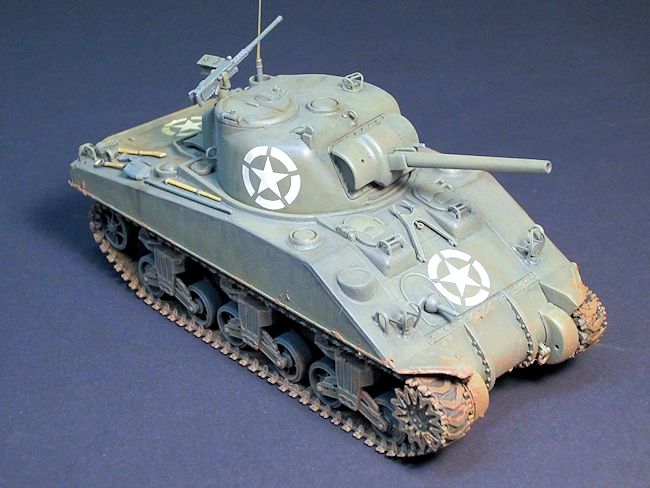
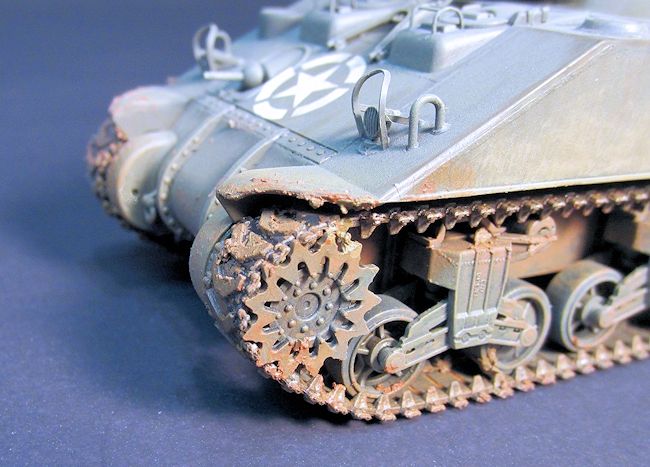
The upper
hull was glued to the lower hull and the turret and tracks were added prior to
decaling. When I added the tracks I had to be careful because they are
directional. As a further note of caution, I had to remove the tracks and cut
off two of the “knobs” on the hull side of the tracks where they wrapped around
the return roller. Otherwise, the tracks interfered with the plate behind the
return roller and would not sit properly. This may have been of my own doing at
some point during construction.
I
brush-painted several coats of Future in the areas where decals were to be
applied. After letting the Future dry overnight, I applied the kit decals. They
were thin and I experienced no trouble getting them into position once they were
on the model. After the decals were in place they settled down with no silvering
and responded well to an application of MicroSol.
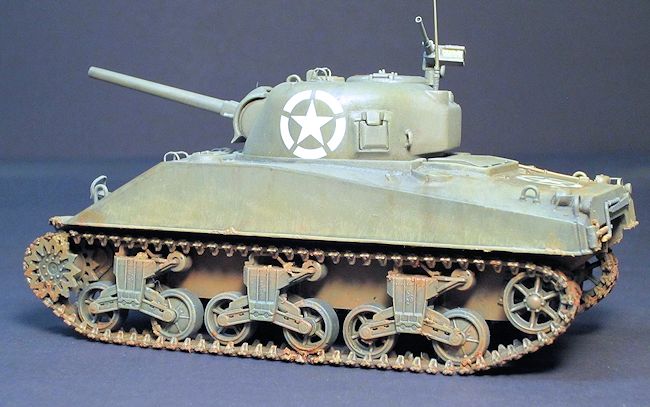
I airbrushed
Poly Scale Flat Clear mixed with a few drops of Hazel Tan over the entire tank.
I used pastels to further dirty the M4A4. Finally, I added thickened brown paint
scraped from the lids of my paint containers with a toothpick to depict mud on
the tracks & fenders. Final detailing was then completed.
| CONCLUSIONS |
If you would like your product reviewed fairly and fairly quickly, please contact the editor or see other details in the Note to Contributors.