Heller 1/72 Alpha Jet
| KIT #: | 80257 |
| PRICE: | $HK45 |
| DECALS: | One option |
| REVIEWER: | Richard F |
| NOTES: |
| HISTORY |
Formation
aerobatics by a really good team is something to behold. My personal favourite
was the now-disbanded Kiwi Red, but when I saw the Patrouille de France at RAF
Leuchars in 2001 I have to say I was quite impressed. They were just as good as
the Red Arrows who performed at the same show.
The Patrouille de France got its name in 1953 although France had aerobatics teams as far back as 1931.
 The team
flew Thunderjets, Ouragans, Mysteres, and Magisters before switching to the
Alpha Jet in 1981.
The team
flew Thunderjets, Ouragans, Mysteres, and Magisters before switching to the
Alpha Jet in 1981.
In 2009, the lead pilot for the Patrouille de France is Commandant Benjamin Souberbiell. He's 33, has 2000 hours, and came from a reconnaissance squadron where he flew the Mirage F1 CR. His number four is a 32 year old woman, Commandant Virginia Guyout, who comes from the same squadron flying F1CRs. She's got 1600 hours. The rest of the team range up to 3900 hours and have flown Mirage F1s, Mirage 2000s and Jaguars. You can see them all at the official website: http://www.patrouilledefrance.com/
As for the Alpha Jet itself, it was a French-German collaboration which competed with the Red Arrows' BAe Hawk, not just in aerobatics but as a jet trainer and light attack aircraft. Both jets came onto the market in the 1970s replacing planes like the T-33 and the Fouga Magister. Ultimately the Hawk was probably more successful, and better known, being used by the RAF, RAAF, Canada and 14 other air forces, in increasingly advanced versions over the years. But the Alpha Jet continues to serve with France and Germany, Belgium and ten other air forces. There were 480 Alpha Jets built, compared to about 900 Hawks.
| THE KIT |
| CONSTRUCTION |
Building this kit is quite straightforward. I started by painting my pilots and building their cockpit. The seats are very basic so I added yellow and black ejection handles and a silver component, based on a picture I found online. I also painted a representative instrument panel for each seat. You can't see much because the panels are under a coaming, so I did enough to give the appearance of dials and gauges there.
 After adding
some noseweight and joining the fuselage, I was practically finished! The wings
and tailplanes go on ok, with a little bit of extra effort needed to get a
smooth seam at the wing join (which, it appears from my pictures, I didn't do as
diligently as I might have).
After adding
some noseweight and joining the fuselage, I was practically finished! The wings
and tailplanes go on ok, with a little bit of extra effort needed to get a
smooth seam at the wing join (which, it appears from my pictures, I didn't do as
diligently as I might have).
Areas of construction that are more difficult include getting the main wheels on at the right angle, adding the underside pod (which doesn't fit so well, but has to be added after painting and decaling - see below), and adding the little features under the wings (they look like actuators for the flaps).
I moved house halfway through the construction of this model, and I managed to lose the exhausts, main wheel well doors and two horizontal pieces that go near the top of the tail fin. I hope they will turn up but I wasn't prepared to wait for that happy day.
The kit provides underwing stores but they're not needed for this model.
Generally the fit is pretty good. The canopy fits well except where it is supposed to be flush with the fuselage spine. There's quite a gap, almost as though the canopy part has a small chip missing. I fixed that up and my jet was ready to roll.
| COLORS & MARKINGS |
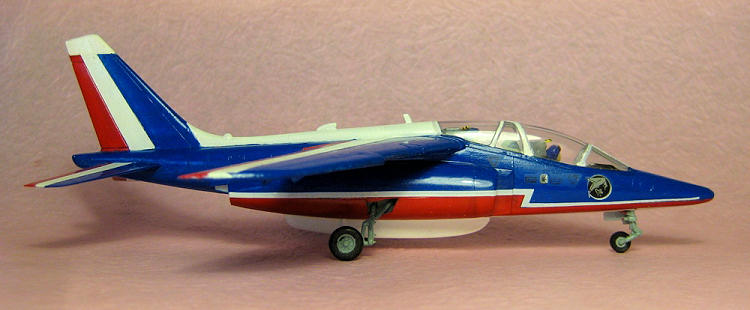
 There's
only one scheme with this boxing of the Heller Alpha Jet - the red white and
blue of the Patrouille de France.
There's
only one scheme with this boxing of the Heller Alpha Jet - the red white and
blue of the Patrouille de France.
The correct shade of blue is hard to define because different photos, taken in different light, give it a range of different hues. I used Mr Color 65 "Bright Blue" with some white in it to lighten it up. The red and white are pretty straightforward. I used Mr Color for both. If I did it again I'd probably lighten it still more, though a lot depends on the photograph you consult.
This one shows the blue as almost teal: http://www.patrouilledefrance.com/photosvol/images/PAF%202005%20en%20vol%20(19)bis_jpg.jpg
This one shows it darker, and closer to what I used: http://www.patrouilledefrance.com/photosvol/images/PAF%202005%20en%20vol%20(29)bis_jpg.jpg I think that image is taken from another jet, possibly through a tinted canopy. I'm fairly confident my jet is a little too dark.
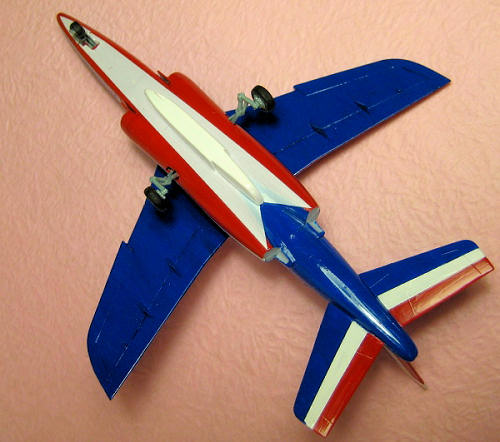
You need plenty of masking tape for this one. The only hard part, though, is guessing the right place to make the "Z" in front of the intake to ensure that the white strip decal creates a clean line between the red and blue. The same applies on the bottom of the aircraft just ahead of the exhaust pipes, where the large white triangle decal forms the boundary between red and blue. You do not need to mask these areas, because the decal will give you the clean line. But you do need to get it in the right spot, so that the decal actually covers the intersection between red and blue. It's easier to mask that straight line on the side of the fuselage, rather than guessing there.
If I could do it again, I would mask
and paint the triangle shape underneath, after installing and gap-filling the
underside pod. I did it the way the instructions recommend, namely painting red
underneath, using the white decal for the underside triangle, then adding the
white underside pod. This was the most dissatisfying part of my c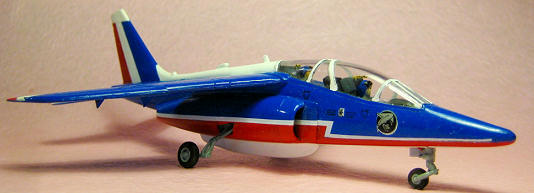 ompleted
build. I wasn't sure how to tackle filling the gap, nor what to do about the
white decal being a different shade than the white paint on the pod and
everywhere else.
ompleted
build. I wasn't sure how to tackle filling the gap, nor what to do about the
white decal being a different shade than the white paint on the pod and
everywhere else.
In the end, I left it given that it's right underneath and hard to see. But if I ever built another one, I would tackle it differently.
After two coats each of the red and blue, and three coats of the gloss white, the jet was ready for its decals.
Decals are pretty basic on this kit and don't take long. They went down nicely on my glossy enamel surface. The kit doesn't provide tail numbers, which it really should. I may get around to applying one, one day, if I can find something suitable.
| CONCLUSIONS |
I like colourful aerobatics jets not only because they're cool but because I don't get any heat for making another "grey and pointy one"! This kit is easy to build and as long as you are comfortable with your masking tape, it is easy, if a little time-consuming, to finish nicely.
| REFERENCES |
If you would like your product reviewed fairly and quickly, please contact me or see other details in the Note to Contributors.