Italeri 1/48 Eurofighter
| KIT #: | 2610 |
| PRICE: | $22.00 MSRP |
| DECALS: | Three options |
| REVIEWER: | Dale Rannals |
| NOTES: |
| HISTORY |
Not
being a “fast jet” guy, I knew very little about this aircraft before starting
this kit. I just really liked the
looks of it. So with a bit of
perusing the net I came up with these tidbits.
(There’s plenty more out there…tons of it actually.)
So here we go……
The
EF200 Eurofighter is a twin engine, all weather, highly agile fighter designed
and built by a consortium of European nations, namely the
 The
EuroFighter has a simple cropped-delta wing with a straight trailing edge and
features full-span split "flaperons” (flap-ailerons). There are small strakes on
the fuselage below the cockpit and above and behind the canard fins to make sure
that airflow over the wing remains effective at high angles of attack. The
canard fins are of "all-moving" configuration and have a strong anhedral droop.
A large dorsal airbrake is located behind the cockpit and a brake parachute is
stored in a housing at the base of the tail. There is also a retractable
inflight refueling probe on the right side of the nose
The
EuroFighter has a simple cropped-delta wing with a straight trailing edge and
features full-span split "flaperons” (flap-ailerons). There are small strakes on
the fuselage below the cockpit and above and behind the canard fins to make sure
that airflow over the wing remains effective at high angles of attack. The
canard fins are of "all-moving" configuration and have a strong anhedral droop.
A large dorsal airbrake is located behind the cockpit and a brake parachute is
stored in a housing at the base of the tail. There is also a retractable
inflight refueling probe on the right side of the nose
The Typhoon
features lightweight construction (82% composites = 70% carbon fiber composites
+ 12% glass reinforced composites), with an estimated lifespan of 6000 flying
hours.
This,
along with a substantial use of titanium and lithium-aluminum alloys elsewhere,
help keep the weight down. Although
comparable in dimensions to the Tornado, the EuroFighter has an empty weight
only about 70% as great, while being more capable in almost all regards. The
advanced construction techniques also reduce the parts count of the airframe,
with the EuroFighter having about 16,000 structural elements to 36,000 for the
Tornado. Maintenance is greatly reduced as well, with the cost of maintenance
for the Typhoon estimated at 25% of total life-cycle cost, while it runs at
almost 50% for the Tornado.
While the EuroFighter has a greater RCS than the
The
EuroFighter is powered by twin Eurojet EJ.200 two-spool afterburning turbofans,
with the intakes on the belly of the aircraft under the cockpit. This position
helps ensure airflow at high angles of attack.
Each EJ.200 turbofan provides 13,490 lb thrust and 20,250 lb with
afterburners.
The Typhoon is
capable of supersonic cruise without using afterburners. This is referred to as
"super-cruise". According to some sources, the maximum speed possible without
reheat is between Mach 1.2 and Mach 1.5.
 The
Eurofighter is stated to have superlative agility; the consortium claims their
fighter has a larger sustained subsonic turn rate, sustained supersonic turn
rate, and faster acceleration at Mach 0.9 at 20,000 feet than the F-14 Tomcat,
F-15 Eagle, F-16 Fighting Falcon, F/A-18 Hornet, Dassault Mirage 2000, Dassault
Rafale, the Sukhoi Su-27, and the Mikoyan MiG-29.
Impressive.
The
Eurofighter is stated to have superlative agility; the consortium claims their
fighter has a larger sustained subsonic turn rate, sustained supersonic turn
rate, and faster acceleration at Mach 0.9 at 20,000 feet than the F-14 Tomcat,
F-15 Eagle, F-16 Fighting Falcon, F/A-18 Hornet, Dassault Mirage 2000, Dassault
Rafale, the Sukhoi Su-27, and the Mikoyan MiG-29.
Impressive.
In 2005, a
trainer Eurofighter T1 was reported to have had a chance encounter the previous
year with two U.S. Air Force F-15Es over the Lake District in the north of
England. The encounter became a mock dogfight with the Eurofighter allegedly
emerging victorious.
In the 2005
Singapore evaluation, the Typhoon won all three combat tests, including one in
which a single Typhoon defeated three RSAF F-16s, and reliably completed all
planned flight tests. Singapore still
went on to buy the F-15 due to uncertainty over Typhoon tranche 2 delivery
dates.
During the
exercise "Typhoon Meet" held in 2008, Eurofighters flew against F/A-18 Hornets,
Mirage F1s, Harriers and F-16s in a mock combat exercise. It is claimed that the
Eurofighters won all engagements (even outnumbered 8 vs 27) without suffering
losses.
The aviation
magazine "Flug Revue" reports that in 2008 German Typhoons were pitted against
French Rafales. The results are said to be "extremely gratifying", the main
difference being the "much greater thrust of the EJ200 engine".
So there you have it. Sounds pretty impressive and looks gorgeous. Lets build…….
| THE KIT |
 Italeri’s
1/48 EF2000 Eurofighter kit is molded in several sprues of light gray plastic
and one of clear bits. Engraved
panel lines endow the parts, though some are a bit heavy handed.
The canopy can be positioned open or closed, and the airbrake and
refueling probes can be built extended if so desired.
Under-wing “hangy” thingies include fuel tanks, Sidewinders, and AMRAAM
missiles.
Italeri’s
1/48 EF2000 Eurofighter kit is molded in several sprues of light gray plastic
and one of clear bits. Engraved
panel lines endow the parts, though some are a bit heavy handed.
The canopy can be positioned open or closed, and the airbrake and
refueling probes can be built extended if so desired.
Under-wing “hangy” thingies include fuel tanks, Sidewinders, and AMRAAM
missiles.
Instructions consist of several pages of well drawn assembly steps. A short history is included and color callouts are both generic and FS numbers. The decal sheet allows machines from several of the users (Germany, Italy, RAF), though these are all prototypes or the first-delivered aircrafts. The decal placement guide is quite thorough, showing all the machines in their own 3 view drawings.
| CONSTRUCTION |
I started off
with the cockpit, of course. And
here was an immediate disappointment.
The office is rather spartan indeed, with just decals for instrument
panels and a very basic seat. Now, this
would be fine if this were a cramped WW2 fighter that you could barely see into,
but under this huge expanse of canopy it would just look wrong.
Surely something more detailed is needed here.
 So I
looked for a detail set. I found
Eduards upgrade set online and ordered it pronto.
It adds color PE instrument panels and PE detail to the kit seat to bring
it up to something closer to par. I
continued gluing together as many subassemblies as I could while I waited for
the detail set to arrive in the mail.
It arrived; I installed it……MUCH nicer.
So I
looked for a detail set. I found
Eduards upgrade set online and ordered it pronto.
It adds color PE instrument panels and PE detail to the kit seat to bring
it up to something closer to par. I
continued gluing together as many subassemblies as I could while I waited for
the detail set to arrive in the mail.
It arrived; I installed it……MUCH nicer.
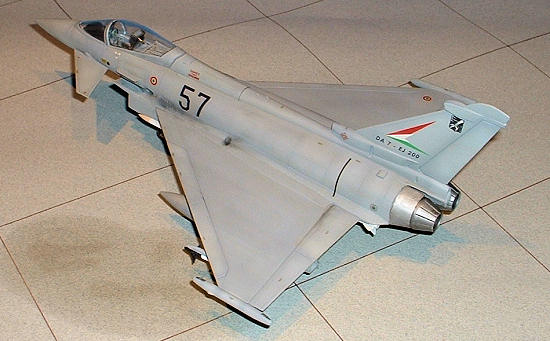
The aircraft,
with its delta wing, lends itself to a simple kit….not much to over-engineer
here. The three piece wing assembly
mates up very well to the two piece fuselage and that is, pretty much, is the
whole aircraft……and what little seams there are to take care of are easy to
tackle.
The rest of the kit is rather unremarkable in assembly…….which is a good thing. . The parts fit well. One part that doesn’t, though, is the re-fueling probe door. To say it is sloppy is, well…very kind. I glued it in as best I could to fill the space and then left it as is…..I didn’t want to putty and sand the area and lose all the detail there. I recommend assembling the door open and the probe extended just to avoid this problem. And in the “what is it” category is the IR seeker housing that goes on the nose of some aircraft. It is an indefinable blob of plastic that doesn’t really fit the contours of the nose. I left it off. In contrast with that, the airbrake, after some minor sanding, fits great……I set it in place without gluing.
| COLORS AND MARKINGS |
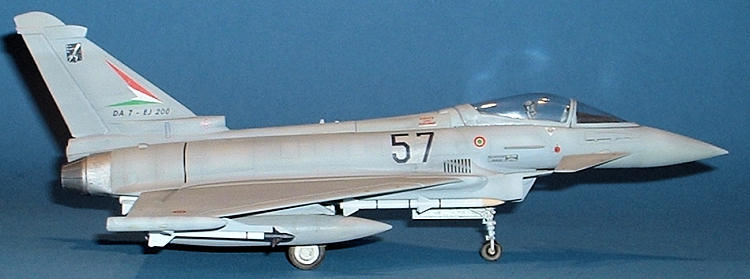
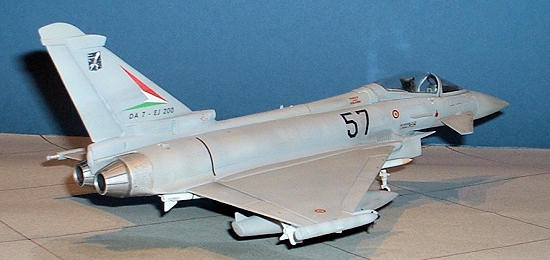
I settled on
the Italian aircraft option for two reasons.
First, I don’t have many Italian aircraft in my display case.
Second, I felt a bit lazy and the Italian bird is one color overall.
This almost worked against me though, for after I brought it back from
the paint-booth I almost lost interest in it.
It just looked bland and boring….it hadn’t “come to life” like so many
kits do after you start painting.
This still looked as dull as the bare plastic, and almost the same shade of
grey.
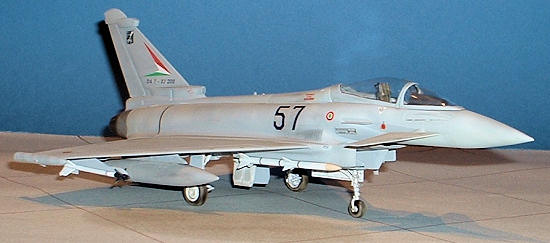
But I
persisted, and on my next trip to the booth a few days later that feeling went
away. I shaded panels and panel
lines with lighter and darker grays to kill that color monotony and give it some
depth. After letting it dry for a
few days I gloss-coated it with Future and again let it dry.
Decals came
next; nothing fancy here, just the kit supplied ones.
They went down okay, and were quite manageable.
I got some silvering under some of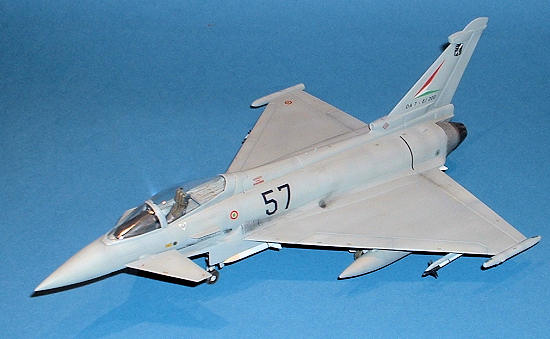 them, but it isn’t very noticeable.
I next broke out the oil paints and, working on one section at a time,
began spotting the surface with dots of color.
I then blended these in with a nice, soft, flat brush damp with turpenoid
to just barely change the hue of the paint.
This effect is very subtle but definitely makes a difference.
The nice thing is, with the long drying times of oil paint, you can play
around with this technique and if it isn’t going well, just wipe it off and try
again.
After this I
gave everything a clear flat coat, in this case a mixture of Future and Tamiya
flat base. But this is where things
went bad….just because I wasn’t paying attention.
I still had the canopy off the plane; just hadn’t gotten around to
attaching it yet so I was painting it separately.
Well, after this flat finish was applied I removed the masks on the
canopy and realized I had totally forgotten to mask the underside of it.
So here I was with a huge expanse of “glass” that had a lovely amount of
gray overspray all over the inside.
After my initial feeling of total disgust with myself (the whole hobby is
“attention to detail” and this mistake showed a huge lack of it!), I
contemplated my options of fixing or replacing.
I figured I might as well look for a vacuform replacement or get a
replacement from Italeri.
But, since the
canopy was already shot, I reasoned it would cause no harm to at least try
fixing this first. So, taking my
very finest hobby sandpaper…..1600 grit I believe it is…..I gently sanded the
paint away under running water.
Then I polished the inside of the canopy with some toothpaste on my finger,
frequently rinsing and re-applying.
Once it started looking halfway decent again I rinsed it off well, dried it, and
re-dipped it in Future. Once dry I
was amazed to find it restored to clarity.
I was a happy camper. I hand
painted the frames with clear flat to match the rest of the aircraft and
attached it.
| FINAL BITS |
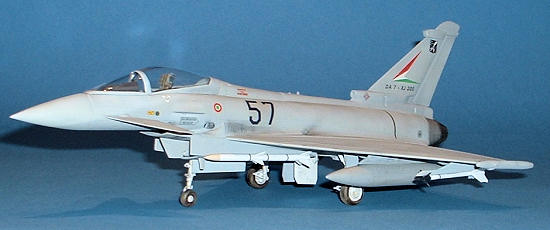
I attached the landing gear and wheels, pylons and fuel tanks.
The kit comes with a nice load-out of AMRAAM and Sidewinder missiles, so
I painted these up and on they went.
Burner cans were painted and applied and she was done.
| CONCLUSIONS |
My canopy flub notwithstanding, I had fun with this kit. It builds up easily and looks like a Eurofighter when done. The panel lines seem a bit heavy handed, but really doesn’t detract from the finished product. As far as accuracy goes, well, I dunno. Definitely not an expert there. It models the prototypes, so I’m sure there are numerous “off” areas. But it can be had on the cheap, is a simple, fun build, and looks like a Eurofighter when done. Good enough for me.
May 2010
If you would like your product reviewed fairly and quickly, please contact me or see other details in the Note to Contributors.