Hasegawa 1/200 Kawasaki C-1 'SKE Version'
| KIT #: | 11023 |
| PRICE: | $HK49 (about 4.60 euros, US$6.30) |
| DECALS: | several options |
| REVIEWER: | Richard F |
| NOTES: |
| HISTORY |
Here's an exciting backstory to my little Kawasaki C-1 cargo plane:
"On June 21, 1995, All Nippon Airways Flight 857 was hijacked at the
Hakodate Airport by a lone hijacker. This incident marking the first time that
the Japanese Air Self-Defense Forces cooperated with the Special Armed Police by
providing Kawasaki C-1 aircraft as means of transportation from Haneda Airport.
The plane was stormed by SAP officers and the hijacker was arrested
 and subdued,
with assistance from the Hokkaido Police's Riot Squad." (quote from
http://shadowspear.com/specassteam.htm, found by
googling "Kawasaki C-1"!)
and subdued,
with assistance from the Hokkaido Police's Riot Squad." (quote from
http://shadowspear.com/specassteam.htm, found by
googling "Kawasaki C-1"!)
I'm flying from Haneda to Hokkaido next week, so I hope the SAP said "let that be a lesson to the rest of you" when they arrested the hijacker!
The C-1 replaced the ancient Curtiss C-46 in Japanese service in 1974. About the size of a 737, it has decent performance other than a poor range (designed to keep within Japan's strict policy of not having an offensive military capability). Thirty one were built and the C-1 still flies with the Japanese military.
You can read more about it on the internet or in the preview here on Modeling Madness: http://www.modelingmadness.com/reviews/mod/previews/11023.htm.
In the preview, I speculated that most, if not all, were still flying. Well, it turns out that two were destroyed in a gruesome crash in 1983 when a three-ship formation at 700 feet flew into a mountain. Two of the three planes crashed and the third hit some trees but managed to fly on and land safely. Eight aircrew were killed. Another one was modified for ECM training with large radomes, and called, with great originality, the EC-1.
| THE KIT |
 This is a
nice Hasegawa kit with fine engraved panel lines and a clean moulding. There are
no construction options - the fuselage is quite small and unlike the Hasegawa
C-130, you don't have the option to build the rear cargo bay door in the open
position. Naturally there is no cockpit detail because the kit is so
small. There are some openings on the fuselage for windows, and these have no
clear parts. The two engines have turbine fans to put inside the engines, and
the undercarriage is reasonably detailed for such small model.
This is a
nice Hasegawa kit with fine engraved panel lines and a clean moulding. There are
no construction options - the fuselage is quite small and unlike the Hasegawa
C-130, you don't have the option to build the rear cargo bay door in the open
position. Naturally there is no cockpit detail because the kit is so
small. There are some openings on the fuselage for windows, and these have no
clear parts. The two engines have turbine fans to put inside the engines, and
the undercarriage is reasonably detailed for such small model.
Beyond that, there's not much to say. It's a small model. There aren't many parts!
| CONSTRUCTION |
 Before you
read on, please bear in mind that I am not as talented a modeler as many of MM's
readers and contributors. I have basic skills and I base my progress on turnover
ahead of quality! I admire the incredible models of others and hope that my own
more humble efforts can be seen as my way of getting fun out of the hobby.
I'm cool with that and I think readers will still get a good sense of how this
kit builds up.
Before you
read on, please bear in mind that I am not as talented a modeler as many of MM's
readers and contributors. I have basic skills and I base my progress on turnover
ahead of quality! I admire the incredible models of others and hope that my own
more humble efforts can be seen as my way of getting fun out of the hobby.
I'm cool with that and I think readers will still get a good sense of how this
kit builds up.
For once I didn't start in the cockpit! I did the wheels and undercarriage legs first. Cargo planes are cool - I really like them - but they have too many wheels. This one has two at the nose which really are pretty tiny, and 8 at the back to give the C-1 a good footing on rough strips. It took a while to sand them (just lightly to remove the mould line) and paint them up. The instructions say the wheels are silver, so I did them in a flat aluminium colour.
You have to get the
cockpit at some point, of course, and so I painted it black and added as much
weight as I could. I always test planes before I glue the fuselage to ensure I
get enough weight up front. I dry fit the fuselage and wings, and then rest it
on a pencil under where the main gear goes. If it falls forward, there's enough
weight. This one took a while to fall forward (maybe because the tail, though
light, is quite
 high).
Eventually there was enough to prevent it tail sitting, but by now I was glad of
those 8 main wheels because it seemed to need a whole lot of weight in the nose.
high).
Eventually there was enough to prevent it tail sitting, but by now I was glad of
those 8 main wheels because it seemed to need a whole lot of weight in the nose.
Out came the glue and as predicted when I previewed the kit, it was a nice fit with no gaps, except for the engine pylons.
Construction was very fast from there on. Stick on the tailplane, build the engines and add on the SKE radar on the top fuselage just forward of the wing. It's two parts: a rectangle with a dome on top. Once all that was done, I added the engines under the wings. This was probably a mistake - they get in the way of painting the fuselage beneath the wings, and the inner wings themselves. If I was doing it again, I'd add them after painting.
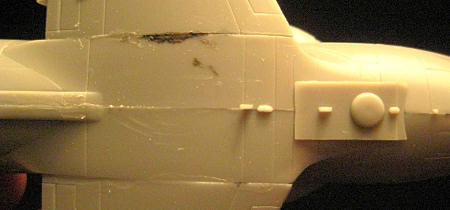
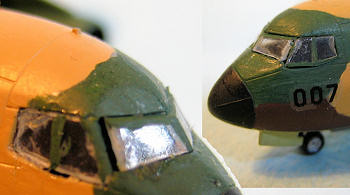 Putting
the canopy in was a real disaster. Having got the whole plane finished, painted
and decaled, I went to install the clear windscreen. Imagine my horror to find I
couldn't get it to fit in at all! After fooling around for ages, I cut it into
three parts and inserted each piece into the fuselage. It worked well until the
last piece, and the result is pretty embarrassing to be honest. It's only
because I am a random dude on the internet that I am even going to post the
pictures! But you might as well see the trouble I had.
Putting
the canopy in was a real disaster. Having got the whole plane finished, painted
and decaled, I went to install the clear windscreen. Imagine my horror to find I
couldn't get it to fit in at all! After fooling around for ages, I cut it into
three parts and inserted each piece into the fuselage. It worked well until the
last piece, and the result is pretty embarrassing to be honest. It's only
because I am a random dude on the internet that I am even going to post the
pictures! But you might as well see the trouble I had.
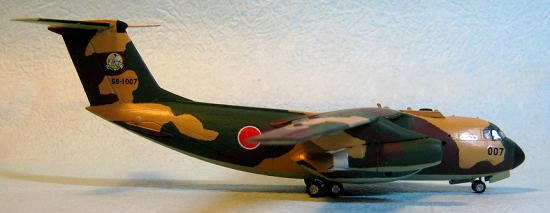
| COLORS & MARKINGS |
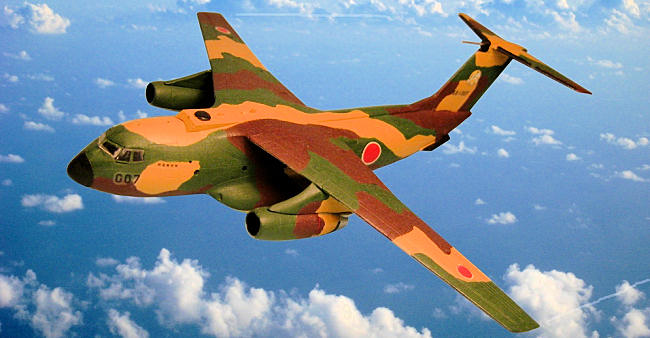
Most pictures I found on the internet showed the same tactical scheme as I used on this model. There have been some commemorative or special schemes and I think you can buy decals for those to use on this kit. But as this was a quick build, I went with the box top and the instructions.
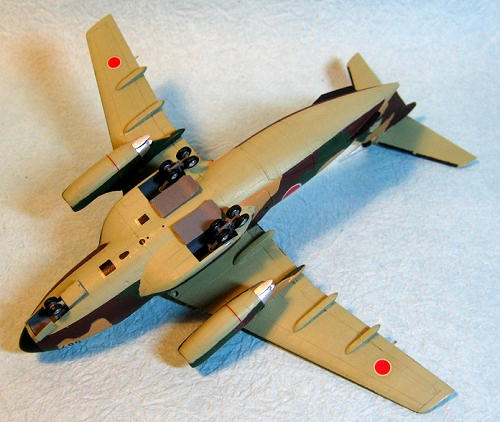 For the light
tan, I brush painted Mr Color 19 "Sandy Brown" enamel.
The dark brown was Tamiya XF10 Flat Brown acrylic. The green was Tamiya XF26
Deep Green acrylic. This green is a bit too dark when you compare with photos,
but it looks right from the box art. And yes, that's what I looked at before I
painted! For some reason I never thought to google some pictures until I wrote
this.
For the light
tan, I brush painted Mr Color 19 "Sandy Brown" enamel.
The dark brown was Tamiya XF10 Flat Brown acrylic. The green was Tamiya XF26
Deep Green acrylic. This green is a bit too dark when you compare with photos,
but it looks right from the box art. And yes, that's what I looked at before I
painted! For some reason I never thought to google some pictures until I wrote
this.
The underside was Tamiya XF14 JA Grey acrylic, which was pretty close to pictures. So, maybe not precisely the right colours, and using enamel and acrylic in the same scheme is a bit tricky because the enamel won't go down over an area already painted in acrylic (not easily, anyway, at least in my experience). I just used the paints I had, and the result is acceptable to me for a build like this one.
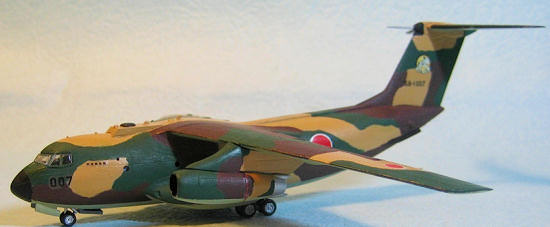
| CONCLUSIONS |
A fun kit, easy to build except for the windscreen which didn't fit very well. Suitable for anyone other than - perhaps - little kids because the parts are pretty small. And it's a nice rendition of a quirky plane that you don't often see, even in Japan.
| REFERENCES |
If you would like your product reviewed fairly and quickly, pleasecontact the editor or see other details in the Note to Contributors.