Anigrand 1/72 Yak-36 'Freehand'
| KIT #: | AA-2036 |
| PRICE: | $38.00 MSRP |
| DECALS: | One option |
| REVIEWER: | Carmel J. Attard |
| NOTES: | Short run resin kit with vacuformed canopy |
| HISTORY |
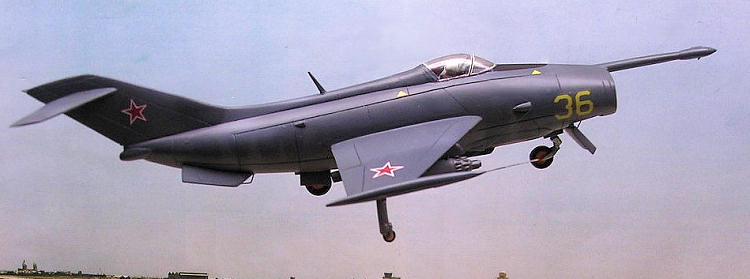
When in 1960
Alexander Yakovlev watched the British prototype, the Short SC1 at Farnborough
he was so impressed by the VTOL concept that he started his own VTOL study. A
year later in 1961 with success of the Hawker Kestrel conventional flight,
Yakovlev quickly decided to build a test bed in the class of the Kestrel. This
had vectored nozzles which could rotate through 90 degrees. A small jet was also
installed under the nose probe and tail cone for pitch control. A retractable
door was fitted under the nose and the fuselage centre to reduce hot gas
re-ingestion. There were three flight aircraft built with serial numbers 36, 37
and 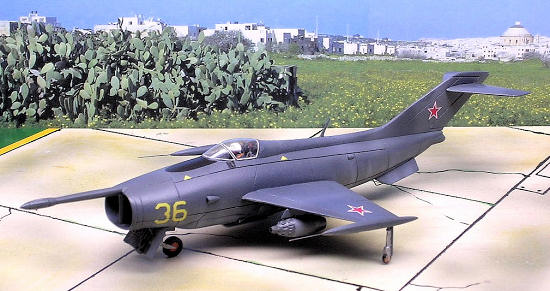 38. The first hover flight was conducted in 1964 and the first VTOL flight
completed in 1966. The Yak-36 as it came to be known was first publicly
displayed with rocket pods installed at the Domodedovo Air Show in July 1967
when two examples were seen flying. NATO was shocked by its appearance and gave
it designation ‘Freehand’. However the flight performance was proved to be
unstable however it provided various vital flight data to the eventual
forthcoming Yak-38 Forger.
38. The first hover flight was conducted in 1964 and the first VTOL flight
completed in 1966. The Yak-36 as it came to be known was first publicly
displayed with rocket pods installed at the Domodedovo Air Show in July 1967
when two examples were seen flying. NATO was shocked by its appearance and gave
it designation ‘Freehand’. However the flight performance was proved to be
unstable however it provided various vital flight data to the eventual
forthcoming Yak-38 Forger.
| THE KIT |
Anigrand
excellent series of resin models in 1/72 scale
includes theYAk-36 Freehand. This is a cast resin kit of the first Soviet VTOL
aircraft. There are 30 cream coloured parts containing a remarkable amount of
surface detail with engraved panel lines and these consist of port and starboard
fuselage parts, a long nose probe which has an integral vertical plate like
bracket that
 precisely fits inside the air intake to produce two ducts for the
two separate horizontal engines. Inside the intake fits two side by side
compressor fronts which are neatly moulded showing blade detail. There are port
and Stb wing parts, pilot seat, control stick, outrigger landing gear, a
separate fin , tail planes and two ventral streaks. Other parts cater for two
exhaust nozzles and these have louver detail, nose and under fuselage landing
gear and wheels, jet exhaust nozzles, nose gear doors and separate flaps for the
vertical engine intake. The kit instructions come in an A4 single sheet which is
printed on both sides. One side contains 1/72 scale drawing that depicts the
colour detail of the complete aircraft. The well printed decal sheet although
brief contains well registered red stars with white outline, a yellow numerical
36 and four inverted yellow triangles to go to each side. A clear accurate vac
canopy completes the kit. The other side of the instructions shows an exploded
view of the kit parts which is easy to follow during assembly and a brief
history of the aircraft. There is a good photograph which I found very useful to
refer to when it came to detail the front lowered panel. A colour picture of the
Yak-36 on the box cover also helped to colour detail the model.
precisely fits inside the air intake to produce two ducts for the
two separate horizontal engines. Inside the intake fits two side by side
compressor fronts which are neatly moulded showing blade detail. There are port
and Stb wing parts, pilot seat, control stick, outrigger landing gear, a
separate fin , tail planes and two ventral streaks. Other parts cater for two
exhaust nozzles and these have louver detail, nose and under fuselage landing
gear and wheels, jet exhaust nozzles, nose gear doors and separate flaps for the
vertical engine intake. The kit instructions come in an A4 single sheet which is
printed on both sides. One side contains 1/72 scale drawing that depicts the
colour detail of the complete aircraft. The well printed decal sheet although
brief contains well registered red stars with white outline, a yellow numerical
36 and four inverted yellow triangles to go to each side. A clear accurate vac
canopy completes the kit. The other side of the instructions shows an exploded
view of the kit parts which is easy to follow during assembly and a brief
history of the aircraft. There is a good photograph which I found very useful to
refer to when it came to detail the front lowered panel. A colour picture of the
Yak-36 on the box cover also helped to colour detail the model.
| CONSTRUCTION |
The parts are first cleaned; the runner carefully
separated using an exacto saw blade and a few air bubbles attended to with a
small amount of filler. Since the kit lacked detail to wheel wells, cockpit and
the anti-reingestion flap. Useful information for this detail was obtained from
the web, particularly www.airliners.net
which provided very good reference photos. The nose flap interior detail could
be obtained from the photo that appears on the instructions. This I added using
carefully cut and shaped
 plastic card adding drilled holes and engraved slots
using a pointed blade. This formed the inner face of the flap. Two hinges are
also added made out of measured lengths of steel wire. The two nose wheel doors
and flap are a one peace item that can be used as is if the undercarriage is
retracted but in my case the u/c was lowered and therefore separated into three
pars with the front door hinged at its centre line across. The rear fuselage
wheel well doors were also separated.
plastic card adding drilled holes and engraved slots
using a pointed blade. This formed the inner face of the flap. Two hinges are
also added made out of measured lengths of steel wire. The two nose wheel doors
and flap are a one peace item that can be used as is if the undercarriage is
retracted but in my case the u/c was lowered and therefore separated into three
pars with the front door hinged at its centre line across. The rear fuselage
wheel well doors were also separated.
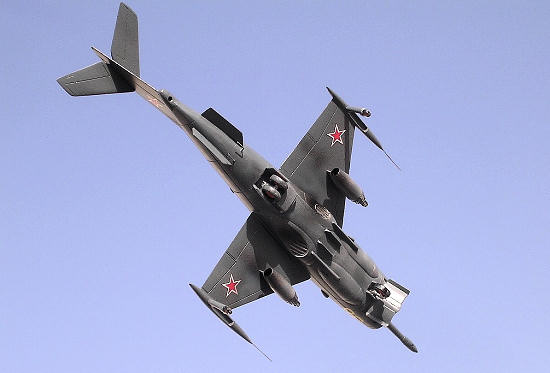
Interior detail added using parts from spares box. An instrument panel and instrument dials added to cockpit while the seat was carefully painted and fixed in place. The crew figure was added from spares; The wheel hubs painted yellow orangish as per instructions and that the Rocket pods came from the KP Sukhoi Su-25 box, and pylons shaped from plastic card. Since the fuselage had no locating holes I added to inner face small tabs from cut pieces of plastic card. This helped to facilitate locating parts together and self alignment, a definite must with resin kits where super glue will not give a second chance to reposition any misalignment. The place for fixing the tail plane was marked engraved. Position of strakes and wings were also marked. The main wings are fixed at an anhedral angle. Using a piece of hardboard I cut a template to conform to the front elevation of the aircraft drawing. This was used to produce the exact lowered angle of the wings to fuselage. A small amount of filler was added to the wing to fuselage joints. Any panel lines spoilt by the filler were carefully rescribed after sanding the seams smooth. Finally the undercarriage gear fixed in place and the wheels were left to fit as a final resort.
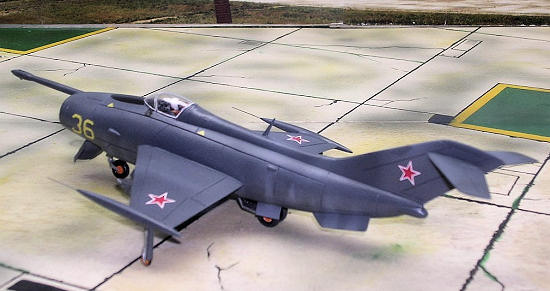
| COLORS & MARKINGS |
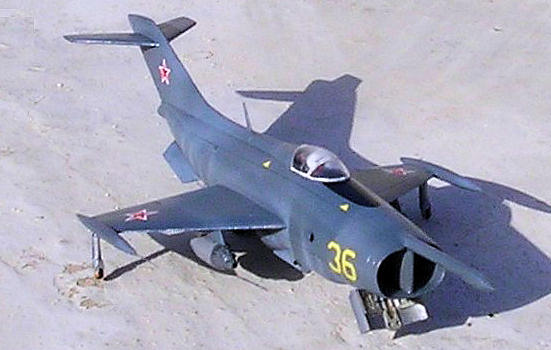 While the interior of wheel wells and wheel doors was
silver all the rest was blue grey adding
lighter shade of same colour to simulate a small
degree of weathering. Two strips of decals
are provided. One with Russian stars and the other with the aircraft number and
some ejection seat warning triangles. Had I chosen to do 37 or 38 of which I had
seen reference pictures then the lower surfaces would have been pale green close
to interior green. This is the standard camouflage colors to lower surfaces on
VTOL aircraft.
While the interior of wheel wells and wheel doors was
silver all the rest was blue grey adding
lighter shade of same colour to simulate a small
degree of weathering. Two strips of decals
are provided. One with Russian stars and the other with the aircraft number and
some ejection seat warning triangles. Had I chosen to do 37 or 38 of which I had
seen reference pictures then the lower surfaces would have been pale green close
to interior green. This is the standard camouflage colors to lower surfaces on
VTOL aircraft.
| CONCLUSIONS |
If you would like your product reviewed fairly and quickly, please contact me or see other details in the Note to Contributors.