Italeri 1/72 RAH-66 Comanche
| KIT #: | 550058 |
| PRICE: | $12.00 SRP |
| DECALS: | Two options |
| REVIEWER: | Dan Lee |
| NOTES: | 2 Sets of Attack Squadron Hellfires, Eduard Apache AH-64 PE and Master M197 20mm cannon used. |
| HISTORY |
The RAH-66 Comanche was supposed to be the stealth scout helicopter of the 21st century to replace the OH-6 and OH-58 scout helicopters then (and still) in use. It came from the Light Helicopter EXperimental competition (LHX) that Boeing and Sikorsky won in 1991.
 The
program’s timing was not great as it began during the end of the Cold War where
its primary mission (attacking Soviet armor) didn’t really exist anymore. It was
slowly strangled by increasing mission creep, wildly changing operational
parameters, high expectations due to over-optimistic projections and the ever
popular skyrocketing cost. The Government Accountability Office warned in 2000
that the Comanche could consume 2/3 of the Army’s aviation budget by 2008.
The
program’s timing was not great as it began during the end of the Cold War where
its primary mission (attacking Soviet armor) didn’t really exist anymore. It was
slowly strangled by increasing mission creep, wildly changing operational
parameters, high expectations due to over-optimistic projections and the ever
popular skyrocketing cost. The Government Accountability Office warned in 2000
that the Comanche could consume 2/3 of the Army’s aviation budget by 2008.
Reality struck in 2004 when the Army finally cancelled the program after two prototypes were built and flown. It was pretty fast for a helicopter with a top speed around 320 km/hr but that was without the addition of weapons and sensors. A fun series of video games were based on this seemingly indestructible (to weapons not accountants) helicopter.
| THE KIT |
 It comes in
the typical flimsy Italeri box that opens at both ends. The kit consists of two
not bagged olive drab sprues of 75 different parts and one clear sprue in a
separate bag for the canopy. The parts are relatively free of flash and
imperfections such as sink and ejection pin marks. However, the panel lines are
really over done and too deep for 1/72 or 1/48 scale and the interior/weapons
detail is rather soft (but not horrible considering the price.) The canopy is
fairly clear and the decals sheet for the two prototypes looks okay for the
scale.
It comes in
the typical flimsy Italeri box that opens at both ends. The kit consists of two
not bagged olive drab sprues of 75 different parts and one clear sprue in a
separate bag for the canopy. The parts are relatively free of flash and
imperfections such as sink and ejection pin marks. However, the panel lines are
really over done and too deep for 1/72 or 1/48 scale and the interior/weapons
detail is rather soft (but not horrible considering the price.) The canopy is
fairly clear and the decals sheet for the two prototypes looks okay for the
scale.
The instruction booklet is multilingual with easy to follow detailed diagrams.
| CONSTRUCTION |
The details on this kit are too soft for me even in 1/72 scale. In order for me to complicate this build and make it stretch out the build for a year, I needed an Eduard PE set for the AH-64 Apache, two sets of Attack Squadron's 1/72 Hellfire missiles and a Master brass 1/72 tri-barrelled 20mm M197 Gatling cannon designed originally for the AH-1 Cobra.
I started with the 20mm
cannon. I didn't like the Italeri representation of the the XM301 Cannon which
is why I bought the Master brass tri-barreled 20mm cannon. I used CA glue to
attach the PE spacers and a piece of plastic rod between the three barrel
nozzles to form them into a triangular shape. I then cut p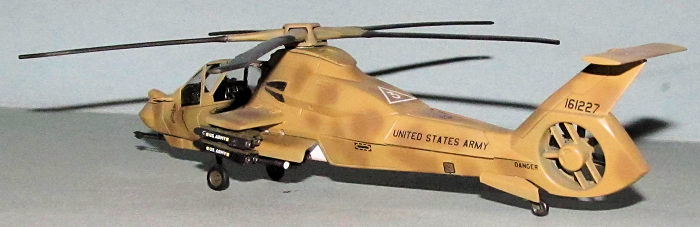 ieces
of 5 thou thick plastic card around the barrels to form the solid triangle
shape. I then filled the gaps with Vallejo plastic primer and when dry, sanded
it. It was painted flat black and put aside.
ieces
of 5 thou thick plastic card around the barrels to form the solid triangle
shape. I then filled the gaps with Vallejo plastic primer and when dry, sanded
it. It was painted flat black and put aside.
Next up was the cockpit. I used some of the Eduard Apache parts like the crew restraints, rudder pedals and MFD bezels for the interior. I didn't use the PE main instrument panel as it had conventional dials and displays unlike the Comanche's F/A-18 Hornet like MFDs. It was sprayed flat black with olive drab seats and tan colored seat belts which were hand painted.
I glued the interior into the fuselage and then glued the various fuselage parts together as per the instructions except the 20mm turret and the sensor turret because if one does then it makes filling/sanding the various parts rather difficult. Next I drilled out the various mounting holes, attached the rotor subassemblies and winglets together then I threw the Comanche into the box for a while to let the glue cure before dealing with the seams.
When I took on the fuselage
seams, the first thing I did was fill in the excessively large old school
Matchbox style panel lines with Vallejo plastic putty. The extra was removed
with damp Q-tips and left to cure. I needed to fill in the seams again to make
them acceptable to me. I then tackl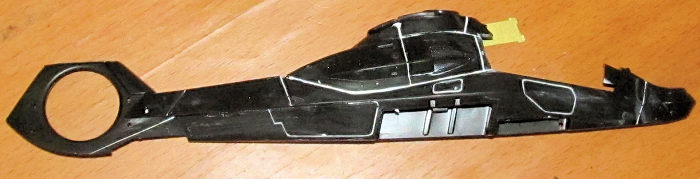 ed
the seams between the fuselage halves, the gaps in the tail rotor and the
various fins/winglets. It involved several filling/sanding sessions to get the
various gaps filled just right. I attached the winglets to the fuselage and
filled in the gaps between the winglets and fuselage with more Vallejo plastic
putty (again, the excess removed with damp Q-Tips.) The only area I didn't sand
was the nose mounted sensors as the seam ran right down the middle. I covered
those up with 10 thou plastic card and sanded the edges. There is a big visible
seam in the tail wheel wheel well. I didn't want to fill/sand that seam so I
took trimmed a 10 thou piece of plastic card (with pre drilled holes for the
tail wheel) to fit and glued it in.
ed
the seams between the fuselage halves, the gaps in the tail rotor and the
various fins/winglets. It involved several filling/sanding sessions to get the
various gaps filled just right. I attached the winglets to the fuselage and
filled in the gaps between the winglets and fuselage with more Vallejo plastic
putty (again, the excess removed with damp Q-Tips.) The only area I didn't sand
was the nose mounted sensors as the seam ran right down the middle. I covered
those up with 10 thou plastic card and sanded the edges. There is a big visible
seam in the tail wheel wheel well. I didn't want to fill/sand that seam so I
took trimmed a 10 thou piece of plastic card (with pre drilled holes for the
tail wheel) to fit and glued it in.
The rotor was a headache because the seams were located between the rotors. I had to be extremely careful filling the seams with CA glue then sanding them down. I then had to attach the rotor hub which was also two pieces. Again I had to fill/sand in awkward places.
I glued the various winglets and tailplane but not the landing gear, weapons racks, doors, canopy and other tiny bits. At this point, the fuselage minus most of the dangly bits was ready for painting.
| COLORS & MARKINGS |
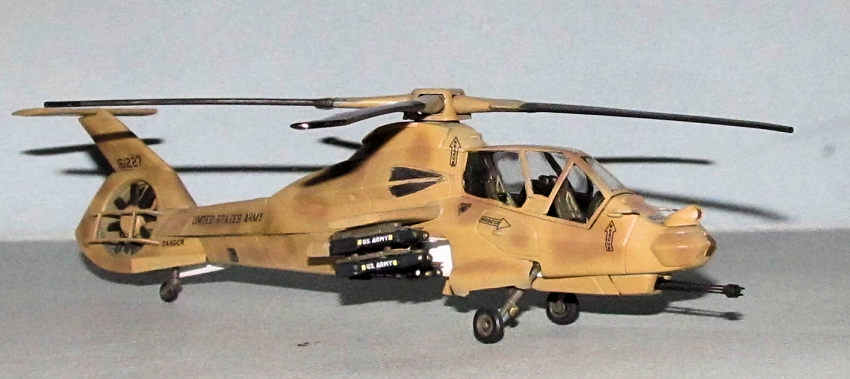
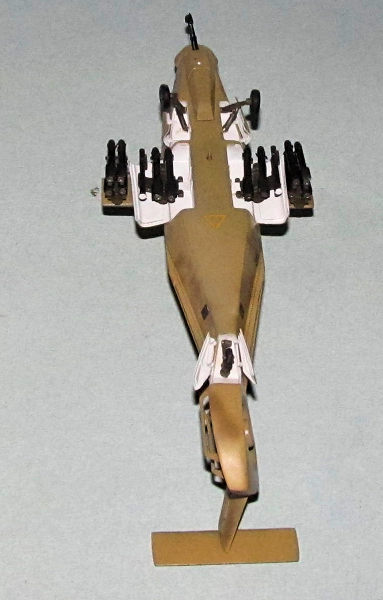 I didn't
want to paint the Comanche as a prototype, but as an operational bird if the
budget and reality axe didn't kill it. Instead of the standard US Army dark helo
drab I opted for a fictional desert camouflage similar to the Israeli snake
pattern: a base of Sand with Earth Brown spots. I sprayed on Tamiya XF-59 Desert
Yellow followed by spots of Gunze Aqueous Earth Brown on the main fuselage and
the various bits except the sensor turret which I hadn't assembled at the time.
I did not preshade or post shade the paint. The canopy was masked and painted as
well.
I didn't
want to paint the Comanche as a prototype, but as an operational bird if the
budget and reality axe didn't kill it. Instead of the standard US Army dark helo
drab I opted for a fictional desert camouflage similar to the Israeli snake
pattern: a base of Sand with Earth Brown spots. I sprayed on Tamiya XF-59 Desert
Yellow followed by spots of Gunze Aqueous Earth Brown on the main fuselage and
the various bits except the sensor turret which I hadn't assembled at the time.
I did not preshade or post shade the paint. The canopy was masked and painted as
well.
Once the paint was dry I masked off the wheel wells and sprayed them flat white. The landing gear, wheels, tail wheel were painted olive drab while the rubber wheels were hand painted german grey.
The intakes were hand painted flat black while the sensors were hand painted silver and then overcoated with clear yellow.
I used the kit decals because there aren't any aftermarket decals that I know of. I added some old decals from various kits to make fictional unit ID markings.
I didn't weather the helicopter because I suspect that Stealth requires clean surfaces for it to work properly. The chopper was sprayed with a flat coat.
| FINAL CONSTRUCTION |
Remember that 20mm tribarreled Gatling gun? I glued the cannon turret plastic
together minus the gun and removed most of the plastic mounting peg for the
turret. It was filled, sanded and then painted. I then drilled out a hole to
mount the prepainted cannon subassembly and secured it in the turret with a drop
of CA glue. I then glued the turret to the fuselage.
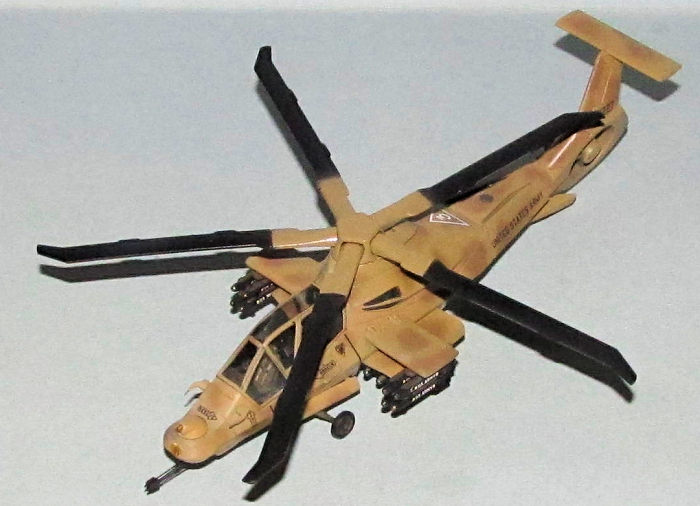
Next up I worked on the Stinger launch tubes. I added some cut plastic card bits to spruce up the detail as per photos of the real thing. I sprayed the body of the launch tubes flat black then hand painted the plastic card bits olive green and the ends of the tubes flat white.
I sawed off the Attack Resin Hellfire launch rails. I needed two fully assembled rails and two top half rails to mount all 12 Hellfires. The Attack resin parts came off fairly easy with a small saw blade but I did break off part of two lower launch rails and had to use the spares. These parts were sanded a bit and painted Xtracrylix Olive Drab.
 Assembling
the Hellfires was tedious and hard on the eyes. I only needed 12 of them to
fully load out the Comanche. I carefully removed each missile from the casting
block and then removed some flash on the nose with an Exactoblade knife and some
600 grit sandpaper. However I ended up damaging the very thin rear fins on two
of the missiles so I actually used 14 missiles. After I cleaned up the resin
missile bodies, I had to add 1/72 PE engine nozzles and forward fins and this
task took the longest to do. I started this in Dec of 2016 and stopped within an
hour after having so many problems adding very small fins to the missile body. I
didn't finish the task till July of 2017 as I gathered up enough willpower to
complete all 12 missiles. The fin alignment isn't perfect, but it is done. The
missiles do look the part and are better looking than Italeri's fat sausage
shaped Hellfire missiles.
Assembling
the Hellfires was tedious and hard on the eyes. I only needed 12 of them to
fully load out the Comanche. I carefully removed each missile from the casting
block and then removed some flash on the nose with an Exactoblade knife and some
600 grit sandpaper. However I ended up damaging the very thin rear fins on two
of the missiles so I actually used 14 missiles. After I cleaned up the resin
missile bodies, I had to add 1/72 PE engine nozzles and forward fins and this
task took the longest to do. I started this in Dec of 2016 and stopped within an
hour after having so many problems adding very small fins to the missile body. I
didn't finish the task till July of 2017 as I gathered up enough willpower to
complete all 12 missiles. The fin alignment isn't perfect, but it is done. The
missiles do look the part and are better looking than Italeri's fat sausage
shaped Hellfire missiles.
I painted them flat black then put a gloss coat on them for the decals. Hand painted the nose and rocket exhaust metallic grey. When dry, I painted each of the Hellfire noses with Tamiya clear yellow. I sprayed a flat coat on and when it was dry, glued each of the Hellfires in place with a thin smear of CA glue. I found out that one of the rear resin fins interfered with the proper installation of the Hellfire missiles on the top rails so I had to cut off part of the fin. Fortunately it is barely noticeable. The missile launch rails were glued onto the winglets and the retractable missile bay racks with CA glue.
The remaining tiny bits were painted and then added including some PE to provide some surface detail. Lastly, I peeled off the masking and glued on the canopy with white glue.
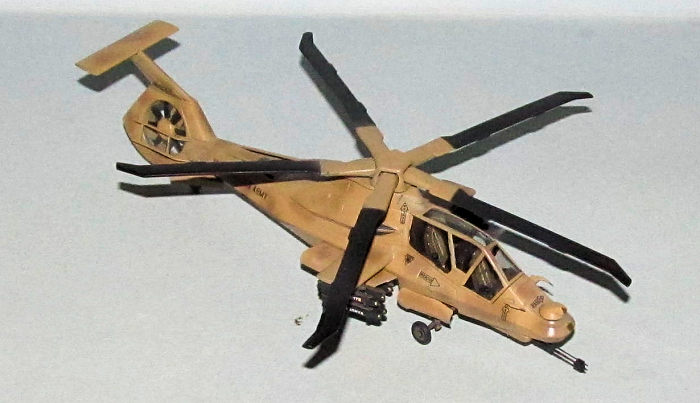
| CONCLUSIONS |
The Italeri Comanche was not a simple build because of all aftermarket I added which I think makes the model stand out. I knew it wasn't going to be easy, but I didn't think the build would take a year. If you like prototype or stealth gunship choppers then this kit is the only game in town in both 1/72 and 1/48 scale. Overall not a bad kit, but not a great kit either as it is more for the experienced modeller than a beginner. I found that the kit's details were too soft for my liking. and did not like the overdone panel lines.
However, I liked the overall result and enjoyed building this kit despite the issues (self inflicted or otherwise.)
25 July 2017
Copyright ModelingMadness.com. If you would like your product reviewed fairly and fairly quickly, please
contact
the editor or see other details in the
Note to
Contributors. Back to the Main Page
Back to the Review
Index Page
Back to the Previews Index Page