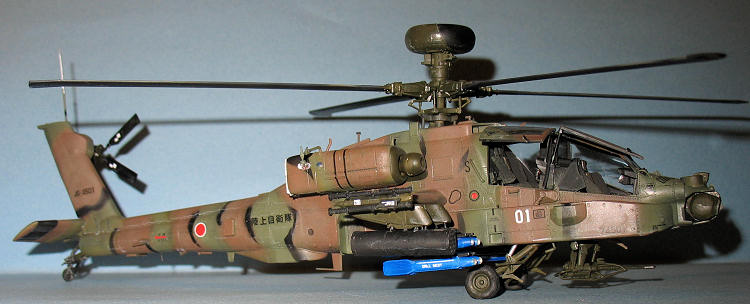
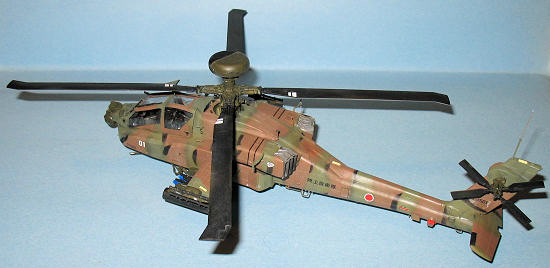
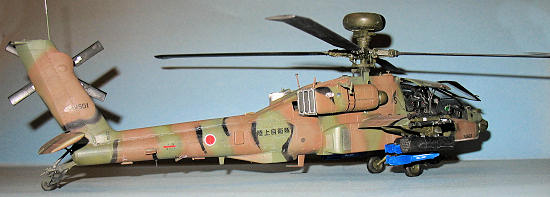
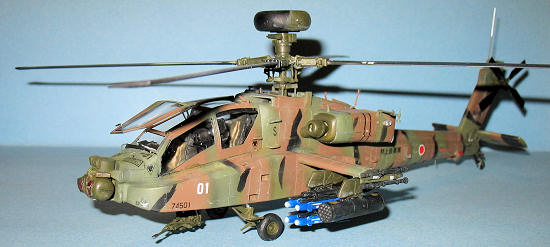
Hasegawa 1/48 AH-64D Apache Longbow "JGSDF"
| KIT #: | 07242 (Pt 42) |
| PRICE: | $54.00 SRP |
| DECALS: | Eight options |
| REVIEWER: | Dan Lee |
| NOTES: |
| HISTORY |
The
Hughes/McDonnell-Douglas/Boeing AH-64 was chosen as the US Army's advanced
attack helicopter to replace its venerable Vietnam-era AH-1 Huey Cobras. It was
felt that a large, sophisticated, twin-engined chopper was more to what the Army
needed than the smaller, lighter, and less sophisticated Cobras. Interestingly,
the USMC has continued to use updated Cobras as its helo gunship of choice,
preferring the smaller helo as being more able to survive in combat.
 Much of the Corps
faith in the Cobra was shown during Desert Storm when the AH-1s were able to
deal with the sandy conditions better than the Army's more complex helo. Despite
the problems that the Apache has had over the years, it has proven itself to be
a very capable platform, doing all that the Army could want from it. Such has
been the success of the Apache that it has been exported to a number of foreign
military forces.
Much of the Corps
faith in the Cobra was shown during Desert Storm when the AH-1s were able to
deal with the sandy conditions better than the Army's more complex helo. Despite
the problems that the Apache has had over the years, it has proven itself to be
a very capable platform, doing all that the Army could want from it. Such has
been the success of the Apache that it has been exported to a number of foreign
military forces.
The latest and greatest Apache is the radar-equipped AH-64D that is the current production model. This has even more advanced sensors including a mast-mounted radar set that can peer over the tops of obstacles without putting the rest of the chopper in harm's way. The benefit of this fire control radar is that it can track and target objectives, then when ready, the helo pops up, fires off its weapons and then ducks back down behind cover. Like its earlier AH-64A variant, the Longbow carries a variety of weapons from Hellfire missiles to conventional rocket pods to Sidewinder self-defense missile.
| THE KIT |
| CONSTRUCTION |
I’ve built the Hase
Apache 64A version (the Longbow D model isn’t really much more different than in
assembly than the A model) so I’m familiar with the construction and the
mistakes I made with the first one.
First thing one should do is lightly sand down the edges of the interior pieces
to get a better fit for the cockpit and rotor mount.
 The cockpit parts
were assembled and painted flat black.
Hasegawa provides instrument panel decals, but I have had mixed
experiences with them. On a
relatively flat surface these work fine.
On surfaces with lots of raised details, they don’t work so well.
I opted to hand paint/dry brush the details on the areas of raised
details and used decals where the details are relatively flat.
The cockpit parts
were assembled and painted flat black.
Hasegawa provides instrument panel decals, but I have had mixed
experiences with them. On a
relatively flat surface these work fine.
On surfaces with lots of raised details, they don’t work so well.
I opted to hand paint/dry brush the details on the areas of raised
details and used decals where the details are relatively flat.
The underside piece
of the forward fuselage doesn’t have the best support so I cut a thin strip of
40 thou plastic card tab glued at the forward mating edge to add more strength.
Another thin strip of 40 thou plastic card was glued to one side of the
narrowest section of the underside piece to eliminate a gap which I had a hard
time getting rid during my last Apache build.
One thing that
anyone who builds this kit should understand is that it has a lot of raised
rivet detail that you need to be careful about.
I put low tack tape on either side of the seam as I used super glue and
Mr Surfacer to fill the gaps/sanded down the seams.
I still lost some of the raised rivets in the process, but not as many as
I lost the last time. Instead of
replacing them with raised rivets, I did the opposite and engraved the rivets.
Under a coat of paint and if one doesn’t look at them with a magnifying
glass then they look okay.
Another area that
caused some grief was the nose.
There is some raised detail that had to be sanded down to remove some fairly
obvious gaps. I cut a small piece
of the sprue to replicate the rounded shape and glued it on after all the
sanding was done.
 The main rotor and
tail rotor assemblies were built with little trouble.
Be careful about the tail rotor as the assembly is rather delicate.
Note that the tail rotor is not aligned at 90 degree angles, but actually
orthogonal. I made the mistake in
my last build because I “assumed” it was “wrong” and a couple of folks pointed
my mistake out.
The main rotor and
tail rotor assemblies were built with little trouble.
Be careful about the tail rotor as the assembly is rather delicate.
Note that the tail rotor is not aligned at 90 degree angles, but actually
orthogonal. I made the mistake in
my last build because I “assumed” it was “wrong” and a couple of folks pointed
my mistake out.
As I was test
fitting the main rotor, I realized that I didn’t keep the alignment of the rotor
mount when I glued the fuselage halves together.
Sigh. All that
sanding/filling was wasted as I cracked open most of the fuselage seams to
realign the rotor mount. “Stuff”
happens and I could have left my mistake there, but
it really needed to be fixed.
I basically tore the kit apart from nose to half of the tail.
I was getting rather frustrated with myself at the time, but this goes to
show that despite how much experience you have and preparation you do that one
can still get into trouble building a kit.
Once the seams were
redone (sigh), I added the sponsons and winglets as per instructions.
Doing the assembly order differently than the instructions at this point
will cause problems. The winglet
ends were pre-drilled for the Stinger missile racks that would go on later.
The small sub
assemblies were done at this time.
First, the radar lollypop was assembled without much of an issue and the seams
were sanded/filled and lost detail was redone.
Next, the delicate 25mm chain gun was assembled.
One problem I found with this is that it doesn’t fit all that well into
the polycap that allows it rotate.
The last time, I had to shave both the chain gun mount and drill into the
polycap in order to put the chain gun onto the model.
This time, I thinned down the width of the mount by light sanding and
drilled the hole with a 1/16” bit before even attempting to test fit the gun
onto the helo. This worked.
Also at this time various antenna and bits were added.
Finally, I worked on the landing gear. I deviated from the assembly instructions as I added the sponsons to the model first instead adding the landing gear which is a different color (Olive Drab) than the rest of the underside. I did make sure that I could add the landing gear without too much trouble by gluing the pieces together and test fitting them into the landing gear bays. The wheels required some sanding, filling and rescribing of lost tire treads.
| COLORS & MARKINGS |
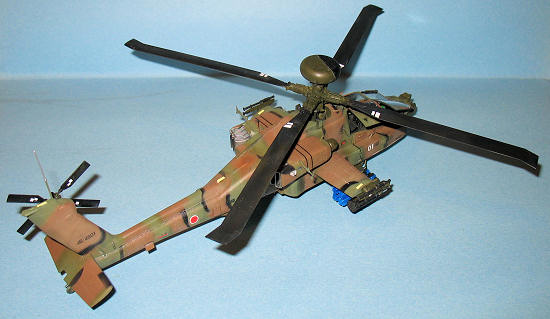
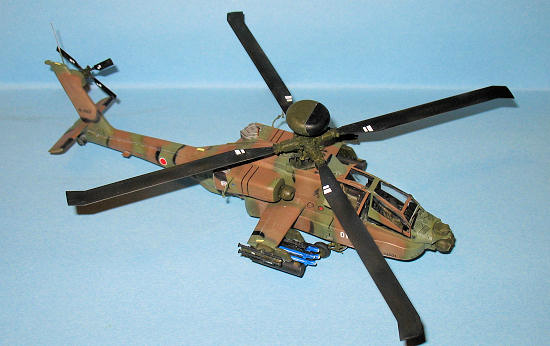 The JGSDF color
scheme is very complicated as it is similar to tiger stripe, but I enjoy the
challenge despite the fact I’m not a fan of masking.
The JGSDF color
scheme is very complicated as it is similar to tiger stripe, but I enjoy the
challenge despite the fact I’m not a fan of masking.
Due to the wide
open nature of the forward cockpit, I masked the canopy on the inside and
outside as just masking one side doesn’t look right.
The canopy interiors were sprayed flat black and once dry, the canopy
interior was glued into place with white glue for temporary attachment for
painting.
The first thing I
did was spray the model flat black like one would an armor model.
Once it dried so I could touch it, I then sprayed on a very thin coat of
Gunze H320 JSDF Light Green,
The dark yellow in
the box art/light red brown in the photos of the real thing color mix suggested
by Hasegawa of 70% OD and 30% Middlestone seems to be wrong.
All I get is a very faded OD which doesn’t work.
The color in question on the box is different than the color I’ve seen on
the photos. It still didn’t look
right when I sprayed it on.
The color in the
photos of the real thing is a light reddish brown, not a dark dark yellow.
I don’t know what the FS color is, but I decided to use a mix of 10 parts
Tamiya Dark Earth XF-52, 2 parts Tamiya Dark Yellow and 3 parts Tamiya Red
Brown. When I had to
repaint the “red brown” portions again, I made a new batch of paint and
got a slightl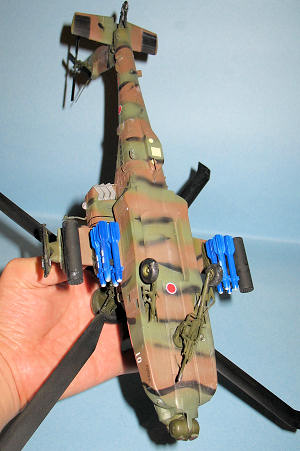 y different color tone (more Dark Earth than red brown.)
As one might imagine, I wasn’t really happy about that.
Instead of freaking out, I just left it as is.
y different color tone (more Dark Earth than red brown.)
As one might imagine, I wasn’t really happy about that.
Instead of freaking out, I just left it as is.
Once the paint was
dry, I sprayed on two light coats of future in preparation for the decals.
I decided to use
the training markings. The decals
proved not be a huge issue except the bigger ones that had to conform to the
mostly raised surface detail. It
took a couple of sessions with Solvaset to fix the silvering.
The training scheme
means that the Hellfire missiles are inert rounds and colored bright blue.
The eight missiles were painted with a thin coat of flat white and once
dry, two light coats of Gunze bright blue.
Since the paint was semi gloss, I put the decals straight on the
The Hellfire launch
racks, 70mm rocket pods and Stinger
I opted not to really weather the Apache beyond what I did with the paint job which is subtly done and barely noticeable in the photographs. I sprayed on a couple of thin coats of Vallejo flat coat and I was done with this phase of the model.
| FINAL CONSTRUCTION |
I noticed that the
difficult seam in the lip next to the rotor mount developed a phantom seam.
It was taken care of with thin CA glue and careful sanding.
Fortunately, it was JSDF green so I didn’t need to make a 3rd batch of
JSDF brown.
The landing gear
easily slid into place and were glued in.
All that previous preparation and lots of test fitting saved me a lot of
grief.
 As it turns out,
the remaining tiny bits (clear parts) were a pain in the butt, but that is what
is expected with those tiny pieces.
The lights proved to be rather pesky as I lost one part as it flew like a rocket
from my tweezers when I was attempting to place it.
I ended up using Krystal Kleer to simulate the lights and brush painted
the colors.
As it turns out,
the remaining tiny bits (clear parts) were a pain in the butt, but that is what
is expected with those tiny pieces.
The lights proved to be rather pesky as I lost one part as it flew like a rocket
from my tweezers when I was attempting to place it.
I ended up using Krystal Kleer to simulate the lights and brush painted
the colors.
The Stinger Missile
racks were easy to attach to the end of the winglets because I had pre-drilled
the holes earlier. I ended up
needing to widen the holes, but all it took was a couple of turns with a hobby
knife to fix that.
I inadvertently
broke a couple of antennas including the main radio mast and ended up having to
reglue and/or replace them.
I had a problem installing the raised hatches the last time I put this together so I did a few things different like test fit. One of the things that screwed up the hatches for me last time is that the pilot’s (rear) hatch doesn’t line up when open. I cut a small piece of 40 thou plastic card and glued it to the rear mounting tab. Once I did this, the pilot’s hatch lined up when I glued it in (using Tamiya Clear.) The gunner’s hatch goes on without any issues.
| CONCLUSIONS |
The Hasegawa Apache
is a very nice kit with a unique camo scheme.
I certainly had fun building it, but it does require some careful
construction to build. I’d
recommend that this kit for the more experienced modeler who has at least a few
kits under their belt.
For those who read
my review of the Apache A model and are wondering why I changed from saying it
was an easy kit to a medium difficulty kit was due to my inexperience at the
time. I’m the first one to admit
that I lucked out on the assembly and somehow blundered my way into completing
the kit without too much problem.
Kit Courtesy of www.dragonmodelsusa.com and your editor. Get yours at your local shop or on-line retailer.
| REFERENCES |
December 2009
If you would like your product reviewed fairly and quickly, please contact me or see other details in the Note to Contributors.