
Skunk Modelworks 1/72 MQ-9 Reaper
| KIT #: | 72003 |
| PRICE: | 180 DKK |
| DECALS: | Four options |
| REVIEWER: | Nicolai Plesberg |
| NOTES: | Two complete kits in each box |
| HISTORY |
The General Atomics MQ-9 Reaper
combat drone is a development of the first unmanned aerial vehicle (UAV) the
RQ-1 / MQ-1 Predator, which entered service in the late 90s as the, at first,
unarmed RQ-1 surv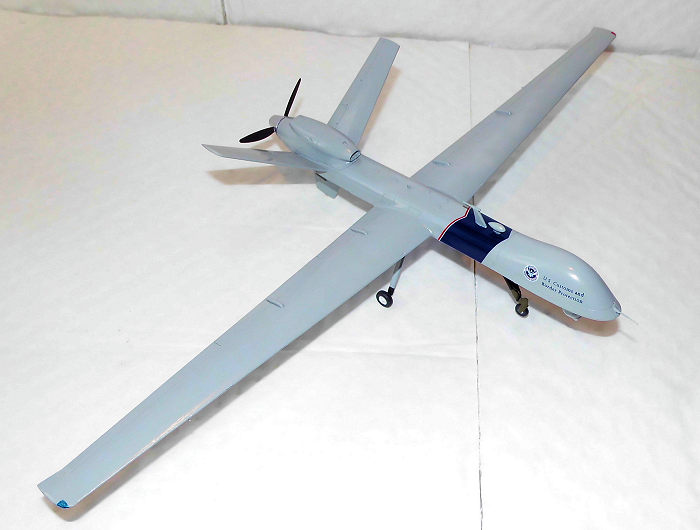 eillance drone, but was developed into the armed MQ-1 in the
early 00s. It was, however, limited in weapons carrying capability being able to
carry two Hellfire missiles and not much else. As the advantages and usefulness
of this new unmanned combat vehicle concept became apparent it was decided to
develop a more capable variant.
eillance drone, but was developed into the armed MQ-1 in the
early 00s. It was, however, limited in weapons carrying capability being able to
carry two Hellfire missiles and not much else. As the advantages and usefulness
of this new unmanned combat vehicle concept became apparent it was decided to
develop a more capable variant.
Initially designated RQ-1 Predator B the new development became known as the MQ-9 Reaper and resembles the Predator in many ways. It is basically a scaled up (about 30%) Predator, were the longer wings houses more fuel and the equally enlarged fuselage has more fuel as well as equipment and not to mention a much more powerful (about eight times) turboprop engine compared to the Predator’s very moderate four cylinder horizontally opposed piston engine. The weapon carrying capability have dramatically increased from just two Hellfire missiles in the Predator to four in the Reaper plus either two GBU-12 Paveway II laser guided bombs or two GBU-38 JDAMs. The venerable Sidewinder air-to-air missile have even been adapted to be part of the Reaper’s arsenal and Stinger air-to-air missiles are in the test phase for a possible further addition. The Reaper entered service with the US Air Force in 2007 and was soon deployed to the combat zones in Afghanistan and Iraq proving the concept of a UAV designed for the hunter-killer role. A small number of Reapers have been exported to a few NATO member states in Europe.
| THE KIT |
The kit consists of four sprues
molded in light grey styrene; two times Sprue A which contains the fuselage,
wings, tail planes and the forward sensor turret and two times Sprue B which
contains gear parts, engine nace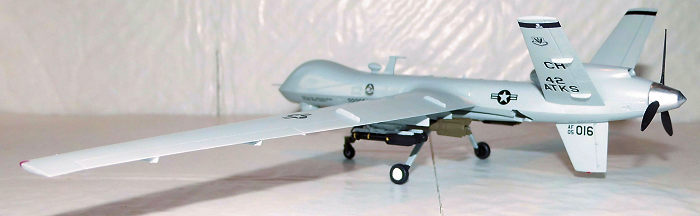 lle and parts for the weapons. The parts are
nicely detailed with crisp and subtle engraved panel lines as well as rivets
that will look good under a coat of paint. The fit is also very good; in fact
almost on the level with Hasegawa / Tamiya. The instructions are simple yet
effective in showing how the parts goes together as are painting instructions
although alternate information always will be welcome. The decal sheets are
printed glossy and in register by Cartograf. Actually one register issue did
catch my eyes; the fuselage roundel for the RAF version have the centre red dot
slightly off register, but that doesn’t ruin the overall impression of the
sheets in general, especially if you don’t want to model the British version!
lle and parts for the weapons. The parts are
nicely detailed with crisp and subtle engraved panel lines as well as rivets
that will look good under a coat of paint. The fit is also very good; in fact
almost on the level with Hasegawa / Tamiya. The instructions are simple yet
effective in showing how the parts goes together as are painting instructions
although alternate information always will be welcome. The decal sheets are
printed glossy and in register by Cartograf. Actually one register issue did
catch my eyes; the fuselage roundel for the RAF version have the centre red dot
slightly off register, but that doesn’t ruin the overall impression of the
sheets in general, especially if you don’t want to model the British version!
| CONSTRUCTION |
Well, there are really no
surprises here as mentioned before. The instructions are straight forward so
construction began with step 1, which was about gluing the gear bays into the
lower fuselage half then gluing the wings together and glue them to the lower
fuselage half as well concluded step 2. As the instructions don’t mention it, I
checked for nose weight and did these puppies need it?! After gluing what I
thought would be enough into the noses and then gluing the fuselages together
concluded step 3. Engine nacelles were next; glued together then attached to the
fuselages. That was only one third of step 4, but I decided to wait with the
butterfly tail planes as well as the sensor turret to facilitate easier seam
treatment / painting later. I sanded and filled / gluefilled the various s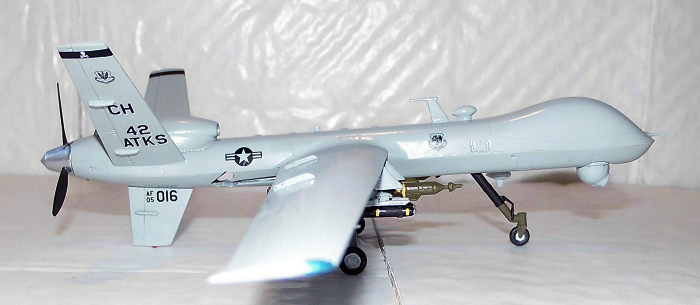 eams
that needed it even though it wasn’t that much, plus an alignment issue on the
leading edge of the tail planes which probably is the only thing preventing this
kit being in the same league as Tamigawa.
eams
that needed it even though it wasn’t that much, plus an alignment issue on the
leading edge of the tail planes which probably is the only thing preventing this
kit being in the same league as Tamigawa.
In the meantime I also dealt with the propellers / spinners gluing them together and sanding / filling the seam around the blades as the fit wasn’t really perfect in any way. The weapons for the armed Reaper were also assembled and painted at this stage as were the gears. On three out of four main gear legs the small supporting strut was more or less missing (a molding error of some kind it seemed to me) so this was done by attaching stretched sprue bits as replacement for the missing struts. When that was done the gears and gear bays were painted; the bays plus main gear legs went grey (Humbrol 127 US Ghost Grey), while parts of the nose gears went black and olive drab, wheel hubs (partially) white and tires tire black. Propellers were also painted at this stage; blades went flat black with yellow tips and spinners went silver.
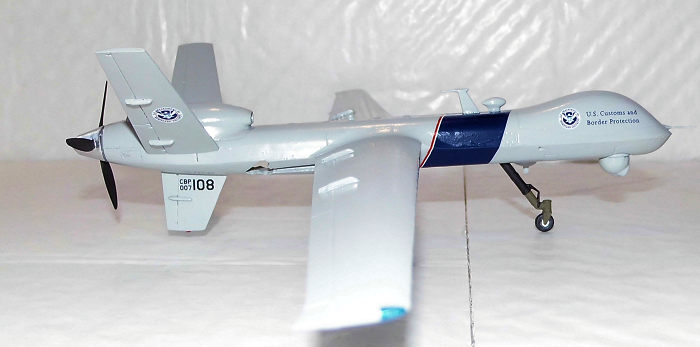
To finalize construction I glued in the tail planes plus gear and the remaining details with a few exceptions; I had decided that one of the planes should be from the US Customs and Border Protection with its prominent blue band around the fuselage, which in the kit comes as a decal. In that case don’t glue the antennas B16 and B18 in place or you will have serious trouble in putting the decal in place!
| COLORS & MARKINGS |
The paint scheme, as given in
the kit instructions, is quite simple: US Ghost Grey, or FS36375 all over the
airframe so three coats went on to get a perfect coverage. As the paint I used (Humbrol
127) is actually satin but it looked gloss enough for my judgement so the decals
went on with no further glossing and no real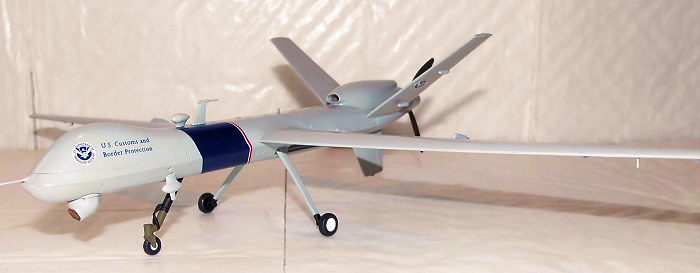 hassles. The only decals that had a
bit of bite (read: looming trouble) in them were those for the weapons; to me it
seemed a bit exaggerating to put decals on those tiny things especially the
Hellfire missiles! Nevertheless I succeeded in doing that and both Reapers were
given a coat of Humbrol Satin Cote to seal in the decals while the weapons were
given the all flat variant (Humbrol Matt Cote).
hassles. The only decals that had a
bit of bite (read: looming trouble) in them were those for the weapons; to me it
seemed a bit exaggerating to put decals on those tiny things especially the
Hellfire missiles! Nevertheless I succeeded in doing that and both Reapers were
given a coat of Humbrol Satin Cote to seal in the decals while the weapons were
given the all flat variant (Humbrol Matt Cote).
The final construction consisted of attaching the pylons and weapons to the armed Reaper and the remaining details to the other plus a few touch ups and the remaining detail painting. However, the armed Reaper sat firmly on the propeller blade so it was still tail heavy. The trouble was that the weapons apparently fielded just a bit more to the balance aft of the main gears than the front of them. Taking a small chunk of lead and got it stuffed well up in the nose gear bay and painting it grey, to camouflage its presence, my two 1/72 scale Reapers were finished.
| CONCLUSIONS |
 These are in fact exceptional
fine kits that build without trouble and an almost perfect fit so with some
experience they will be an enjoyable experience of modeling. Just be aware of
the nose weight issue because the required amount can easily fit into the nose,
so there is really no excuse to use the nose gear bay as I was forced to do;
tip: the sensor turret could in fact also hold a small amount of weight –
another argument to wait attaching it to the latest possible stage!!
These are in fact exceptional
fine kits that build without trouble and an almost perfect fit so with some
experience they will be an enjoyable experience of modeling. Just be aware of
the nose weight issue because the required amount can easily fit into the nose,
so there is really no excuse to use the nose gear bay as I was forced to do;
tip: the sensor turret could in fact also hold a small amount of weight –
another argument to wait attaching it to the latest possible stage!!
Recommended to all that are interested in bringing their collection up to date.
| REFERENCES |
Wikipedia, the Online Encyclopedia
Nicolai Plesberg
2 October 2017 Copyright ModelingMadness.com If you would like your product reviewed fairly and fairly quickly, please contact the editor or see other details in the
Note to
Contributors. Back to the Main Page
Back to the Review
Index Page
Back to the Previews Index Page