| KIT #: | 07245 |
| PRICE: | $70.00 |
| DECALS: | Four options |
| REVIEWER: | Donald Zhou |
| NOTES: | Advantages: Well detailed, full weapon fit, and choice of open or closed weapon bays. Disadvantages: Some minor details quibbles, wrong version of the Sidewinder, and slightly over engineered |
| HISTORY |
 The F-22 flew its first combat
sortie in September of 2014, dropping several 1000lbs JDAM’s in support of U.S.
efforts to eliminate ISIS. Further combat operations will continue. Despite its
first combat operations, most commanders would like to keep the Raptors as an
information “sucker” and “distributor” despite dropping 270 bombs on 60
locations and performing its first close air support mission when several
Raptors were given the go ahead on short notice. In August of 2016, two Raptors
also performed an intercept of two Russina SU-24 Fencers when they attacked
Kurdish forces friendly to the U.S.
The F-22 flew its first combat
sortie in September of 2014, dropping several 1000lbs JDAM’s in support of U.S.
efforts to eliminate ISIS. Further combat operations will continue. Despite its
first combat operations, most commanders would like to keep the Raptors as an
information “sucker” and “distributor” despite dropping 270 bombs on 60
locations and performing its first close air support mission when several
Raptors were given the go ahead on short notice. In August of 2016, two Raptors
also performed an intercept of two Russina SU-24 Fencers when they attacked
Kurdish forces friendly to the U.S.
| THE KIT |
The kit has been
described at
this link.
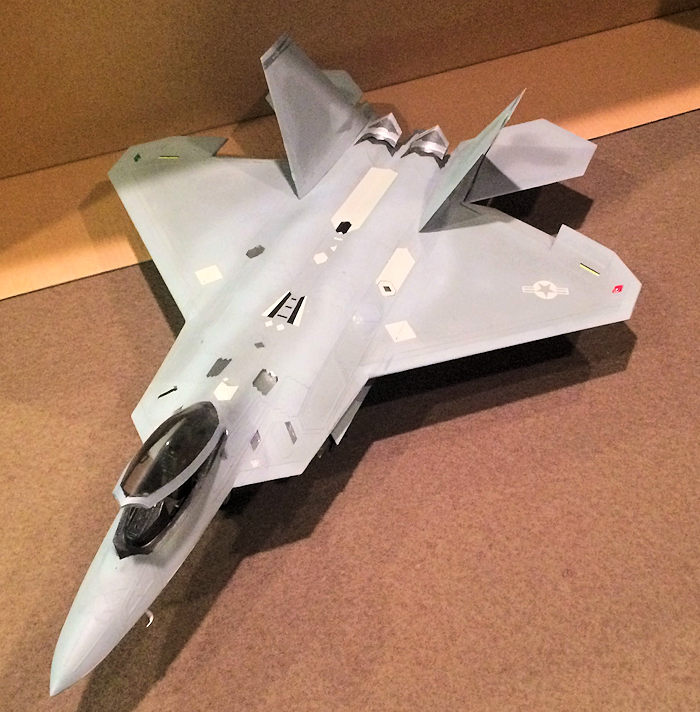
Like my second F-35 kit, this one will have everything open with weapons added,
which made everything a little tougher. Also, I sourced two AIM-9M Sidewinders
from an ancient Monogram F-15 kit since as previously stated, 9M version of the
Sidewinder are not included in the kit and the F-22 only recently started to be
armed with the 9X version.
| CONSTRUCTION |
 I’ll only concentrated on what are
needed to build the fighter with bays open since most of the construction
details have been previously noted (see above).
I’ll only concentrated on what are
needed to build the fighter with bays open since most of the construction
details have been previously noted (see above).
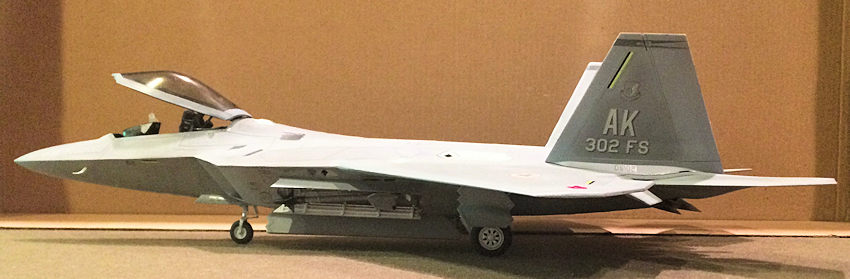
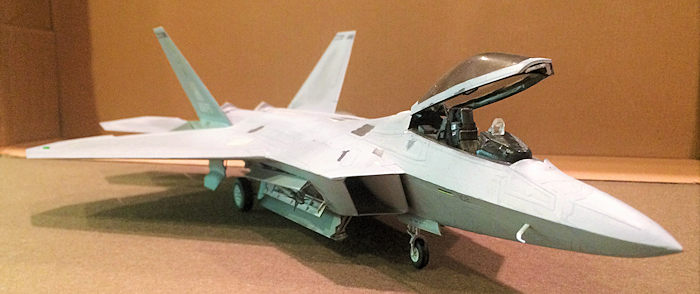
The first thing is the cockpit. Again, the canopy will be open while the screens are off. I used Euro I dark grey for the closed off screens since even LCD screens, in closed off mode, does not go completely dark. The seat lacks seat belt since I lost my second photo-etch sets from my F-35. Yes, I know, the belts may not be correct but at this scale, it’s close enough. Once I find them again, I’ll put them on. Luckily, the seat is such a tight fit that cementing it in place is not needed.
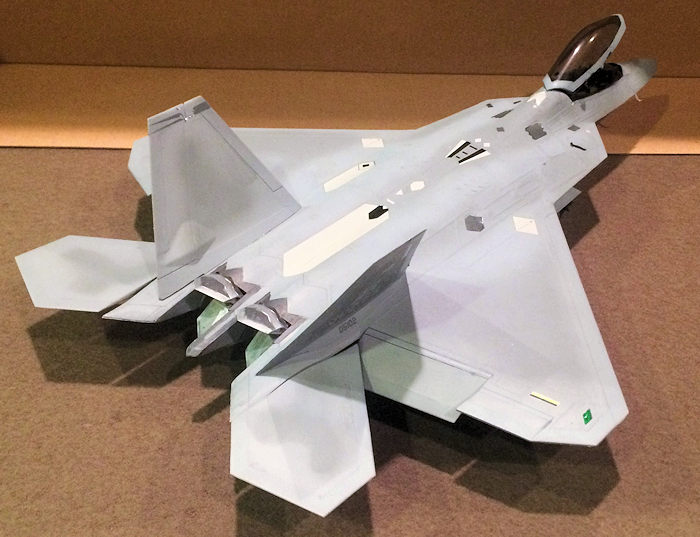
Next come the weapon bays assembly and there are a lot of details that need to go in there. I put the AMRAAM “trapeze” launchers in the main bays but forgo the sidewinder launch rails because those look pretty flimsy. I left off all the doors for later.
The rest of the assemblies are straight forward. This time, dealing with the connector pegs, I know what was in store so left off those that gave me fits in the first one and clipped off the rest. The top and the bottom came together much better this time.
| COLORS & MARKINGS |
 Painting is just as involving as
before due to the “Raptor sheen”. Also, this time, there are a lot of weapon bay
details to paint, especially the side Sidewinder bays as there are some black
boxes to take care off.
Painting is just as involving as
before due to the “Raptor sheen”. Also, this time, there are a lot of weapon bay
details to paint, especially the side Sidewinder bays as there are some black
boxes to take care off.
Otherwise, the rest of the paint were all free handed except the weapons. The AMMRAM’s and Sidewinders all have dark ghost grey bodies with the AMRAAM’s having white nose dome and gunmetal fins. The Sidewinders have Tamiya Rubber Black nose with gunmetal “Spin stabilizers”.
With the decals, the same thing applies. Hasegawa’s decals takes far longer to move from their backing papers so I got that assembly line going again. There are also a lot of decals for the missiles. Being the lazy bum that I am, I actually skipped most of the decals on the AMRAAMs since 1. There are sure a lot of them. Nine per missile and 2. Most importantly, most of the decals are on the side of the missile’s body, and will be hidden once they get squeezed into the bays. Adapting the motto of, “if you can’t see it, then I didn’t do it”, I simply left them off and just added the yellow and brown demarcation lines to the missiles. Other than that, the decal session actually went faster than expected despite the number of them.
| FINAL CONSTRUCTION |
There are now a lot more final details. The first to go are all the AMRAAM’s. Becareful inserting them in. There just isn’t that much space between them and the bays and getting them on is tricky as there is only one small locating pin and hole and that will be blocked by the missile body. Also, notice the middle AMRAAM is slightly forward than the rest in order not to conflict with the fins of the left and right missiles. Take note of that and try not to jam the middle missile alongside the rest and snap off a few fins.
 Next are all the doors. Clean up
here is extremely heavy as the reinforcement struts that are on the doors all
have pour stubs all over the place. Use a sharp hobby knife to chip them off (at
least they come off easy) and then scrape them clean before cementing them on.
Notice which doors goes where as there are a lot of them.
Next are all the doors. Clean up
here is extremely heavy as the reinforcement struts that are on the doors all
have pour stubs all over the place. Use a sharp hobby knife to chip them off (at
least they come off easy) and then scrape them clean before cementing them on.
Notice which doors goes where as there are a lot of them.
Before cementing them on, I decided to tackle the landing gears first. Again, Hasegawa really over engineered this with poly caps. It took a while to get all the gears settled. Use super glue as not only the poly caps, but there are a lot of connecting gears and most of them don’t have that much cement space to put on. At least this time nothing snapped but you still need to watch where the main gear height as the poly caps really allows a lot of leeway in this area.
Now it’s time to put on the doors. There are again, a lot of connection points. The first three connection points on each doors, I drop a little super glue to help with the joining process. The rest with plastic cement. Becareful with the main gear doors as there are a few hydraulic links to put on first, and then you need to squeeze the connector points between the AMRAAM bodies in order to place them in the correct position all the while trying to balance the links so that they hit the correct place. Took a few dry runs to get this right.
After all the doors are dry, I assembled the Sidewinder launchers then carefully inserted them into the bays, again, be careful so that all the slots hit their correct holes or else it will not look right. After that, I superglued the 9M Sidewinders onto the rails.
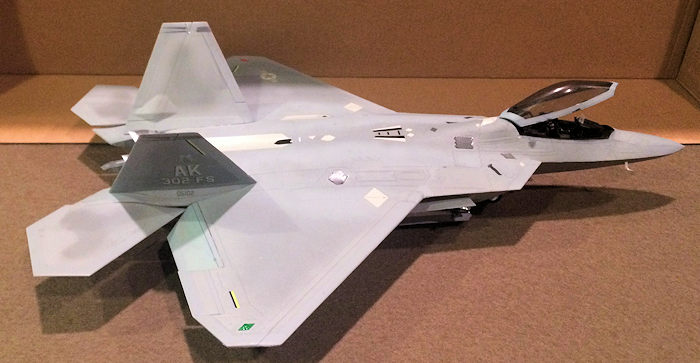 With model now on its legs, the
last two bit of details can be added, the first are the exhaust petals. This
time I used the open petals. Notice there are two different version for the
closed and open one. Careful reading of the instructions will do you good here!
They are once again, painted white inside but this time, I added several burnt
metal streaks to symbolize the heat that result in this area.
With model now on its legs, the
last two bit of details can be added, the first are the exhaust petals. This
time I used the open petals. Notice there are two different version for the
closed and open one. Careful reading of the instructions will do you good here!
They are once again, painted white inside but this time, I added several burnt
metal streaks to symbolize the heat that result in this area.
Finally, everything conclude with the canopy. This time, read the instruction carefully as there is a different hydraulic links in the “Raised” position and a supporting strut that needs to be added in order to support the raised canopy. I used superglue on both so as to get the canopy to set quicker since there are a lot of weight forward and cement just will not hold in this situation.
With that, the model is finally finished.
| CONCLUSIONS |
And there you have it! My second F-22! Like my second F-35, an F-22 with its bay open just look plain different than a closed bay version! Now, hope the rumor are true that Trumpeter is doing a 1/32 scale one. I will definitely jump if that rumor is true, especially if Trumpeter fix the few deficiencies of this model, namely use photo-etch to fix the vent details, which are decals in this model, and most importantly, use metal struts in place of the poly caps for the landing gears, they do not work. I may just build that bird as an in-flight mode!
14 November 2016
Copyright ModelingMadness.com
If you would like your product reviewed fairly and fairly quickly, please contact the editor or see other details in the Note to Contributors.