
Czech Model 1/48 Curtiss A-12 Shrike
| KIT #: | 4813 |
| PRICE: | $39.98 MSRP (34.96 at Squadron) |
| DECALS: | Three options |
| REVIEWER: | Tom Cleaver |
| NOTES: | Short run with resin and vacuformed parts. |
| HISTORY |
The Curtiss A-12 was a development of the A-8 two seat attack aircraft. That airplane was a strange mélange of the new and old: it was the first monoplane with an all-metal airframe accepted for Army Air Corps service, as well as the first to utilize wing slots and flaps to lower landing speed, and to provide an enclosed cockpit for both crewmen, yet it was equipped with externally-braced wings and fixed landing gear. Powered by a Curtiss Conqueror inline engine, 12 YA-8 service-test prototypes were ordered in 1931; these were successful enough to for the design to be awarded a then-large production contract for 46 aircraft in 1933.
 The first YA-8 was returned to Curtiss to be converted to use an air-cooled
625 h.p. Pratt & Whitney Hornet radial engine. Radials were considered
better powerplants for attack aircraft, since they could sustain more
damage from ground fire than a liquid-cooled engine and continue to
operate. Additionally, they were less expensive to operate, which was a
significant factor for the Air Corps in this period. The airplane returned
to service as the YA-10 on September 8, 1932. The YA-10 was slower than
the YA-8, but the Army determined to utilize radials for all future attack
aircraft.
The first YA-8 was returned to Curtiss to be converted to use an air-cooled
625 h.p. Pratt & Whitney Hornet radial engine. Radials were considered
better powerplants for attack aircraft, since they could sustain more
damage from ground fire than a liquid-cooled engine and continue to
operate. Additionally, they were less expensive to operate, which was a
significant factor for the Air Corps in this period. The airplane returned
to service as the YA-10 on September 8, 1932. The YA-10 was slower than
the YA-8, but the Army determined to utilize radials for all future attack
aircraft.
With the success of the YA-10 conversion, the 46 A-8s that had been ordered February 27, 1933, were delivered between November 1933 to February 1934 as the A-12, powered by the 670 h.p. Wright R-1820 Cyclone. These equipped the 3rd Attack Group at Fort Crockett, Texas, then the Air Corps’ only ground attack unit. 20 more A-12s were produced for export to China during 1936, powered by an R-1820F-52 Cyclone offering 775 h.p.
With the cockpit arrangement changed from the A-8's two separate positions
to two cockpits closer together with an open pilot’s cockpit and the gunner
seated under a long greenhouse, the A-12 was armed with four .30 caliber
machine guns mounted in the wheel spats, with a fifth flexible
 weapon of the same
caliber in the rear. Then 30-pound bombs could be carried internally,
or four 300-pound weapons externally.
weapon of the same
caliber in the rear. Then 30-pound bombs could be carried internally,
or four 300-pound weapons externally.
The A-12s were phased out of frontline service with the introduction of the Northrop A-17 in 1938, and were distributed to Army units as hacks. They equipped one second-line unit in Hawaii after leaving the 3rd Attack Group, and several were at Hickam Field when the Japanese attacked in 1941.
The twenty A-12s supplied to China were used ineffectively and the few that were actually assembled were lost on operations in 1937.
| THE KIT |
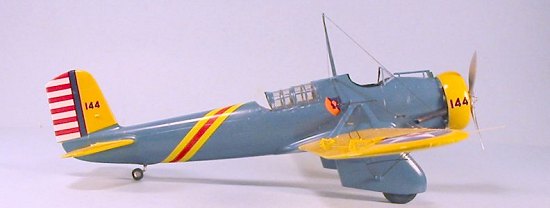
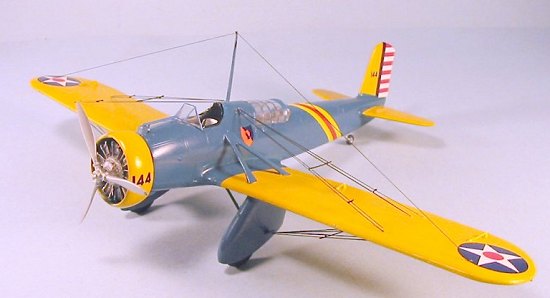
Produced by MPM under the house name of Czech Model for Squadron, the A-12 is closely similar to the earlier A-8 kit, with a different fuselage and wheel spats, and a different engine. Cockpit detail parts and an engine are provided in resin. Decals are provided for three aircraft: an Olive Drab and Yellow aircraft operated by the 3rd Attack Group, a Blue and Yellow A-12 operated in Hawaii before the war, and a camouflaged A-12 used by the Chinese Air Force. For more on this kit, please visit the preview.
| CONSTRUCTION |
Having built the A-8, I was expecting a similar project - a limited run kit that was not too difficult, with enough detail to come up with a nice-looking model in the end. Unfortunately, this was not the case.
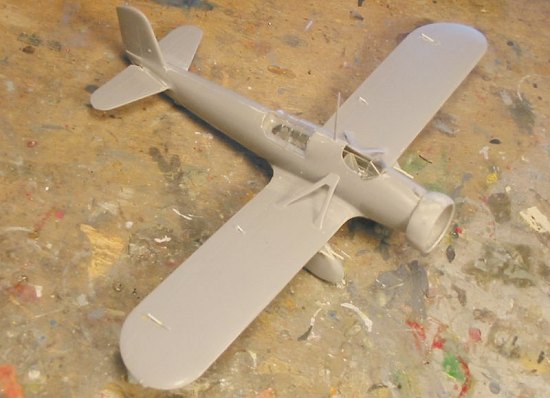
Construction of the main airframe proceeded similarly to that of the A-8: painting and detailing the cockpits, assembling the fuselage, attaching the wings and horizontal stabilizers, and the landing gear without problem. And then the ease of the project came to a screeching halt when it came time to deal with the engine.
 The engine is provided in multiple parts, with two parts for each cylinder,
and the cylinders are then attached individually to the crankcase. This
isn’t hard to do, and anyone who has dealt with an MPM kit knows the
drill. Unfortunately, the resulting engine not only bears no resemblance
to any Wright Cyclone engine I have ever seen, it is also too big by 12
scale inches in diameter. In 1/48 scale, this means that the engine is 1/8"
too big all the way around. This is noticeable, since it results in an
engine installation that the pilot could not have seen over or around.
Progress on the model came to a screeching halt while I contemplated a
solution.
The engine is provided in multiple parts, with two parts for each cylinder,
and the cylinders are then attached individually to the crankcase. This
isn’t hard to do, and anyone who has dealt with an MPM kit knows the
drill. Unfortunately, the resulting engine not only bears no resemblance
to any Wright Cyclone engine I have ever seen, it is also too big by 12
scale inches in diameter. In 1/48 scale, this means that the engine is 1/8"
too big all the way around. This is noticeable, since it results in an
engine installation that the pilot could not have seen over or around.
Progress on the model came to a screeching halt while I contemplated a
solution.
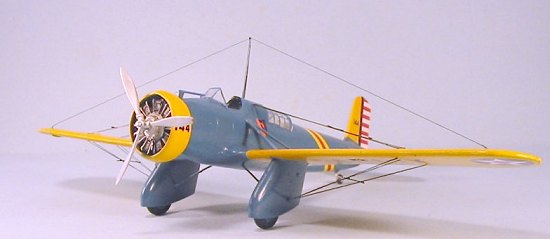
I considered trying to modify the kit engine to the correct size, but was stopped by the fact that it would still look wrong. Finally, I found a resin R-1820 in the spares box - made by MPM no less! - that both looked right and was the correct size. I was then confronted with having to cut down the cowling halves, and reshape them so the cowling would both fit and be round. This wasn’t easy, but it was eventually accomplished. With the cowling modified, I tried to attach the resin exhaust stacks. These didn’t fit, and the end result was I found a sprue tree from the Eduard Camel that had a circular sprue where the engine had been that was the right diameter. With a lot of clean-up, this was fitted inside the rear cowling and glued in position. I then glued the cowling with the exhaust collector to the model in the correct position, after insuring the engine would fit inside afterwards. I then hand-painted the engine and set it aside.
I took the Futured rear canopy and glued it into position, using cyanoacrylate glue to fill the gap around the canopy where it fit to the fuselage. I had to do the same when attaching the front cockpit windscreen. With these masked off using Scotch Brand transparent tape, I was ready for the paint shop.
| COLORS & MARKINGS |
 Painting:
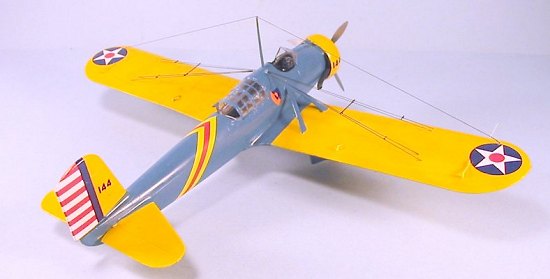
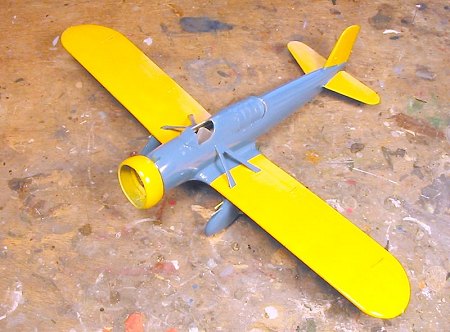
I painted the engine cowling, wings and tail surfaces with Tamiya Flat Yellow, then masked them off and painted the fuselage with Tamiya Sky Blue, which was “close enough” to Air Corps Blue for my purposes. I should note there was a lot of masking off of the wings and tail surfaces in order to insure they stayed yellow while I painted the fuselage. When that was dry, I unmasked the model, touched up where necessary, and gave it a coat of Future.
Decals:
The decals are by Microscale, and went on without problem under a coat of Micro-Sol. When the decals were fully set, I washed off the model to get rid of setting solution residue and gave the model another coat of Future.
| FINAL CONSTRUCTION |
 I
attached the engine inside cowling, fitted the propeller, hand-painted the
wheels, and unmasked the canopies. Since these aircraft were maintained in
very clean condition, I did not weather the model.
I
attached the engine inside cowling, fitted the propeller, hand-painted the
wheels, and unmasked the canopies. Since these aircraft were maintained in
very clean condition, I did not weather the model.
I used stretched sprue for the rigging. I haven’t done this in several years, and have to say that modern plastic is not so good for this process as what we used to have back when modelers had to trudge 5 miles uphill through the snow in both directions to get to the hobby shop and purchase one of those old kits. It took several attempts to get sprue that I could use, but then it was easily attached and tightened by passing a just-doused match under it. I then carefully painted the rigging gloss black.
| CONCLUSIONS |
 While the kit is competently designed and an easy project to assemble, the
incorrect engine really puts the kibosh on it unless a modeler is fortunate
to have a more accurate R-1820 in the spares box. Additionally, having to
make a new exhaust collector ring for it (assuming you aren’t lucky enough
to have that Eduard sprue lying around) is also difficult, and getting the
cowling right is another problem. This is not the kind of thing you can
forego, if your ultimate goal is a model that resembles the real thing -
that kit engine is just too big to not be noticeable. The only other
solution I could think of would be to steal an engine and cowling from a
Hobbycraft P-26, though the engine there is a Pratt & Whitney R-1340
Hornet, not a Wright R-1820 Cyclone. All of this is unfortunate, since the
A-12 is a significant airplane for anyone who includes “Golden Age”
aircraft in their collection. Too bad MPM couldn’t have just included the
good-looking resin R-1820 they’d previously produced.
While the kit is competently designed and an easy project to assemble, the
incorrect engine really puts the kibosh on it unless a modeler is fortunate
to have a more accurate R-1820 in the spares box. Additionally, having to
make a new exhaust collector ring for it (assuming you aren’t lucky enough
to have that Eduard sprue lying around) is also difficult, and getting the
cowling right is another problem. This is not the kind of thing you can
forego, if your ultimate goal is a model that resembles the real thing -
that kit engine is just too big to not be noticeable. The only other
solution I could think of would be to steal an engine and cowling from a
Hobbycraft P-26, though the engine there is a Pratt & Whitney R-1340
Hornet, not a Wright R-1820 Cyclone. All of this is unfortunate, since the
A-12 is a significant airplane for anyone who includes “Golden Age”
aircraft in their collection. Too bad MPM couldn’t have just included the
good-looking resin R-1820 they’d previously produced.
September 2004
If you would like your product reviewed fairly and fairly quickly, please contact the editor or see other details in the Note to Contributors.