Merlin 1/72 Curtiss Hawk III
|
KIT # |
? |
|
PRICE: |
Kit; cheap. Therapy; priceless |
|
DECALS: |
Two options |
|
REVIEWER: |
Mark Fordham |
|
NOTES: |
Low pressure limited run kit |
|
HISTORY |
 The first export of
the Hawk was a single example to Turkey delivered in April 1935. Thailand
started to receive Hawks from August 1935. In March 1936 the first of a
total of 102 were delivered to China, 90 of these being assembled by the
Central Aircraft Manufacturing Company (CAMCO) at Hangzhou. One other
user was Argentina which started to take deliveries from May 1936.
Argentina also purchased the sole example of the Hawk IV in July 1936;
this using a Hawk III airframe with a full sliding canopy, carburettor
heating and an exhaust collector ring for the SR-1820F-56. One civil
demonstrator of the Hawk II was also built.
The first export of
the Hawk was a single example to Turkey delivered in April 1935. Thailand
started to receive Hawks from August 1935. In March 1936 the first of a
total of 102 were delivered to China, 90 of these being assembled by the
Central Aircraft Manufacturing Company (CAMCO) at Hangzhou. One other
user was Argentina which started to take deliveries from May 1936.
Argentina also purchased the sole example of the Hawk IV in July 1936;
this using a Hawk III airframe with a full sliding canopy, carburettor
heating and an exhaust collector ring for the SR-1820F-56. One civil
demonstrator of the Hawk II was also built.
The Curtiss Hawk II saw combat in China and Siam.
In China they were used in the Sino-Japanese War from 1937 and until 1941
when they were relegated to second-line duties.
Four Siamese fighter squadrons were equipped with Hawk IIIs and one was
operating Hawk IIs during late 1940 when France and Siam engaged in a
short border war. The Hawks flew escort, interception and dive-bombing
missions against French forces based in Indochina. The survivors of these
fighters saw action on 7 December 1941, when Japanese forces invaded
Thailand. This action was short-lived as peace talks led to a cease fire
later that day. One Hawk III is preserved in Thailand as part of the Thai
Air Force Museum at don Muang Air Base, near Bangkok.
Lazy again got history from here http://www.dalnet.se/~surfcity/hawk_iii.htm
|
THE KIT |
 Merlin,
 Merlin, say it three times, spin around twice anticlockwise and
throw salt over your left shoulder and that box of misshapen plastic will
turn into a Tamigawa quality masterpiece, well not in the real world at
least, but you might need the help of that Powerful Wizards namesake to
get this little beastie together, It’s not the worst Merlin I’ve done,
that dubious honor falls to the Westland Wapati but its not the best one
either. As Merlin kits go its pretty much run
Merlin,
Merlin, Merlin, say it three times, spin around twice anticlockwise and
throw salt over your left shoulder and that box of misshapen plastic will
turn into a Tamigawa quality masterpiece, well not in the real world at
least, but you might need the help of that Powerful Wizards namesake to
get this little beastie together, It’s not the worst Merlin I’ve done,
that dubious honor falls to the Westland Wapati but its not the best one
either. As Merlin kits go its pretty much run
 of
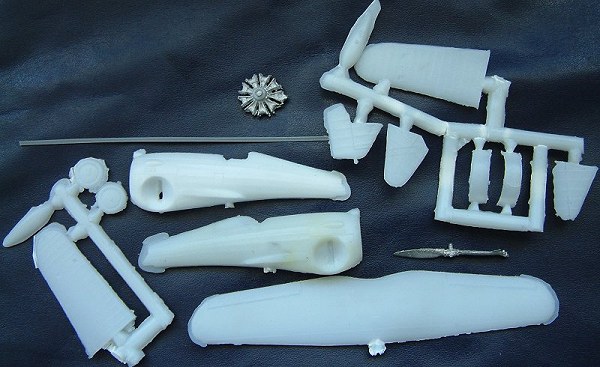
the mill with crudely molded parts and a mix of plastic and white metal
parts. A set of 1/72nd scale plans is supplied but they don’t
give you a clear idea of the strut arrangement, A decal sheet with two
options and a small amount of Contrail strut material is provided that is
0.9 mm too short to get all the struts out of it.
of
the mill with crudely molded parts and a mix of plastic and white metal
parts. A set of 1/72nd scale plans is supplied but they don’t
give you a clear idea of the strut arrangement, A decal sheet with two
options and a small amount of Contrail strut material is provided that is
0.9 mm too short to get all the struts out of it.
Okay now that I have slammed Merlin it’s time to remind readers that these kits are limited run mixed media kitset that when they came out were of aircraft not available anywhere else, time and technology has basically caught up with Merlin and most of the unique kits they offered in the late 70’s and early 80’s have now been released by the likes of MPM and Pavla who’s superior quality have relegated many Merlin kits to the landfill or sent onto slightly mad Kiwi’s.
|
CONSTRUCTION |
Construction starts like all Merlin Kits trying to figure out which is flash and which is model, after a couple of stuff ups with the Knife I had the major components or is that blobs of plastic cut out and ready for clean up and like with all my previous Merlin models a fair amount of time is needed with the files and sandpaper before you have a flat usable surface to which you can apply glue.
 A simple cockpit
floor was built up using plastic card and old bits from the spares box,
the seat came from the kit after spending quite a bit of time with a
needle file and sand paper getting it to look like a seat rather than a
blob of plastic. Once the cockpit was finished don’t forget to cut the
slots for the front undercarriage as these are completely flashed over.
A simple cockpit
floor was built up using plastic card and old bits from the spares box,
the seat came from the kit after spending quite a bit of time with a
needle file and sand paper getting it to look like a seat rather than a
blob of plastic. Once the cockpit was finished don’t forget to cut the
slots for the front undercarriage as these are completely flashed over.
Once the cockpit was finished the fuselage was joined up and welded together with MEK and set aside to harden for the night. Once dry no filler was needed but you will need to spend some time sanding of the bumps, lumps and Mr Merlins fingerprints that come pre molded into all Merlin plastic. The wings came under attention next and yet again its up to the builder to get things like the shape, thickness and smoothness correct as all Merlin provides you with is a couple of stabs of plastic that may or may not be wings, much shaping and sanding is needed to get the kit parts to a useable stage.
Once you have spent many a happy hour sanding and shaping the wings, rudder and tail planes you now have the wondrous joy of gluing them to the fuselage and fussing with the correct dihedral as there sure aren’t any lugs or pins to help with the alignment, a little jig made up on scrap and odds and ends will help here and save you having to stand around like a dork for ½ an hour holding a little plastic airplane in your hands waiting for that 2 second super glue to finally “grab”. Oh and you can be guaranteed that either the phone will ring or a couple of Jehovah Witnesses will come to the door, nothing against them personally but they do have a knack of turning up at precisely the wrong moment, and Murphy being Murphy the second you put the plane down the superglue will grab and glue the wings at the wrong angle or worse still you will spend the next 2 hours trying to chip your model off the kitchen bench. Been there, done that, got yelled at!
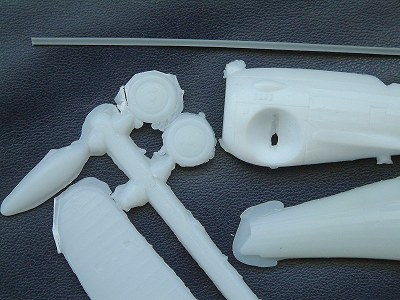
 The white metal
radial comes in for some major filling and trimming along with the
plastic cowling, the cowling is a real piece of $#%^ that took hours of
sanding and judicious bending and tweaking to get round and still looks
crappy, if I ever come across a trashed Monogram Goshawk the first thing
I would pirate is the engine and cowling as these are vastly superior to
the Merlin offerings, exhausts by Q-tip out of ear.
The white metal
radial comes in for some major filling and trimming along with the
plastic cowling, the cowling is a real piece of $#%^ that took hours of
sanding and judicious bending and tweaking to get round and still looks
crappy, if I ever come across a trashed Monogram Goshawk the first thing
I would pirate is the engine and cowling as these are vastly superior to
the Merlin offerings, exhausts by Q-tip out of ear.
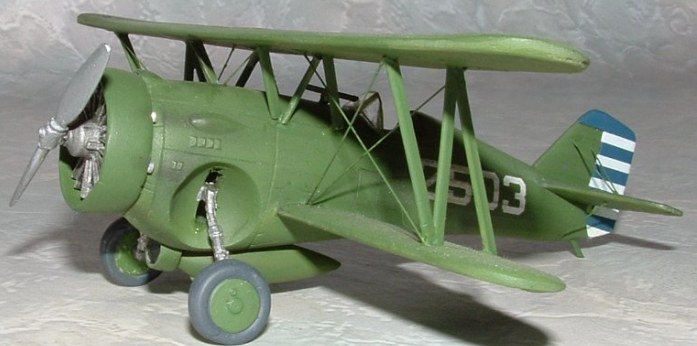
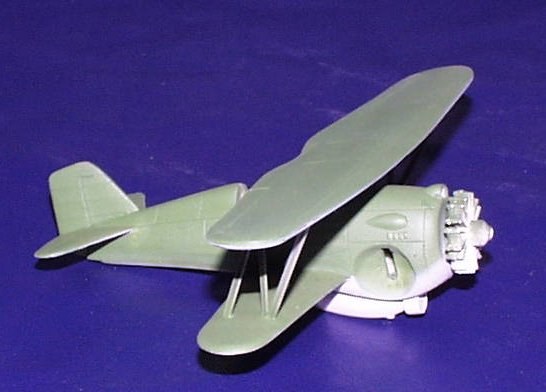
When it comes to bi planes I always assemble the fuselage and lower wing and then do the major painting before adding the top wing so it about time to head off to the spray room with this sucker and hit it with some colour. Now Merlin gives you marking for a silver doped US aircraft, but come on people, I doubt that I’m ever going to be able to assemble a Merlin kit good enough to do a NMF on it, thankfully the Hawk III was also used by the Chinese and even more thankfully they painted their aircraft and Merlin had supplied the decals as an option.
|
COLORS & MARKINGS |
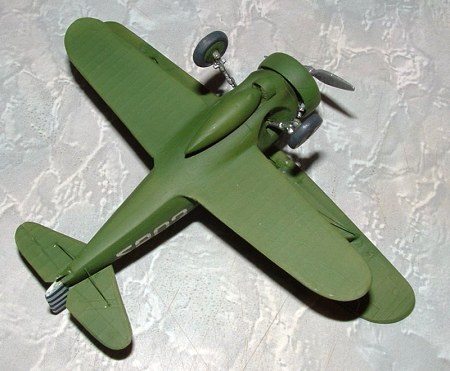
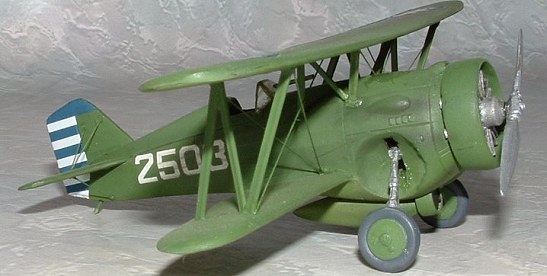
 With a couple of
printed pic’s in my grubby little hands it was time to shut myself away
in the spray room to lay down bright green overall colour of the Chinese
Hawks. The Hawk isn’t a big plane in 1/72nd scale and painting
took all of 10 minutes, I’ve been trialing the Aeromaster Acrylics range
lately and I must admit they would ALMOST make me switch from my
beloved Humbrols. The paint went on smooth without any of the normal
spitting and splattering I get when trying to spray the Tamiya acrylics
with my airbrush.
With a couple of
printed pic’s in my grubby little hands it was time to shut myself away
in the spray room to lay down bright green overall colour of the Chinese
Hawks. The Hawk isn’t a big plane in 1/72nd scale and painting
took all of 10 minutes, I’ve been trialing the Aeromaster Acrylics range
lately and I must admit they would ALMOST make me switch from my
beloved Humbrols. The paint went on smooth without any of the normal
spitting and splattering I get when trying to spray the Tamiya acrylics
with my airbrush.
Once the paint was dry a couple of coats of gloss varnish were spray bombed onto the model in preparation of the final assembly and decals. The hardest part of any Bi-plane is the fitting of the top wing and Merlin kits a just that little bit harder as you have to cut each strut to length out of stock before you can add it to the lower wing. To make matters worse the plan views for the strut arrangement and lengths that Merlin provided in the instructions is confusing to say the least and trying to find a decent photo on the net showing clearly how the struts went proved somewhat elusive and I think I got the struts wrong in the end J but onwards we must. I normally add any fuselage struts first then glue the top wing to these, this gives me a pivot point and allows a bit of movement up and down and backwards and forwards to get the top wing in the right place before hitting the outer struts with that 2 second superglue, wait 30 minutes then move onto the next strut.
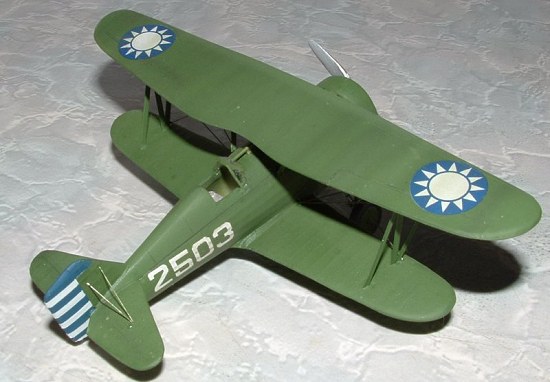
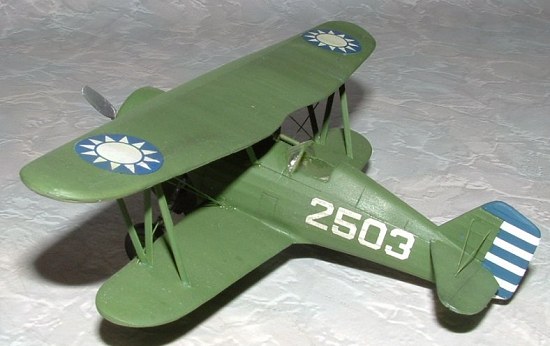
With the upper wing on
and the white metal undercarriage legs cleaned up and glued into the
pre-cut slots it was time to add the decals, unfortunately the Merlin
decals had at some time been folded over right across the Chinese
roundels and left in the box, over the years the Chinese marking had
cracked and flaked off making them unusable, not to worry I had a set of
 national marking
left over from some unknown kit in the decal bin. The white fuselage
codes thankfully were away from the crease and went on with no problems,
the roundels seemed to be a touch on the dark side but reacted well to my
home made decal softener and snuggled down a treat. The tail stripes were
hand painted as the Merlin ones although useable were about 15 shades
lighter than the roundels.
national marking
left over from some unknown kit in the decal bin. The white fuselage
codes thankfully were away from the crease and went on with no problems,
the roundels seemed to be a touch on the dark side but reacted well to my
home made decal softener and snuggled down a treat. The tail stripes were
hand painted as the Merlin ones although useable were about 15 shades
lighter than the roundels.
|
FINAL CONSTRUCTION |
Once the hodge-podge decals were on and dry a couple of coats of Humbrol Matt-Kote was sprayed on to kill the gloss finish and seal in the decals. A small amount of weathering was added from pastels and water colour washes and then it was time to add the rigging. Normally I do my rigging with stretched sprue but I though this time I’d try a different idea and try a guitar string, don’t ask me which one it is as I don’t know one end of a Guitar from the other but it is the thinnest that is made. This springy wire is just a tad too thick for 1/72nd scale rigging but is very easy to work with as all you have to do is cut it to length and drop a dab of superglue on it and wait 30 minutes. I might not use it on 1/72nd scale single seater’s again but for 1/48th singles and even some of the bigger 1/72nd scale bombers it would be perfect. The overall effect is too heavy but it sure was quicker.
|
CONCLUSIONS |
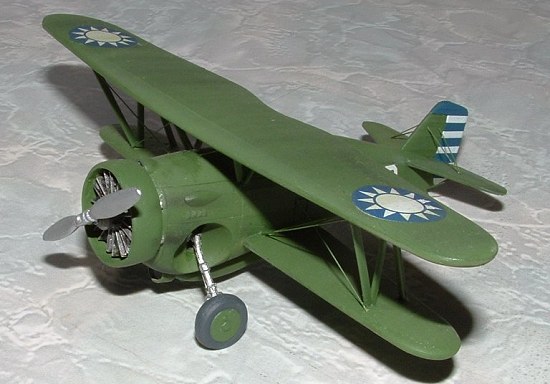
 Merlin's little Hawk
looks a real shocker on the sprues with crudely formed pieces and lots of
flash, but the plastic is soft and easy to work with and with a bit time
and effort a presentable model can be achieved, okay it’s never going to
be a show winner but I don’t build for shows anyway, the satisfaction of
turning misshapen, warped and short shot lumps of plastic into something
that looks a bit like the plane on the front of the box is what this
hobby is about for me, Once again my heartfelt thanks to Tel “The Axeman”
for the review sample. Down to two now Mate.
Merlin's little Hawk
looks a real shocker on the sprues with crudely formed pieces and lots of
flash, but the plastic is soft and easy to work with and with a bit time
and effort a presentable model can be achieved, okay it’s never going to
be a show winner but I don’t build for shows anyway, the satisfaction of
turning misshapen, warped and short shot lumps of plastic into something
that looks a bit like the plane on the front of the box is what this
hobby is about for me, Once again my heartfelt thanks to Tel “The Axeman”
for the review sample. Down to two now Mate.
|
REFERENCES |
Google Hawk III
Merlin instructions and plans.
http://www.dalnet.se/~surfcity/hawk_iii.htm for the history on the Hawk
Copyright ModelingMadness.com
If you would like your product reviewed fairly and fairly quickly, please
contact
the editor or see other details in the Note to
Contributors.