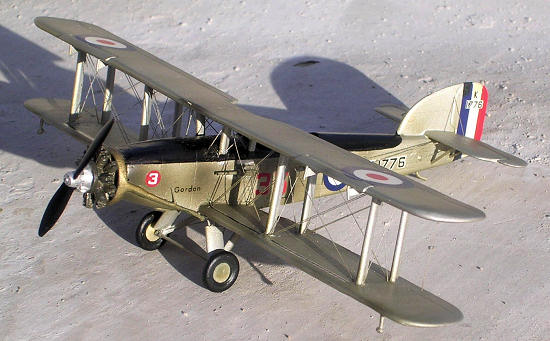
Contrail 1/72 Fairey Gordon/Seal
| KIT #: | ? |
| PRICE: | £6.00 when new |
| DECALS: | Two Options |
| REVIEWER: | Carmel J. Attard |
| NOTES: | Vacuformed kit with injection molded parts |
| HISTORY |
The
Fairey Gordon
was a British light bomber (a 2 seat day bomber) and utility aircraft.It evolved
from the Fairey IIIF.
The Gordon was a
conventional two-bay fabric-covered metal biplane. It was powered by 525 to 605
hp (390 to 450 kW) variants of the Armstrong Siddeley Panther IIa engine.
Armament was one .303 in (7.7 mm) Lewis gun in the rear cockpit and a fixed
forward-firing 0.303-in (7.7-mm) Vickers machine gun, plus 500 lb (230 kg) of
bombs. The aircraft was somewhat basic; instruments were airspeed
indicator,altimeter, oil pressure gauge, rev counter, turn and back indicator
and compass.
The Gordon was
developed from the Fairey IIIF, primarily by use of the new Armstrong Siddeley
Panther engine. The prototype was first flown on the March 1931, and around 80
earlier IIIFs were converted to a similar standard, 178 new-build aircraft were
made for the RAF, a handful of IIIFs being converted on the production line. 154
Mark Is were produced, before production switched to the Mark II with larger fin
and rudder; only 24 of these were completed before production switched to the
Fairey Swordfish. Bith tha Gordon and the Navy Seal operated from Hal Far, Malta
for a time during the prewar years in the early 30s.
The type had
mostly been retired from RAF and Royal Navy Fleet Air Arm service prior to World
War II. No 6, No14, No29, No35, No 45, No 47, No207, and No 223 Squadrons of the
RAF operated the type.. Six of these aircraft were transferred to the Egyptian
Air Force.
Forty-nine Gordons were dispatched to the
Royal
New Zealand Air Force in
April 1939, 41 entering brief service as pilot trainers. The RNZAF found the
aircraft worn out and showing signs of their service in the Middle East —
including at least one scorpion. The last of these — and the last intact Gordon
anywhere — was struck off RNZAF service in 1943.
The only known survivor is RNZAF Gordon Mark I NZ629,
which is under restoration in New Zealand. On 12th April 1940 two
trainee pilots Wilfred Everist and Walter Raphael of 1 Service Flying Training
School were flying NZ629 from Wigram when they encountered thick cloud and were
blown towards th Southern Alps. The aircraft crash landed in beech forest just
beneath the snowline o Mount White. Everist and Raphael tramped to a shearers
hut. The airframe, minus instruments, guns and engine, was left suspended in
trees at the crash site, (part of a large sheep station). In 1976 it was
relocated - still largely suspended from trees - by Charles Darby, with
assistance from Walter Raphael, (Everist was killed in action over France).
NZ629 was recovered by Aerospatiale Lama. It was stored for over twenty years
before restoration commenced. As of 2005 the restorers were looking for an
engine.
| THE KIT |
 It is
surprising how the period of Inter War years has been almost totally neglected
by injection moulded kit manufacturers. Thanks to the cottage industry who with
vac form kits market produced biplanes of the mid 20s-30s like the Blackburn
Baffin, Ripon, Blackburn, Fairey IIIF, Gordon, Seal, Wildebeest, Overstrand,
Horsley and so on, these being generally offered by Contrail Models.
One of these kit offerings is the
Fairey Gordon. This can equally well be made as a Fairey Seal used by Fleet Air
Arm. This is a good quality kit released by Contrail with a good detail
moulding. It is a fairly straight forward construction to produce a nice
finished a pre war medium bomber biplane.
It is
surprising how the period of Inter War years has been almost totally neglected
by injection moulded kit manufacturers. Thanks to the cottage industry who with
vac form kits market produced biplanes of the mid 20s-30s like the Blackburn
Baffin, Ripon, Blackburn, Fairey IIIF, Gordon, Seal, Wildebeest, Overstrand,
Horsley and so on, these being generally offered by Contrail Models.
One of these kit offerings is the
Fairey Gordon. This can equally well be made as a Fairey Seal used by Fleet Air
Arm. This is a good quality kit released by Contrail with a good detail
moulding. It is a fairly straight forward construction to produce a nice
finished a pre war medium bomber biplane.
The
1/72 scale Fairey Gordon comes in white sheet of vac form plastic with some
injection moulded parts in the kit. These are injected in black plastic and the
parts comprise of engine cylinders, exhaust ring, pipes, undercarriage legs,
wing struts of different sizes and propeller. Generally speaking the injected
parts are quite crude but with a little patience can be produced to advantage.
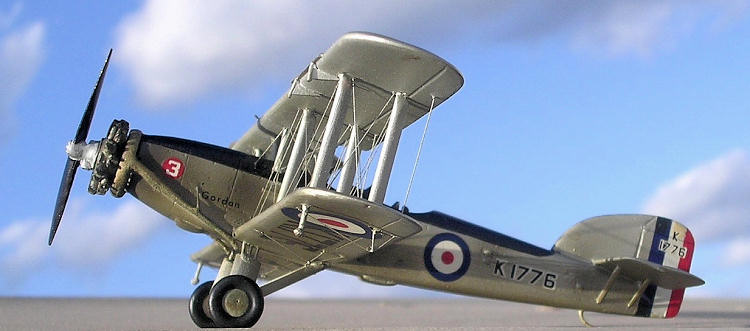
There is also a good quality decal sheet for a RAF Gordon of 35 Squadron so that
there is no need to stock spare roundel and black serial numbers or purchase
extra decals from specialist suppliers.
| CONSTRUCTION |
The
kit component parts, mainly the fuselage and wing parts, tail fin to produce the
Gordon, cockpit decking, crew seats and instrument panel are scored around with
a sharp modelling knife and are broken away from the carrier backing sheet of
plastic. This is followed by removing the excess plastic by sanding using wet
and dry paper stuck to a board. This is best done inn a circular motion and
gently pressing each kit part to ensure that the waste plastic was removed
evenly. The cockpit area was then shaped using a pointed modelling blade and
files. The fuselage halves were placed flat on a board so that the cabine struts
placement is marked and gently drilled blind holes. The same sequence repeated
at the correct positions in the wings and interplane struts. The cockpit floor,
instrument panel that comes with the kit were cut and assembled and painted.
Crew seats were shaped, painted and assembled inside the cockpit which so far wa s
all fixed to one side of the fuselage. Plastic pieces were added intermittently
at the inner of the joint to act as guides. Interior was painted aluminium and
black with seats dark leather brown.. Fuselage halves were joined together using
liquid cement. Tail planes and fin also glued in place. The lower wing halves
were then joined to the fuselage by inserting the locating tongues at the root
of wing slots which were cut in the fuselage lower. This assembly may look a
little flimsy at first but when the top wing was added at a later stage the
complete structure became quite rigid. At this stage more detail was added to
the cockpit like control wheel, three crew seats, seat straps, rudder pedals,
front instruments, some side instruments and control wires at the rear of
fuselage.
s
all fixed to one side of the fuselage. Plastic pieces were added intermittently
at the inner of the joint to act as guides. Interior was painted aluminium and
black with seats dark leather brown.. Fuselage halves were joined together using
liquid cement. Tail planes and fin also glued in place. The lower wing halves
were then joined to the fuselage by inserting the locating tongues at the root
of wing slots which were cut in the fuselage lower. This assembly may look a
little flimsy at first but when the top wing was added at a later stage the
complete structure became quite rigid. At this stage more detail was added to
the cockpit like control wheel, three crew seats, seat straps, rudder pedals,
front instruments, some side instruments and control wires at the rear of
fuselage.
Leading edge slots on upper main wings were cut out from plastic card and
correctly curved with a file. These were fixed in place along with actuating
jacks. The two row radial engine was replaced with a white metal one along with
a more accurate metal propeller from the Aeroclub selection. Undercarriage
struts were finally added along with a thin metal rod for the wheel axel.
The final
task was to add the rigging. I did the rigging process when struts were in place
and both wings were set together. For many this may be the principal reason that
could be discouraging to build biplanes but I can assure that this will be the
the case until the very first set of rigging is completed on a biplane. From
then on one can be hooked and forgets all about monoplanes and jet aircraft for
a long while. The method I use is drilling tiny holes at appropriate places next
to the wing struts, and literally sewing the two wings together. Once sewn using
invisible thread, a tiny spot of super glue is added to the drilled hole. Filler
added and area smoothened with excess thread gently sheared off.
| COLORS & MARKINGS |
| CONCLUSIONS |
| REFERENCES |
December 2008
If you would like your product reviewed fairly and fairly quickly , please contact the editor or see other details in the Note to Contributors.
Back to the Review Index Page 2015