| KIT #: | 48007 |
| PRICE: | $59.34 from Hobby Link Japan |
| DECALS: | Two options |
| REVIEWER: | Tom Cleaver |
| NOTES: | Yellow Wings Decals 48-050 “Aircraft of the Movie Dive Bomber” |
| HISTORY |
 altitude.
Sadly, the U.S. Navy, traditional to the end, failed to develop such a
weapon and instead created what was likely the worst torpedo used by any navy,
the Mark XII, which had low speed, short range and an unreliable trigger.
altitude.
Sadly, the U.S. Navy, traditional to the end, failed to develop such a
weapon and instead created what was likely the worst torpedo used by any navy,
the Mark XII, which had low speed, short range and an unreliable trigger.
Sadly, the development did not include use of the newer, more
high-powered developments of the R-1830, which had reached 1,200 h.p. by 1938.
While the airplane was underpowered as a result, and sluggish in
performance when mated to a 2,000-lb torpedo, Dick Best remembered it as a
“nice-flying airplane” when not so burdened.
The torpedo squadrons were considered so important, and the cachet of
flying the most modern carrier aircraft in the world was such that even such a
skilled aviator as Best had to “settle for” an assignment to dive bombers in
1940.
| THE KIT |
Scott Van Aken did a very good review of what’s in the box.
| CONSTRUCTION |
 If you want to build your model with the wings folded, the canopy closed,
and the bombardier doors open, you don’t really need to read further.
Just follow the instructions and your kit will fit, your model will be
interesting, and you will be happy you bought it and did it that way.
If you want to build your model with the wings folded, the canopy closed,
and the bombardier doors open, you don’t really need to read further.
Just follow the instructions and your kit will fit, your model will be
interesting, and you will be happy you bought it and did it that way.
If, on the other hand, you are one of those obtuse hard-headed
individuals whose demanding nature will likely mean the end of the hobby as we
know it when the kit manufacturers stop releasing kits for all you ingrates, you
may wish to read on, so that your experience of building the model will not be
as negative as mine was, as I went skipping heedlessly down the path ahead of
you and found all the minefields the hard way. (Ouch! Yow! Oooh Nooo!
Help!) Follow these
instructions and you will avoid the minefields and have almost as enjoyable time
as those who build it the easy way (described above).
If you want to build your model with the canopies open so you can see the
nice detail in the cockpits, then get on the Internet and go to www.squadron.com
and order Squadron Products Vac Canopy SQ-9615 for $7.16.
This is the vacuform canopy for the Monogram TBD kit.
Don’t worry, when you cut it open, it will fit and look nice.
Sadly, the open canopy parts supplied in the kit are about twice as thick
as they should be, with the result that those parts that should slide under
others are 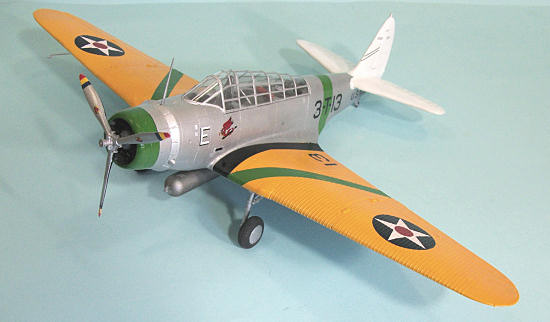 too
big, while those which should slide over others are too small.
Don’t believe me? Cut the
one-piece canopy off the sprue, turn it over, and look at the cross section of
the plastic. If you’re one of those
cheap so-and-so’s, then your only option here is to use the one-piece canopy, as
I did. It fits and looks nice.
Oh, and throw away the canopy masks, they’re too big and not sticky
enough to stay on through the painting process.
You are stuck with applying tape and cutting to shape for each of those
many individual panes in the canopy (the panes will create pain), a tedious
process but it looks good in the end.
too
big, while those which should slide over others are too small.
Don’t believe me? Cut the
one-piece canopy off the sprue, turn it over, and look at the cross section of
the plastic. If you’re one of those
cheap so-and-so’s, then your only option here is to use the one-piece canopy, as
I did. It fits and looks nice.
Oh, and throw away the canopy masks, they’re too big and not sticky
enough to stay on through the painting process.
You are stuck with applying tape and cutting to shape for each of those
many individual panes in the canopy (the panes will create pain), a tedious
process but it looks good in the end.
Proceeding onwards:
If you want to build a model with the wings spread, then glue the two
upper pieces of the wing together, reinforce the joint from inside with some
Evergreen strip, and set it aside upside down (so it sets in the correct
alignment). If you want to build
the model with the bombardier doors closed, then glue a .010 strip of plastic to
the centerline edge of one of the doors, then glue them together without using
the photoetch interior parts (which you won’t see anyway), and reinforce that
joint from the inside with another bit of Evergreen strip.
Sand the centerline piece nice and smooth.
Set this sub-assembly aside with the wings
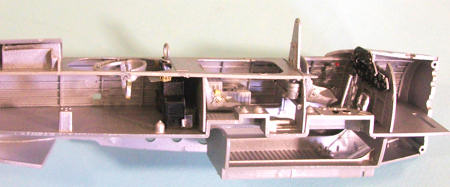
You can now proceed to paint and assemble the cockpit per the
instructions. If you choose to do a
pre-war airplane, as I did, the cockpit should be aluminum lacquer overall, with
gloss black switches, handles, etc.
Mr. U.S. Airplane Colors, aka Dana Bell, has recently discovered some directives
about repainting the cockpits in Interior Green.
It was determined in 1940 that this was a good idea because the aluminum
cockpit interiors were too reflective.
The repaint was to be done “as appropriate,” which probably meant when
the airplane went in for some sort of major overhaul.
The most likely time this would have been done was when the pre-war paint
scheme was removed and the airplane was painted overall light grey during 1941.
Thus, if you are building a wartime TBD, it most likely has an Interior
Green cockpit, while a pre-war scheme most likely has an aluminum cockpit.
You should also remember that you do not want to use the photoetch
shoulder harness. The US Navy
didn’t use shoulder restraints until after the Battle of Midway, so all TBDs
would have lap belts only.
 Remember that if you are doing a pre-war airplane, or an airplane used
anywhere but the Battle of Midway, that you only want the single machine gun at
the rear, which can be slid inside the fuselage if you are doing the canopy
closed. If you are doing a Midway
airplane with the twin gun mount, that could not be stowed and the gunner’s
canopies were removed, leaving the position open.
If you aren’t using the vacuform canopy, you can take a razor saw to
those last two sections of the closed canopy.
Remember that if you are doing a pre-war airplane, or an airplane used
anywhere but the Battle of Midway, that you only want the single machine gun at
the rear, which can be slid inside the fuselage if you are doing the canopy
closed. If you are doing a Midway
airplane with the twin gun mount, that could not be stowed and the gunner’s
canopies were removed, leaving the position open.
If you aren’t using the vacuform canopy, you can take a razor saw to
those last two sections of the closed canopy.
Cut the fuselage halves off the sprue and before you go further, cut some
Evergreen sheet to fit inside those holes on the fuselage side.
They’re supposed to be steps with flush-fitting kick doors.
If you do this now, from the inside, you won’t make a mess of the very
petite surface detail.
Be sure to use a very sharp knife when taking parts off the trees since
they are delicate and fragile. I
found it was good to cut closer to the sprue, then remove the stub when I could
put the part completely on a hard surface.
Be sure to clean off all the sprue gates, because these parts are very
precisely molded (this isn’t the Monogram kit), and won’t fit right otherwise.
If you do this, you won’t be using very much filler anywhere.
Once you have the fuselage assembled, glue some Evergreen sheet into the
rear lower fuselage, so there is something there to create a solid joint when
you attach the lower wing center section.
Before you attach the lower wing center section, glue some Evergreen
strip inside the open area of the bombardier doors, to create a “ledge” to glue
the doors to. Then carefully glue
your closed bombardier doors into position, working the fit from inside to
assure a nice smooth exterior.
Now glue the wing center section in place. If you’re very careful, there
will not be much of a seam along the lower fuselage to deal with; if you have a
seam, you can cover it with surfacer and sand it down - there is little or no
surface detail to loose there.
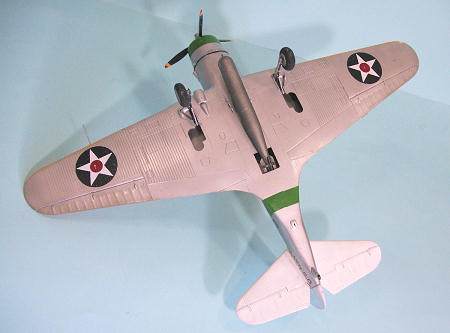 Now glue the upper wing halves to the fuselage and the lower wing center
section. When that is done, glue
the lower outer wing half into place.
If you are careful and pinch the leading edge together - but not too
much! - you won’t have a seam to clean up and you won’t lose that nice detail of
the wraparound corrugation.
Now glue the upper wing halves to the fuselage and the lower wing center
section. When that is done, glue
the lower outer wing half into place.
If you are careful and pinch the leading edge together - but not too
much! - you won’t have a seam to clean up and you won’t lose that nice detail of
the wraparound corrugation.
You can now attach the horizontal stabilizers.
If you test fit carefully, they will fit without you having to use any
seam filler on the stabilizer-to-fuselage joint.
As to the engine, you aren’t going to see any of the rear detail of the
engine, so just glue the exhaust ring in place, choose whether you want the
flaps open or closed, assemble the engine, and attach it in position.
Then attach the cowling.
If you didn’t buy the vacuform canopy, attach the closed canopy now.
Don’t put the telescopic sight in position now, you want to be able to
mask off the clear areas. I used
Tamiya tape, cut with a sharp Number 11 X-Acto, to mask the canopy.
The whole process took about 45 minutes.
You now have your model assembled and can proceed to paint it.
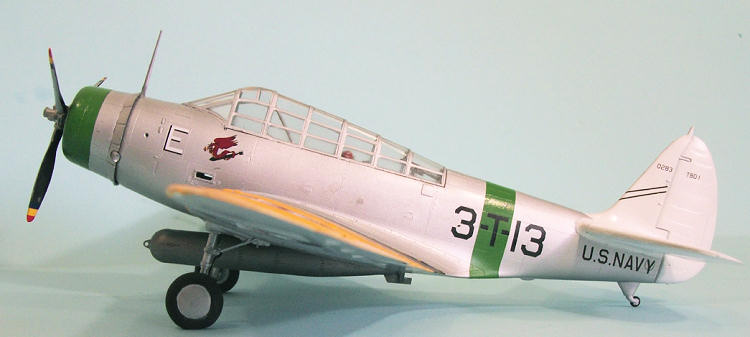
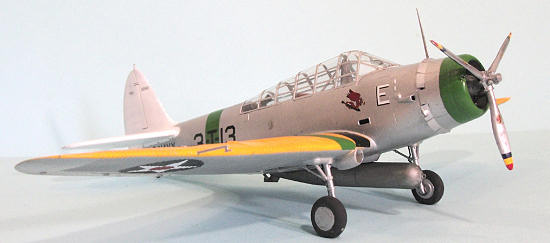
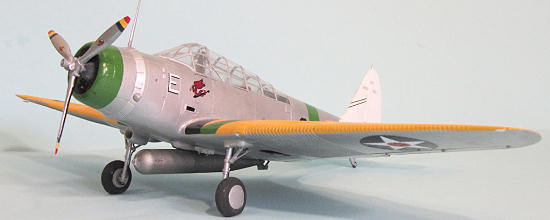
| COLORS & MARKINGS |
Follow the instructions for whatever decal sheet you are doing.
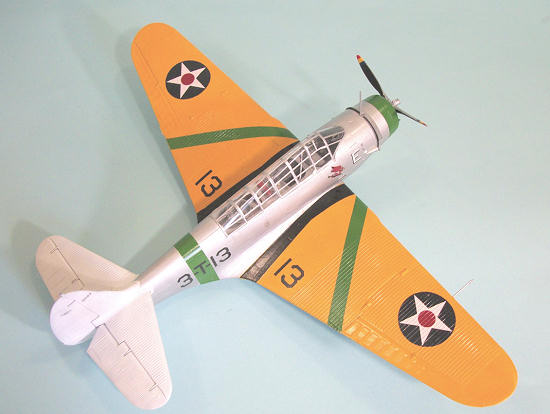
I couldn’t match the green section color with paint, so I used the extra
wing chevrons in the Yellow Wings set and cut and pieced them together to make
the cowl color ring. I found it a
good idea to use Solvaset on the wing stripes and wing insignia, so the decals
would set down in the corrugations.
I used the kit decals for the wingwalks and discovered they were about a
quarter-inch too short, so I used some extra black decal to cover that space.
| FINAL CONSTRUCTION |
| CONCLUSIONS |
 problems
with the bombardier’s doors or the wings. I proceeded with this review in hope
that the rest of you can profit from my problems and give yourself a more
enjoyable experience.
problems
with the bombardier’s doors or the wings. I proceeded with this review in hope
that the rest of you can profit from my problems and give yourself a more
enjoyable experience.
There have been a lot of comments about the price of this new TBD kit
compared with that of the Monogram kit.
While the MSRP is around $80, I have found that most (not all) Internet
outlets are selling it for around $60.
That might still be stretching if for many.
However, the detail of this kit is much better than the old Monogram kit,
and is far more petite. The surface
detail is superior. The only place
I found I needed filler was to fill in a gap between the lower outer wings and
the center section, and the rear lower fuselage.
With the Monogram kit, you have to fill every seam and sand them down.
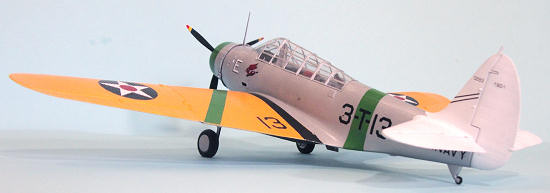
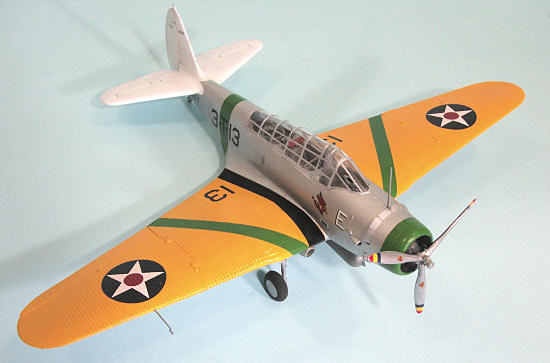
The final look of the Great Wall model is close to an Accurate Miniatures
kit - it certainly looks good sitting next to my VB-3 SB2U-2 Vindicator and VF-3
F3F-2. With the caveats described
above regarding assembly, I can recommend the kit.
If you follow my instructions, your project will be trouble-free and you
won’t get as upset as I did over all the negative discoveries.
Yellow Wings Decals will be releasing 48-099 “Aircraft of the Battle of
the Coral Sea” which has TBDs of both Yorktown and Lexington on the sheets.
It should be a good alternative for those who want something different.
Remember, these airplanes didn’t have the twin-gun rear mount.
Review kit courtesy of
HobbyLink Japan. Order yours at:
Yellow Wings decals courtesy
Yellow Wings Decals. Order yours at
http://yellow‑wingsdecals.com
Tom Cleaver
February 2012 If you would like your product reviewed fairly and fairly quickly, please contact the editor or see other details in the
Note to
Contributors.