Meicraft 1/72 Seversky P-35
| KIT #: | ? |
| PRICE: | Whatever it cost was more than it was worth. |
| DECALS: | |
| REVIEWER: | Joel Hamm |
| NOTES: | Very rough, early cottage industry, short-run. |
| HISTORY |
The purpose of this project was to regain modeling mo-jo, which had atrophied over a half-dozen year hiatus from the hobby. The outcome fell further victim to a lack of proper tools and materials. Model airplaning had been forced by the wayside through a game of real estate leap-frog. Downsizing from the mansion-ette by the mountains to the shack by the sea meant packing the contents of the Secret Model Airplane Museum, and the Fortress of Solitude Building Room, into moving crates stacked into a shed that might, one day, become their new venue; or, more likely, someone’s grab-bag surprise at my post-demise estate sale .
The new digs meant no space, time, energy, or interest for diddling with plastic. However, subsequent procurement of winter quarters in the desert southwest solved, for part of the year, the space and time deficit; but energy and interest needed a while to self resolve. The Web made it easy to keep up with the trickle of tempting new releases (1/72 U.S. military) and eventually the swelling stash inspired a tentative re-entry into the pastime. When packing Big Blue, our trusty Tacoma, for this year’s snowbird migration, I tossed in a carton of expendable kits, and what I thought was my cache of tools and nostrums.
 I set up
shop in a min tool roll-away cart, a me-to-me Christmas present, that could be
rolled from the spacious, but chilly (yes, it do get cold in the desert in Dec.)
garage, to the more comfortable den. Unhappily, the supplies crate yielded only
a few tools and a hodge-podge of dried-up paints, fillers, and glues. All the
Phoenix hobby shops had succumbed to e-commerce, and converted to the new,
lucrative drone trade; but between Wal-Mart, Lowes, Hobby Lobby, and Harbor
Freight, the bare necessities were assembled.
I set up
shop in a min tool roll-away cart, a me-to-me Christmas present, that could be
rolled from the spacious, but chilly (yes, it do get cold in the desert in Dec.)
garage, to the more comfortable den. Unhappily, the supplies crate yielded only
a few tools and a hodge-podge of dried-up paints, fillers, and glues. All the
Phoenix hobby shops had succumbed to e-commerce, and converted to the new,
lucrative drone trade; but between Wal-Mart, Lowes, Hobby Lobby, and Harbor
Freight, the bare necessities were assembled.
Expecting to produce no museum masterpieces, I unsealed the carton of sacrificial kits. The most expendable was this P-35, packed in an unmarked zip-lock bag, lacking header, instruction sheet, decals, or hint of provenance. It may be an early Meikraft issue, though I recall that company turning out higher quality moldings in multi-colored boxes. Meikraft paternity is suggested by a review on this site of just such a kit, as well as references on another marvelous site onto which I blundered: Oldmodelkits.com. If you haven’t discovered it, please visit (I have no personal or fiduciary interest in the affair). The proprietor apparently subsists by living out every modeler’s dream: unearthing boarded up toy and hobby stores, forgotten by time, but filled with musty stacks of models dating as far back as the 1930’s. He has them all: Aurora, Hawk, Lindberg…all the kits we started on as kids, as well as models we never knew existed. There’s also a smattering of recent short run, out of production kits. If you are in search of a long lost something; or just want to re-live those stirring days of yesteryear, give the place a wander-through.
Anyhow – back to the project. History of the subject aircraft is a required field in these kit reviews. There are many places where one can read a more thorough, accurate, and enthusiastic history of the P-35, including the op-cited MM kit review (written, I believe, by our host and editor). I’ll fulfill my obligation by simply stating that the plane was a progenitor of the P-47 Thunderbolt, was outmoded and outclassed when the war started, but reportedly managed to score some victories in the opening Pacific battles.
| THE KIT |
 What
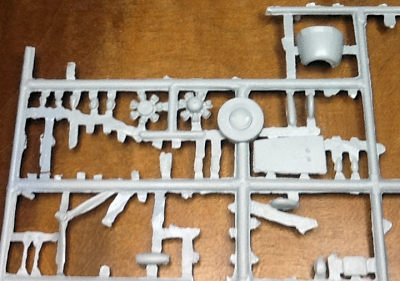
more needs to be said than: “Early, short run, cottage industry.” Thick parts,
indistinct molding, gobs of flash, sprue gates that need to be cut with a chain
saw. Two exception: Most kits of this genre are molded in a soft, waxy,
non-homogenous plastic, that makes shaping and painting a hair-tearing, nail
chewing event. This one is made of crisp styrene that shapes, fills, and sands
easily. The clear parts are another semi-pleasant surprise – flash-encrusted,
but clear and thin. Too thin in some areas. I cracked the turtleback section,
but two sets are provided: one with all three sections molded closed, and one
with windshield, canopy, and turtleback separate, to be displayed open. Why
anyone would chose to display any more of this monstrosity than necessary is a
mystery; so removing and replacing the cracked section was an easy fix.
What
more needs to be said than: “Early, short run, cottage industry.” Thick parts,
indistinct molding, gobs of flash, sprue gates that need to be cut with a chain
saw. Two exception: Most kits of this genre are molded in a soft, waxy,
non-homogenous plastic, that makes shaping and painting a hair-tearing, nail
chewing event. This one is made of crisp styrene that shapes, fills, and sands
easily. The clear parts are another semi-pleasant surprise – flash-encrusted,
but clear and thin. Too thin in some areas. I cracked the turtleback section,
but two sets are provided: one with all three sections molded closed, and one
with windshield, canopy, and turtleback separate, to be displayed open. Why
anyone would chose to display any more of this monstrosity than necessary is a
mystery; so removing and replacing the cracked section was an easy fix.
 I had
bought the kit in the cottage craft heyday, when Merlin, Pegasus, 12-Squared,
Beechnut, Allied Research North, Aviation Usk, and others were cranking out
subjects never expected to be seen in injected plastic. Most of these kits were
tossed aside when the second generation short runners – particularly in Eastern
Europe, replaced them with high quality moldings, usually augmented by resin
castings. The P-35 was muscled out of the stash by an excellent MPM rendering,
no longer in production, but generally available (Oldmodelkits.com has several).
I could have sworn I reviewed the build, but didn’t find the write-up on the
site. Maybe it’s buried in my vast directory of unpublished manuscripts. I’ll
look.
I had
bought the kit in the cottage craft heyday, when Merlin, Pegasus, 12-Squared,
Beechnut, Allied Research North, Aviation Usk, and others were cranking out
subjects never expected to be seen in injected plastic. Most of these kits were
tossed aside when the second generation short runners – particularly in Eastern
Europe, replaced them with high quality moldings, usually augmented by resin
castings. The P-35 was muscled out of the stash by an excellent MPM rendering,
no longer in production, but generally available (Oldmodelkits.com has several).
I could have sworn I reviewed the build, but didn’t find the write-up on the
site. Maybe it’s buried in my vast directory of unpublished manuscripts. I’ll
look.
| CONSTRUCTION |
On these kits generally begins with a search through the spare parts trove for alternative bits and pieces. Unfortunately, the majority of my parts department was 2300 miles away. I did manage to find an alternative radial engine, propeller, and set of horizontal stabilizers; not precisely accurate, perhaps, but on this project, not that close is close enough.
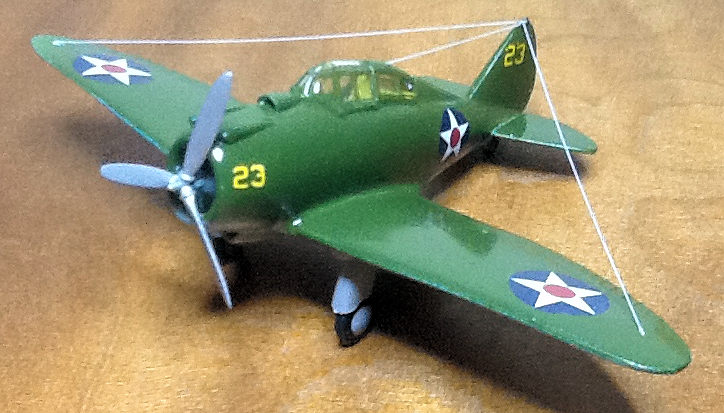
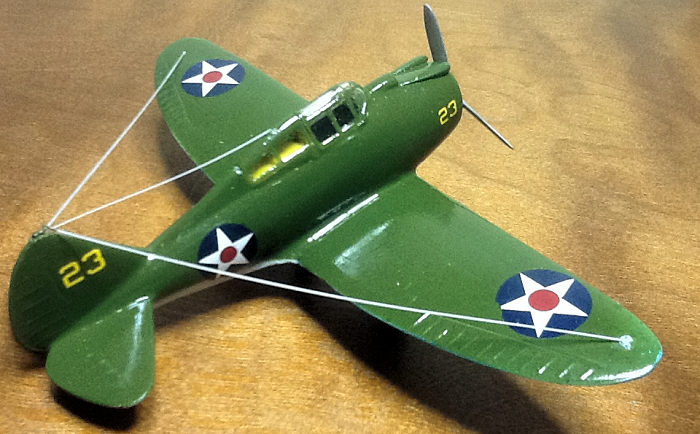
The second task is deciding which version to build. Parts are provided to assemble several variants, differentiated by the presence and location of assorted scoops and fairings. The choice was decided by color scheme. Most P-35’s appear in inter-war pristine polished aluminum. This specimen makes a poor candidate for NMF, demanding a heavy coat of OD and gray to obscure short cuts and boogers. The availability of markings also had a large say. A traipse through the World Wide Web turned up several photos and drawings of planes in simple livery requiring minimal decals.
Step 3 was
sculpting those amorphous globs of plastic into pieces resembling airplane
components. Nothing was exempt.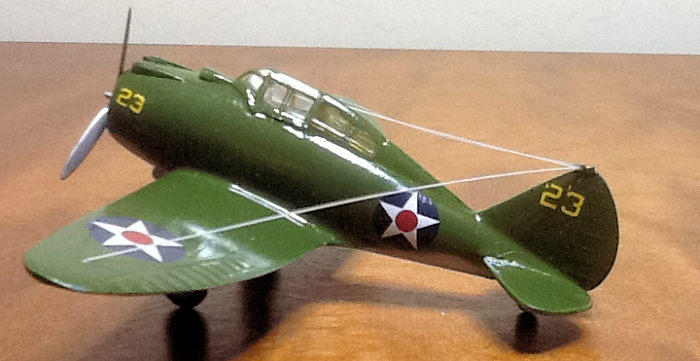 Cowls – 2 were provided, with open and closed cooling flaps – and fuselage
halves had to be thinned from inside. The tombstone-shaped vertical fin and
concrete-slab wings needed external shaving, without altering their shape.
Horizontal stabs, as noted, came from the parts bin and needed only minor
surgery. Mating surfaces, as usual, had to be flattened against a 220 grit
wet/dry sheet and stuck together with liberal glue and filler. The latter
requirement led to a happy discovery. Like all modelers I’ve been on a life-long
search for the perfect filler. The most highly touted is Tamiya’s Mr. Surfacer;
but unless applied in a micro-thin layer, it has nasty habits. It dries slowly
to a sheen that doesn’t easily sand. It out-gasses bubbles that are impossible
to fill. In addition, the stench of the carrier solvent can bring an EPA hazmat
team to your door.
Cowls – 2 were provided, with open and closed cooling flaps – and fuselage
halves had to be thinned from inside. The tombstone-shaped vertical fin and
concrete-slab wings needed external shaving, without altering their shape.
Horizontal stabs, as noted, came from the parts bin and needed only minor
surgery. Mating surfaces, as usual, had to be flattened against a 220 grit
wet/dry sheet and stuck together with liberal glue and filler. The latter
requirement led to a happy discovery. Like all modelers I’ve been on a life-long
search for the perfect filler. The most highly touted is Tamiya’s Mr. Surfacer;
but unless applied in a micro-thin layer, it has nasty habits. It dries slowly
to a sheen that doesn’t easily sand. It out-gasses bubbles that are impossible
to fill. In addition, the stench of the carrier solvent can bring an EPA hazmat
team to your door.
I found a better alternative in, of all places, Wally-Mart. In their artsy-craftsy department they sell a line of acrylic hobby paints, under the name of either Plaid, or Apple Barrel. Flats are $.50 for 2oz., gloss $1.00, and satins $.87. The flat white (I imagine any color would do) makes an excellent filler for joint gaps, shallow depressions, and those nasty underwing mounting holes that never seem to file flush. It fills with minimal shrinkage, and when dry, smoothes with a swipe of 600 grit to an invisible feather. Hit it with a zots of primer or finish coat and you’ll never know it’s there. More about Wal-Mart paints anon.
| COLORS & MARKINGS |
I guess
this is anon enough. I’ve never found reason to stray from my devotion to
Testors enamels, particularly since those Japanese aqueous concoctions sell for
$5 plus shipping per fraction of an ounce. Because this was an expendable,
experimental affair, I thought I’d see what all the acrylic fuss was about. I
bought a few Wal-mart paints, dredged up some wrecked wings and fuselages, and
got a fistful of glazed white 4X4 wall tiles from Lowes, which make excellent
mixing pallets as well as
 test paint
surfaces. Brushing straight from the bottle produced a fair to middlin’
coverage. Brush marks leveled out, and surface detail such as panel lines and
rivets poked through adequately. For spraying, I diluted with equal volume of
Future, now called Johnson’s Pledge Floor Care, and blasted it though my Badger
150 at high pressure. The gauge read 35lbs, but those things are never accurate.
Normal spray pattern yielded a grainy texture. I would guess that could be cured
by a few drops of retarder, such as Windsor and Newton Acrylic Flow Enhancer ($7
at Michaels), but a cheaper and more immediate solution was making slow,
repeated passes at high volume needle settings. That produced a heavy,
glass-like layer that dried and shrank overnight to a thin, taught coat that
snuggled into and around all surface detail. After another day drying in the
sun, it resisted attempts to scratch and gouge it with a fingernail or plastic
shard; and one of the ceramic tiles survived a Pots-and-Pans cycle in the
dishwasher without losing any paint.
test paint
surfaces. Brushing straight from the bottle produced a fair to middlin’
coverage. Brush marks leveled out, and surface detail such as panel lines and
rivets poked through adequately. For spraying, I diluted with equal volume of
Future, now called Johnson’s Pledge Floor Care, and blasted it though my Badger
150 at high pressure. The gauge read 35lbs, but those things are never accurate.
Normal spray pattern yielded a grainy texture. I would guess that could be cured
by a few drops of retarder, such as Windsor and Newton Acrylic Flow Enhancer ($7
at Michaels), but a cheaper and more immediate solution was making slow,
repeated passes at high volume needle settings. That produced a heavy,
glass-like layer that dried and shrank overnight to a thin, taught coat that
snuggled into and around all surface detail. After another day drying in the
sun, it resisted attempts to scratch and gouge it with a fingernail or plastic
shard; and one of the ceramic tiles survived a Pots-and-Pans cycle in the
dishwasher without losing any paint.
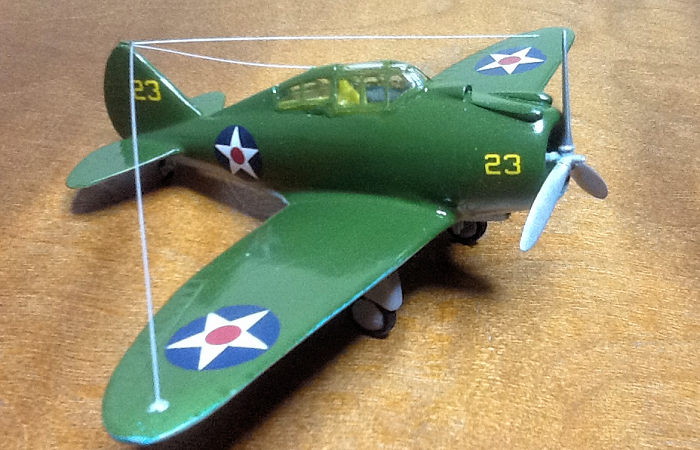
Convinced I was
on to something, I mixed up some gloss OD and gray, masked the greenhouse with
DIY Baremetal foil (Reynolds Wrap and glue stick), and laid multiple coats on
the basic airframe. Incidentally, the canopy was fixed and affixed using another
Wal-Mart discovery – or maybe it was from Lowes. JB Weld Quick Clear is free of
the glitches that plague other brands. It has initial tack, it starts to set
quickly to a workable consistency, and it dries perfectly clear, releasing the
swirls and bubbles usually trapped by mixing. Once dry, I applied the hodgepodge
of decals salvaged from the spares box. Most were yellowed and brittle with age
– just like the reviewer, but succumbed to the last bottle of Solvaset locatable
in the PHX Valley, and settled down all soft and snuggly. My wife suggested that
I try bathing in the stuff. According to internet photos, the y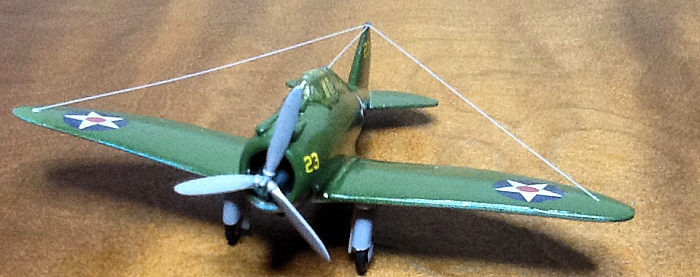 ellow
squadron number should be “25” vice “23”, but the latter was easier to cut from
the Superscale numbers sheet. After a few more days of drying in the sun (I was
afraid this thing might turn into a raisin) everything was sealed in multiple
coats of Future. I like my models all bright and shiny.
ellow
squadron number should be “25” vice “23”, but the latter was easier to cut from
the Superscale numbers sheet. After a few more days of drying in the sun (I was
afraid this thing might turn into a raisin) everything was sealed in multiple
coats of Future. I like my models all bright and shiny.
All the bits and pieces need extensive fiddling, particularly the main landing gear covers. A scoop in front of the windshield had to be scratch built, while several of the nubbins left on the sprues could not be identified or located on photos, so they were omitted. Radio antennae of “invisible thread completed the project.
| CONCLUSIONS |
Another one of these expendable projects and the mo-jo may come back. If you want a 1/72 P-35, hunt up the MPM version.
10 March 2017
Copyright ModelingMadness.com
If you would like your product reviewed fairly and fairly
quickly, please
contact
the editor or see other details in the
Note to
Contributors. Back to the Main Page
Back to the Review Index Page
Back to the Previews Index Page