|
KIT: |
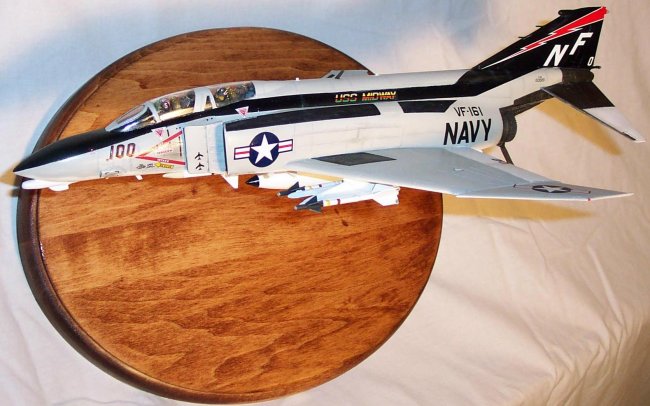
Monogram 1/48 F-4B Phantom II |
|
KIT # |
5813 |
|
PRICE: |
$16.50 |
|
DECALS: |
VF-96 |
|
REVIEWER: |
Peter Fey |
|
NOTES: |
Converted from F-4J kit |
|
HISTORY |
I don’t think I could add anything else to the vast history of the Phabulous Phantom, so I’ll add to a little history about this particular plane and why I decided to build this kit. Back in the early 1990s I had several chances to meet Jack Ensch and hear him speak. Hearing the story of how he and Mugs McKeown downed two MiGs on 23 May 1972 is inspiring to say the least, (all of the books I’ve referenced have great descriptions of this engagement). Ever since then, I’ve been fascinated by VF-161’s success on their last WESTPAC of the Vietnam War—they shot down five MiGs and won the ADM Joe Clifton award as the best fighter squadron in the Navy. When Osprey came out with their fabulous pair of books on F-4 MiG killers, I knew that I’d be building an F-4B from VF-161.
|
THE KIT |
 I don’t even remember when
Monogram first issued this kit—all I know is that it’s been on the shelves as
long as I’ve been going to hobby shops. Like most Monogram kits, there are some
fit problems, but it is a small price to pay for the amount of detail offered.
It has been released in several different boxings over the years, although the
basic kit and decals have been the same. Molded in medium gray, it has: raised
panel lines, excellent cockpit detailing, a canopy that can be modeled open or
closed, crew figures, full weapons load as well as a nice set of Mk 82 bombs
with fuse extenders and TERs, and speed brakes/flaps that can be displayed in
the lowered position. It also includes the intake ECM antennas. Typical of
Monogram kits of that time, the decal sheet leaves a lot to be desired--it is
glossy, out of register, and doesn't stick well (which you would think it would
for all the glue on the sheet). Fortunately, the F-4 is well represented by
aftermarket decals.
I don’t even remember when
Monogram first issued this kit—all I know is that it’s been on the shelves as
long as I’ve been going to hobby shops. Like most Monogram kits, there are some
fit problems, but it is a small price to pay for the amount of detail offered.
It has been released in several different boxings over the years, although the
basic kit and decals have been the same. Molded in medium gray, it has: raised
panel lines, excellent cockpit detailing, a canopy that can be modeled open or
closed, crew figures, full weapons load as well as a nice set of Mk 82 bombs
with fuse extenders and TERs, and speed brakes/flaps that can be displayed in
the lowered position. It also includes the intake ECM antennas. Typical of
Monogram kits of that time, the decal sheet leaves a lot to be desired--it is
glossy, out of register, and doesn't stick well (which you would think it would
for all the glue on the sheet). Fortunately, the F-4 is well represented by
aftermarket decals.
Now why, you ask, would I convert an F-4J into an F-4B when I could have just as easily purchased a Hasegawa one?! Monogram’s kit is an excellent example of the Phantom at about half the cost of the Japanese versions. Sure, you get what you pay for, but I like a challenge! That and reading Mike Wilson’s ongoing saga of converting the Tamiya 1/32 kit made me want to try it in a smaller scale.
|
CONSTRUCTION |
 I started the construction
process by gluing the wings together. The ‘B’ variant does not have the bulged
gear doors or bulged wings, so I needed to make some modifications. Sheet
styrene was cut in the shape of the landing gear doors and glued in place. I
did this with the speed brakes as well. The bulge on top of the wing was sanded
and filed until it was no longer present. I also glued the flaps in the ‘up’
position, and filled the gaps with CA and Squadron Green Putty. At this time I
enlarged some scale drawings to 1/48 scale and used them as a guide to rescribe
the panel lines.
I started the construction
process by gluing the wings together. The ‘B’ variant does not have the bulged
gear doors or bulged wings, so I needed to make some modifications. Sheet
styrene was cut in the shape of the landing gear doors and glued in place. I
did this with the speed brakes as well. The bulge on top of the wing was sanded
and filed until it was no longer present. I also glued the flaps in the ‘up’
position, and filled the gaps with CA and Squadron Green Putty. At this time I
enlarged some scale drawings to 1/48 scale and used them as a guide to rescribe
the panel lines.
Prior to gluing the fuselage together, I glued the cockpit tub in place. I left it unpainted for the time being and concentrated on gluing the fuselage together. (I can hear the gasps of horror as I tell you that I knowingly didn’t convert the Monogram cockpit to a ‘B’ variant, but more on that later.) With the fuselage together I then added all the various antennas on the tail and nose. The IR sensor under the chin was a piece of styrene tubing cut and sanded to shape. Again, having a set of 1/48 scale plans to check my work against made this a relatively easy process. The antenna on the tail is just a piece of sprue from the kit. Next I scribed the panel lines on the fuselage.
With the panel lines scribed on both the wings and fuselage, I mated them together. At this time, I also assembled the splitter plates and intakes. Of course it wouldn’t be a Monogram F-4 without some hideous seams to fill at this point… Copious amounts of Squadron’s Green Putty were used to fix all the seams.
 With the sanding done, I added the various ECM
blisters underneath the wing and intakes. I wanted to display the model with
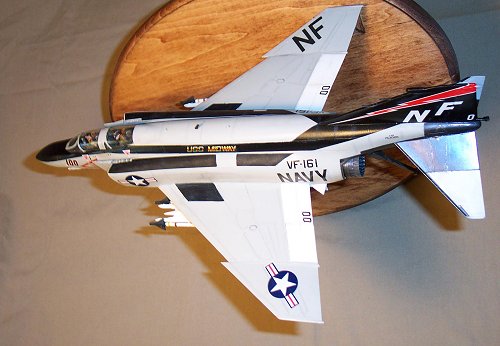
the tailhook down, as it would appear in the overhead stack above the carrier.
I carefully scribed around the tailhook till I could remove it. After sanding
it was set aside for the last step.
With the sanding done, I added the various ECM
blisters underneath the wing and intakes. I wanted to display the model with
the tailhook down, as it would appear in the overhead stack above the carrier.
I carefully scribed around the tailhook till I could remove it. After sanding
it was set aside for the last step.
I finished up with the cockpit. As I mentioned above, I didn’t correct the cockpit to a ‘B’ variant. The human mind will naturally try to fill in the blanks that it can’t see with the eye, so I focused my efforts on the stuff that would be visible. With some resin ejection seats and figures in place, no one would be able to see inside the cockpit. I used the upper portions of two True Details ejections seats, and then bashed together some crewmembers from the kit and an extra from the Hasegawa USN flight deck personnel kit. The Osprey book has some great color photos of VF-161 personnel sitting in their jet, so I used that as a guide to paint the helmets of the aircrew. I finished the cockpit by placing some various wires on the back of the RIO’s instrument panel. The windscreen and canopies were then glued in place and sanded and polished smooth.
|
CAMOUFLAGE & MARKINGS |
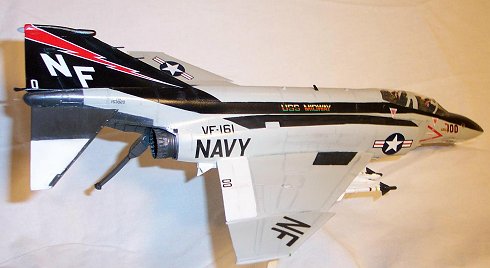
At this point, it was time to head to the paint booth. Before starting the kit, I knew that I was going to be modeling an aircraft from VF-161. Unfortunately I didn’t have the decals, and naively thought that I’d be able to mask and paint them… My first attempt at masking and painting the red lightening bolt almost ended in my chucking the kit out the window, (don’t ask me how I thought I was going to paint the rainbow “USS MIDWAY” on the spine…).
 Enter Modeling Madness’ Swap Shop and Ken Middleton,
who saved my hide for a mere $4! I’ll put my plug in here, as it’s a great
resource if people choose to participate. My thanks to our Fearless Editor for
providing such a forum.
Enter Modeling Madness’ Swap Shop and Ken Middleton,
who saved my hide for a mere $4! I’ll put my plug in here, as it’s a great
resource if people choose to participate. My thanks to our Fearless Editor for
providing such a forum.
So with decals in hand, I proceeded to paint the model. After stripping my previous attempts, I painted the tail and walkways flat black. I masked the black, and proceeded to spray Model Master gloss white. After letting that cure for a day, I masked the white areas and finished off with Model Master Gloss Gull Grey. I let this dry for another day, and then sprayed a coat of Future as a base for the decals.
As mentioned before I used the Superscale sheet 48-325. It has just the basic squadron markings. All stencils and national markings came from my spares file.
With the decals in place I sealed the model with another coat of Future, followed up with a slight overspray of Dullcote to lessen the sheen. Dullcote was sprayed heavily on the walkways to make them flat in contrast to the rest of the kit.
|
FINAL CONSTRUCTION |
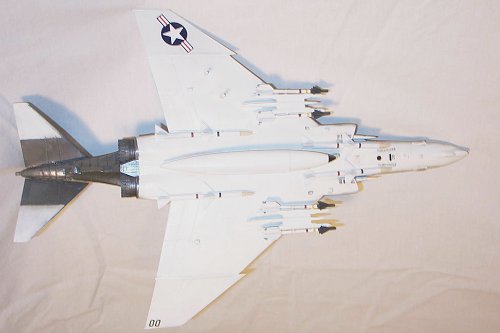
With the painting and decals done, I moved on to the
stores. First, I removed the TERs from the underwing stations. Then I trimmed
and sanded the AIM-9s to make them look a little more realistic. After masking
and painting, I mounted 4 AIM-7s and 4 AIM-9s. The centerline drop tank was
also added at this time. 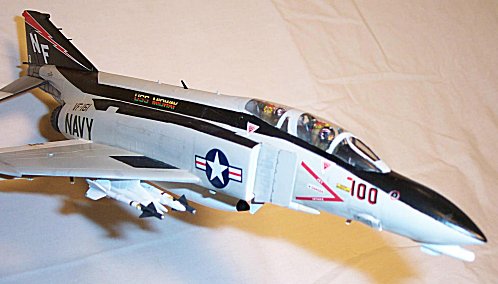
Knowing that the exhausts provided by Monogram weren’t appropriate for the F-4B, I looked at ways to convert them. I made several attempts at converting them before I happened upon some Aires Resin F-4B exhausts. I didn’t like spending more on a set of resin exhausts than I did for the entire kit, but I think they really spruce up the appearance of the model. The last thing I did was glue the tailhook in a lowered position. To prevent against any potential breakage, I drilled matching holes in both the plane and tailhook and glued a metal rod to strengthen the joint.
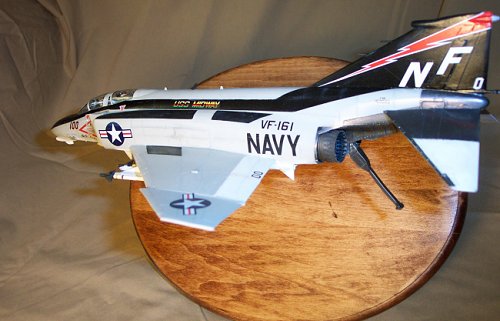
I mounted the plane to a wooden base, and added a plaque with the phrase, “Rock Rivers, CHARLIE!” With a picture hanger on the back of the base to hang it from the wall, it looks quite sharp.
|
CONCLUSIONS |
I spent almost 25 hours on this conversion. It would have been less were it not for my misguided attempts at painting the markings. Although other F-4B kits are available, I felt I was up to the challenge posed by Monogram’s venerable kit. I would recommend it to anyone who has some extra time and would like to try something other that a “shake-n-bake” kit.
|
REFERENCES |
“The Thrill of victory! The Agony of Defeat. A MiG killer becomes a POW.” Naval Aviation Museum Foundation, Fall 1992 CAPT John C. Ensch
“…And kill MiGs Air to Air Combat in the Vietnam War.” Lou Drendel. Squadron Signal Publications. 1984.
US Navy F-4 Phantom II MiG Killers 1972-1973
Osprey Combat Aircraft#30. Brad Elward and Peter Davies. 2002.
If you would like your product reviewed fairly and quickly by a site that has well over 175,000 visitors a month, please contact me or see other details in the Note to Contributors.