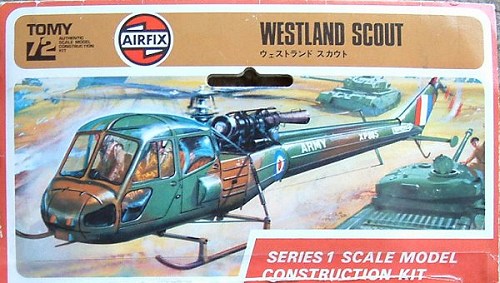
Airfix 1/72 Westland Scout
|
KIT: |
Airfix 1/72 Westland Scout |
|
KIT # |
1042 |
|
PRICE: |
cheep, cheep; fun, fun |
|
DECALS: |
Royal Jordanian Air Force and Army Air Corps |
|
REVIEWER: |
|
|
NOTES: |
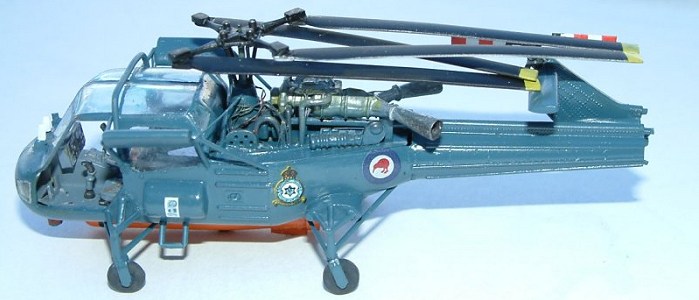
Kit-bashed to a RNZ Navy Wasp |
|
HISTORY |
The Wasp was operated by the RNZN as a standard anti-submarine equipment aboard it’s four frigates, the Waikato, Wellington, Canterbury and the Southland, it was normally flown by a solo pilot carrying two 122kg torpedos. The Wasps were maintained by N0 3 Squadron at the RNZAF base at Auckland. In an unusual arrangement, the aircraft were flown by naval pilots, and maintained by air force personnel. RNZN rotary training is provided by the RNZAF, and in recent years there has been increased pilot exchange between the two services. Staff rotation is generally over eighteen months to two years. The helicopters are also rotated as the various naval vessels are refitted, and as the frigates are re-assigned duties. The aircraft were officially retired on April 9, 1998, as the Navy acquired Kaman Sea Sprites to equip the ANZAC frigates now coming on line.
|
THE KIT |
The Airfix Scout is one of the early 70 releases in the clear blister-pak with the painting, decal and instructions printed on the back of the cardboard. Two decal options are offered for the Scout including a very colourful white/red Jordanian Air force version.
There is no 1/72nd scale kitset of the Westland Wasp that I am aware of and although there is the airwaves conversion set for this particular kit when Scott (MM) sent me this kit to review I decided to Kiwi’fy it by converting the Scout into a Wasp the hard way, by scratchbuilding. I managed to find some plans on the internet of both the Scout and the Wasp, by studying the plans I could see the main differences between the Scout and Wasp was the undercarriage, with the Scout having skids and the wasp having a complex strut/wheel setup.
There are a few photos of the RNZN Wasps at kiwiaircraftimages.com but most of these have been taken from the front of the Chopper and doesn’t include any full shots, lots of very good detail shots but I had to “best guess” a lot of the details.
|
CONSTRUCTION |
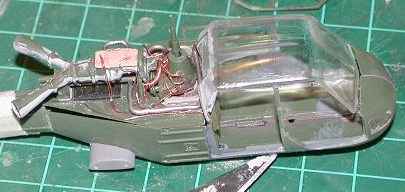
 First
part of construction commenced by building in some extra details into the
cockpit as all Airfix offer you is a couple of basic seats a centre
console and a floor. Plastic card was added to the floor and a few detail
added to the seats, the compulsory brown sheepskin car seat was added to
the
First
part of construction commenced by building in some extra details into the
cockpit as all Airfix offer you is a couple of basic seats a centre
console and a floor. Plastic card was added to the floor and a few detail
added to the seats, the compulsory brown sheepskin car seat was added to
the 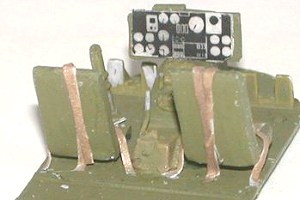 pilot’s seat using brown painted masking tape. The interior of the
RNZN (Royal New Zealand Navy) Wasps are painted a light grey so Tamiya
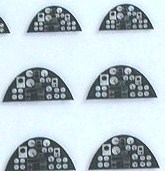
XF-66 was used. The instrument panel was printed up on overhead
transparency sheet and cut to shape and looks the part in this scale.
pilot’s seat using brown painted masking tape. The interior of the
RNZN (Royal New Zealand Navy) Wasps are painted a light grey so Tamiya
XF-66 was used. The instrument panel was printed up on overhead
transparency sheet and cut to shape and looks the part in this scale.
Moving on to the engines required a little bit more work as the engine supplied by Airfix is very basic, extra details were added from bits of plastic, wire, resin off-cuts and solder. Rather going for total accuracy at this scale the aim was more to busy up the power-plant. The exhausts were cleaned up and hollowed out a little more, scaling them to plans and photos show them to be was under scale and not conical enough.
 Having
to scratch-build the complex undercarriage was made more difficult in the
fact that I couldn’t find any clear shots on how and where the lower
undercarriage struts attached to the underside of the chopper, so again
they are “best-guessed” for location. The undercarriage was built up
using stretched sprue and lengths of paper clip wire. The rear
undercarriage extensions were carved out of a chunk of laptop case as the
plastic is nice and thick. The wheels came from various 1/144th
scale jet planes that my sons have shot down in their air battles.
Having
to scratch-build the complex undercarriage was made more difficult in the
fact that I couldn’t find any clear shots on how and where the lower
undercarriage struts attached to the underside of the chopper, so again
they are “best-guessed” for location. The undercarriage was built up
using stretched sprue and lengths of paper clip wire. The rear
undercarriage extensions were carved out of a chunk of laptop case as the
plastic is nice and thick. The wheels came from various 1/144th
scale jet planes that my sons have shot down in their air battles.
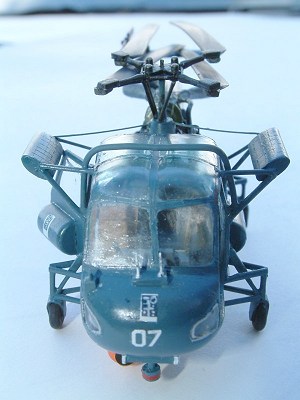
The
Scout/Wasp canopy fit is shocking as seen by the gap in the photo, being
a good 1mm too short at the front. The fit was even worse around the
front doors but thankfully the RNZN removed the front doors off their
Wasps to facilitate quick exit in the event ditching at sea! The doors
were carefully cut out
 and binned, while I had the knife in my hand I
decided to remove one of the rear doors as well as it made it easier to
shuffle the badly fitting canopy around if you don’t have to try and line
up the top of the doors as well. The huge gap at the bottom of the canopy
was filled with a sliver of plastic card and Tamiya filler thinned with
Nail polish remover added until the gap was filled.
and binned, while I had the knife in my hand I
decided to remove one of the rear doors as well as it made it easier to
shuffle the badly fitting canopy around if you don’t have to try and line
up the top of the doors as well. The huge gap at the bottom of the canopy
was filled with a sliver of plastic card and Tamiya filler thinned with
Nail polish remover added until the gap was filled.
With so much cutting and hacking going on I thought “what the Hell” let's fold the tail at the same time, so off with her head errr tail. A small hinge was made out of 10 tho card and prettied up with some wiring. The Scout has a single tailplane that sits under the rotor and on the Wasp it is at the top and on the opposite side of the rotor so the tailplane was cut in half and glued to the top. Various lumps and bumps around the nose were added from plastic card and filler with the blade ariels being off-cuts from an etched brass set.
The rear rotor went AWOL, a common problem at the moment with me, the last three models have all been missing important pieces (lost by me), so a new one was made up from thin plastic card and a length of sprue. The main rotors were given a slight weight droop and glued in the folded position. Pitch control arms were added from stretched sprue and painted matt black and the rotor assembly was put aside until the construction was complete as it is rather delicate.
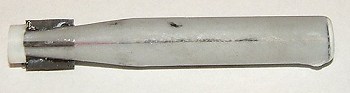 The
final scratchbuilt bits included the dummy practice torpedo which was
made out of an old bomb with plastic card fins. The “things” (remember I'm
not a chopper nut) over the rear doors were carved out of laptop plastic
and stretched sprue for the supports. A bar that runs over the top of the
canopy and down to the front undercarriage on the real one is shaped more
like a I beam but no matter how many times I tried to bend some
Plastistrut or plastic card I could not get it to bend in the right
place, in the end I settled for a round bar made out of stretched sprue
as a round section is a lot easier to bend around the sharp curve of the
cockpit.
The
final scratchbuilt bits included the dummy practice torpedo which was
made out of an old bomb with plastic card fins. The “things” (remember I'm
not a chopper nut) over the rear doors were carved out of laptop plastic
and stretched sprue for the supports. A bar that runs over the top of the
canopy and down to the front undercarriage on the real one is shaped more
like a I beam but no matter how many times I tried to bend some
Plastistrut or plastic card I could not get it to bend in the right
place, in the end I settled for a round bar made out of stretched sprue
as a round section is a lot easier to bend around the sharp curve of the
cockpit.
|
CAMOUFLAGE & MARKINGS |
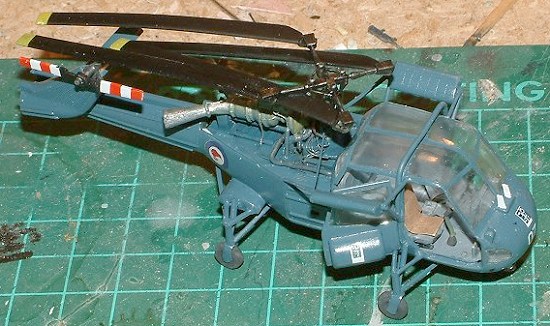 Because
of the small size (it’s barely 4 inches long in 1/72nd scale)
and the large amount on glass that I couldn’t mask easily I hand brushed
the Wasp using a home brewed Blue/Grey mix eyeballed from photos that for
the life of me will never be able to replicate! Two coats were brushed on
and the when dry the paint was given a rub over with a nylon pot scrubber
to smooth down some of the brush marks. A number of coats of Future was
the brushed on the give the correct gloss coverage for the decals.
Because
of the small size (it’s barely 4 inches long in 1/72nd scale)
and the large amount on glass that I couldn’t mask easily I hand brushed
the Wasp using a home brewed Blue/Grey mix eyeballed from photos that for
the life of me will never be able to replicate! Two coats were brushed on
and the when dry the paint was given a rub over with a nylon pot scrubber
to smooth down some of the brush marks. A number of coats of Future was
the brushed on the give the correct gloss coverage for the decals.
Decals were cobbled together from the spares box, The Kiwi roundels
coming from the Matchbox Strikemaster sheet and the Squadron badge is
from a Esci RAF sheet, it’s slightly too large but it the smallest I
could find. The markings on the nose and rear doors are stickers that
were applied during a HMNZS Southland open day, the photos are too grainy
to make out all the details apart from the number 50, these were
replicated by hand painting on a white decal. On RNZN Wasps the is a
white “RNZN” lettering on the rear boom unfortunately I have no white
lettering that small so It will have to stay off until such time suitable
lettering can be found. There is also “HMNZS Southland” in very small
lettering under the 07 on the nose and that again was left off due to the
fact that I have nothing that is that small, oh my soul for a Alps
printer J.
|
FINAL CONSTRUCTION |
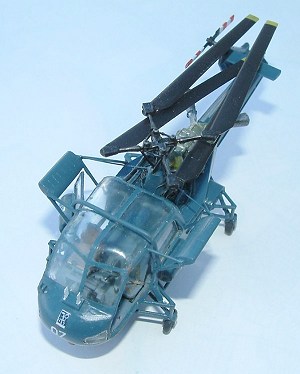
 Final
painting, touch ups and last minute details were added at this point, the
rear door glass added using Kristal Klear which is quite a large area to
fill but looks better than clear sheet glued behind the door frame. With
the preassembled rotor plonked on top and the rear rotor glued on the
Scout was now officially a Wasp HAS.1.
Final
painting, touch ups and last minute details were added at this point, the
rear door glass added using Kristal Klear which is quite a large area to
fill but looks better than clear sheet glued behind the door frame. With
the preassembled rotor plonked on top and the rear rotor glued on the
Scout was now officially a Wasp HAS.1.
|
CONCLUSIONS |
A challenging and fun conversion that pushed my mediocre modelling skills to the limit. The Wasp is not perfect or 100% accurate but it cost me nothing but some time and effort. I have seen photos of the Airwaves conversion over at the Helinews website and it blows my one out of the water. Still I have a Wasp for my Kiwi aircraft collection now and the Scout has woken up a latent desire to do some more of these whirly things. My thanks to MM/FBN for yet another Airfix treasure.
August 2003
|
REFERENCES |
New Zealand Aircraft Illustrated Alan Knowles http://www.kiwaircraftimages.com
If you would like your product reviewed fairly and quickly, please contact
me or see other details in the Note to
Contributors.