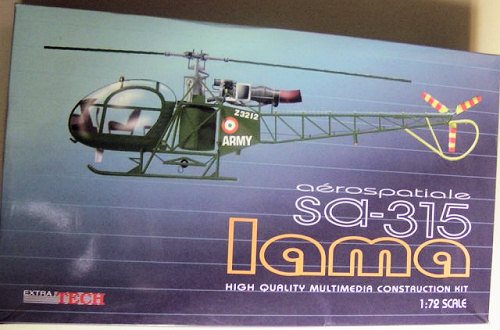
| KIT: | Extra Tech 1/72 SA.315B Lama |
| KIT #: | 7202 |
| PRICE: | $30.00 from Linden Hill |
| DECALS: | Three options |
| REVIEWER: | Kenn Hamm |
| NOTES: | A great kit for that etch and resin fix |
| HISTORY |
The Lama was developed as a result of a specification by the Indian Air Force, in 1968, for a helicopter that could operate well in “hot and high” conditions. Sud Aviation developed the Lama from the older Alouette II, and operates well as a rescue and flying crane platform. Jean Boulet reached 12,442 meters (40,820 feet) in a Lama in 1972, which is still the absolute altitude record for all types of helicopters some 35 years later!
The Lama was produced in France by Sud / Aerospatiale, but also under license by HAL in India (as the HAL Cheetah) and by Helibras of Brazil (as the HB315-B Gaviao).
By 1988, 407 Lamas were in use by 31 countries around the world, with France, India, and the Andean nations of South America (like Argentina, Brazil, Chile, and Ecuador)
| THE KIT |
 Extratech
is yet another great Czech modeling factory, and is probably best known for its
detail sets for a wide array of kits. However, they have made a number of kits
of their own over the years. I’ve only ever seen this kit and the two radar
stations, but they did a number of armor kits and at least one other helicopter
kit. I am not sure of their current status, as their Web site has not been
updated since January 2005, but this kit is apparently still for sale at Linden
Hill Imports, where I bought it in 2004.
Extratech
is yet another great Czech modeling factory, and is probably best known for its
detail sets for a wide array of kits. However, they have made a number of kits
of their own over the years. I’ve only ever seen this kit and the two radar
stations, but they did a number of armor kits and at least one other helicopter
kit. I am not sure of their current status, as their Web site has not been
updated since January 2005, but this kit is apparently still for sale at Linden
Hill Imports, where I bought it in 2004.
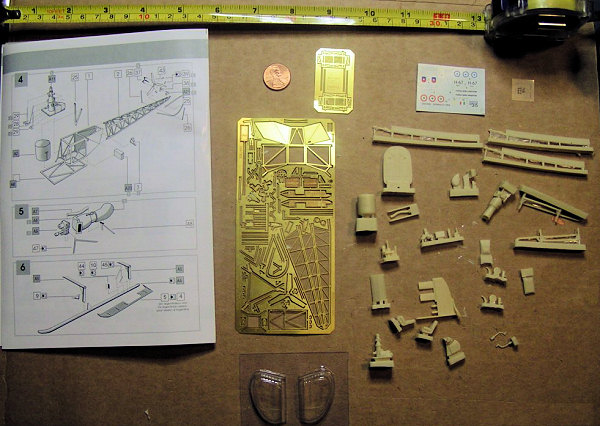
The kit is made up of 43 resin bits, 85 etched parts, the two vacuformed cockpit halves, and a tiny 1.5 inch by 2 inch decal sheet. The box is waxed paper over a stout corrugated cardboard bottom.
The photo etch frets are well detailed and there are several tiny bits for my big ham-fisted fingers (pun intended) to wrestle with. Tweezers are a must with this one. I’d also recommend a bending rig like the ones that Small Shop puts out to help cut out bend and shape your etched parts because they are small, thin, and fragile, not unlike the braces in these types of lightweight helicopters in real life. Most impressive are the baskets on each side for the Chilean version, which are very finely detailed and quite a motivator for building the Chilean version, by my reckoning!
The resin is very crisp and my copy is quite free of bubbles. There is the usual gossamer that will need to be cut away from some areas, like between the landing skids, and there will be some sawing of blocks, but all in all the resin is ready for paint with a wash to clean off the molding chemicals. There are some small and thin parts here, so be careful. I took the control sticks and bagged them up separately so they aren’t near the rest of the bits which, while not huge, would still easily snap the controls in two if handled roughly.
The vacuformed canopy is the entire canopy bubble, which will be a challenge to mask off and paint, but at least a little easier than having to assemble all that glass into a frame, like I have seen in some plastic molded kits. It keeps the plastic thin, and while it isn’t crystal clear, a coat of future should give it a realistic look.
The instructions are good about showing an exploded three-dimensional view of what you need to do for each of the eight very complicated and delicate steps to craft this little wonder. Whether a part is etched, resin, or vacuformed plastic is identified in the first pages that show each of the parts of the kit in two dimensions. I would prefer to see more details on the bends of some of the more complicated etched parts, especially the area just behind the cockpit where the engine and fuel tank attach to the frame, which has several folds I think you will want to get right the first time.
 The
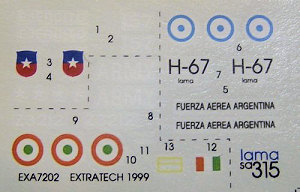
decal sheet, as I said, is very small, but then so is this kit. You get three
different versions on the sheet. The first is for the Indian Army Air Force,
and is by far the largest of the three in terms of decal sizes, but all the
decals would easily fit on an American or British postage stamp! The second
version is for the Argentina Army Air Force and the third is for the Chilean
Army Air Force. The Indian and Chilean birds are in Olive Green, while the
Argentine bird is in Orange. All three have the brightly painted yellow and
fluorescent red tail rotors with yellow rotorguards. The decals are my only
gripe for this kit, as they remind me of modern Heller decals. They look sharp
and are in register, but there is that silvery outline around them of about 1/16
of an inch (~1.5mm), that will need to be trimmed, or neutralized with Micro Sol
and a very careful application of Future.
The
decal sheet, as I said, is very small, but then so is this kit. You get three
different versions on the sheet. The first is for the Indian Army Air Force,
and is by far the largest of the three in terms of decal sizes, but all the
decals would easily fit on an American or British postage stamp! The second
version is for the Argentina Army Air Force and the third is for the Chilean
Army Air Force. The Indian and Chilean birds are in Olive Green, while the
Argentine bird is in Orange. All three have the brightly painted yellow and
fluorescent red tail rotors with yellow rotorguards. The decals are my only
gripe for this kit, as they remind me of modern Heller decals. They look sharp
and are in register, but there is that silvery outline around them of about 1/16
of an inch (~1.5mm), that will need to be trimmed, or neutralized with Micro Sol
and a very careful application of Future.
The decal and painting guides appear to be spot on, at least for the Chilean and Indian versions. I wasn’t able to find an image of the Argentine version in 1:1 scale. It did lead me to one more little gripe. The image in the instructions booklet shows what turns out to be a French version , but there are no decals for said version, and no images, other than the well-drawn images on the box top, of any of the included versions.
| CONCLUSIONS |
This kit is simply excellent. I included a couple of small criticisms for what really are trivial issues, if only to flex my reviewer muscles a bit, but all in all it is a great project. This is not for someone new to resin or photo-etch. You should have a few resin kits under your belt, and some serious time with etch bits before you attempt this kit. What you will likely end up with, though, is a kit that will look very delicate and detailed. Using the included finishing options give you a little different subject matter as well, as the three air forces are much less common options.
| REFERENCES |
Kit instructions
FAI Records page on Jean Boulet - http://records.fai.org/pilot.asp?from=rotorcraft&id=439
Wikipedia entry on the Alouette II http://en.wikipedia.org/wiki/Aerospatiale_Alouette_II
Extratech Website www.extratech.cz
September 2007
This kit is courtesy of my wallet, purchased from Linden Hill Imports.
If you would like your product reviewed fairly and quickly, please contact me or see other details in the Note to Contributors.