Kinetic 1/48 S-2E/G Tracker
| KIT #: | 48024 |
| PRICE: | $89.00 SRP |
| DECALS: | One option |
| REVIEWER: | Tom Cleaver |
| NOTES: | New tool kit |
| HISTORY |
The Grumman S2F, nicknamed the “Stoof,” revolutionized carrier-based
anti-submarine warfare.
Designed in 1951 to a Navy specification calling for an aircraft capable of
performing both the “hunter” and “killer” role in ASW, Grumman was awarded a
contract for the G-89 design on
 Powered by two 1,525 h.p. Wright R-1820 Cyclones, the S2F-1 has a
wingspan that is close to that of the North American B-25, and is only
slightly shorter in fuselage length than that medium bomber.
With wing-folding, the overall span is reduced to only slightly more
than the span of the horizontal stabilizer. Combining both hunter and killer
roles meant that a carrier could carry fewer aircraft than a squadron
equipped with the Grumman A2F “Guardian,” with more capability.
Powered by two 1,525 h.p. Wright R-1820 Cyclones, the S2F-1 has a
wingspan that is close to that of the North American B-25, and is only
slightly shorter in fuselage length than that medium bomber.
With wing-folding, the overall span is reduced to only slightly more
than the span of the horizontal stabilizer. Combining both hunter and killer
roles meant that a carrier could carry fewer aircraft than a squadron
equipped with the Grumman A2F “Guardian,” with more capability.
The S2F-1 entered license production by deHavilland
The designation changed to S-2A in 1962.
In 1959, the S2F-3S first appeared, later designated S-2D.
This sub-type introduced major changes, with the fuselage lengthened
18.5 inches ahead of the wing, and widened 3.25 inches, while wingspan was
increased by 35 inches. Th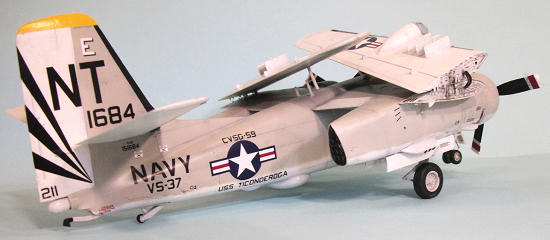 e
tail surfaces were enlarged, and fuel capacity was increased sufficient to
increase on-station patrol endurance from 6 hours with a range of 900 miles
for the S-2A to 9 hours and a range of 1,352 miles for the S-2D.
Avionics were improved, a more powerful searchlight was installed,
and an improved
e
tail surfaces were enlarged, and fuel capacity was increased sufficient to
increase on-station patrol endurance from 6 hours with a range of 900 miles
for the S-2A to 9 hours and a range of 1,352 miles for the S-2D.
Avionics were improved, a more powerful searchlight was installed,
and an improved
Following military service, the Tracker took on a new job as a
fire-fighting aircraft, replacing the aging Grumman TBM and Douglas B-26 in
such service. Its excellent low
altitude performance and maneuverability allows the airplane to operate
safely over difficult terrain.
Many have been upgraded over the years with more powerful turboprop engines;
this upgrade was also adopted by several of the smaller air forces that
continued to operate the Tracker.
| THE KIT |
The S-2A was released in 1/72 scale by Hasegawa in the 1970s, and has
been available since. This S-2E
is the first injection-molded kit of the later Tracker, and the only one in
1/48 scale. The kit provides
the option of assembly with wings folded or extended, underwing ordnance and
two torpedoes for the bomb bay, a cockpit that is “detailed enough” for what
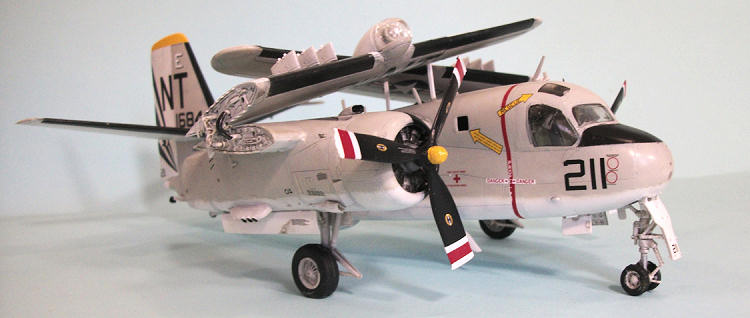
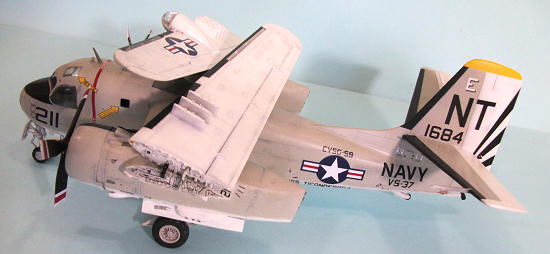
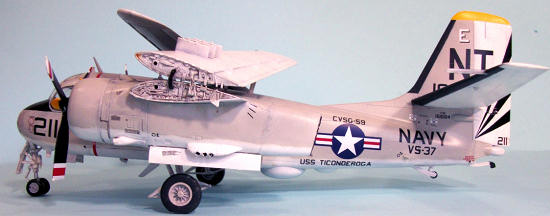
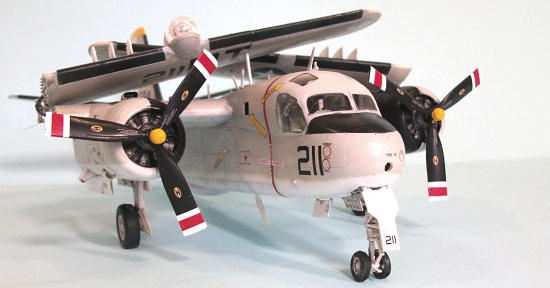
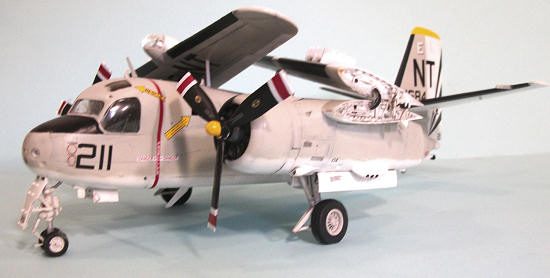
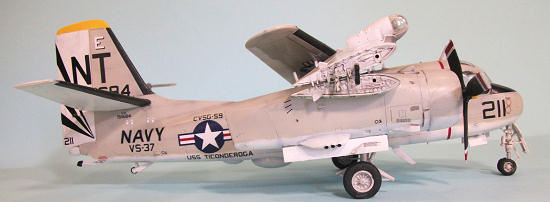
the viewer can see when completed. Decals are provided for one airplane, an
S-2E flown by VS-37 aboard USS
| CONSTRUCTION |
Construction is straightforward, but there are things I would do
differently if I were to build a second one, based on what I know now.
Hopefully if you haven’t built yours yet, you can follow these
suggestions and have a better result.
First, the molding of the wings and tail are such that the extreme
trailing edge is molded with the upper half of the wings and horizontal
stabilizers, and with the right fuselage half.
The molding of the part that fits to that is not as good as it could
be in each case. You should
sand down the inner side of the mating part, to insure a smooth fit without
a “ridge” because if you don’t
 you
will have a lot of putty to apply and sand down, with concomitant loss of
detail. But thinning the edge
before assembly will avoid this.
you
will have a lot of putty to apply and sand down, with concomitant loss of
detail. But thinning the edge
before assembly will avoid this.
The other problem is insuring nose sit.
Most of the kit is behind the main gear.
On the real airplane, most of the weight, engines, cockpit, bomb bay
ordnance, etc., is ahead of the gear and so nose sitting is not a problem.
I stuffed squashed fish weights in every nook and cranny: behind the
instrument panel, under the cockpit floor to either side of the nose gear
bay, and it wasn’t enough. I
ended up having to pry off the engines and cowling from each nacelle and
fill the area ahead of the main gear wells with heavier weights.
And even then with all of that, the sit is problematic because that
weight isn’t far enough ahead of main gear to be really effective.
You should fill the area immediately behind the cockpit bulkhead with
heavier weights, in addition to all the cramming into the nose.
You can’t see anything in there through the windows, so don’t worry.
Paint the interior black and all is well.
Putting the weight as far forward as possible is necessary to insure
proper sit. And even then,
after you have put in twice as much weight as necessary, do not attach the
engines and cowlings to the nacelles until you have the rest of the model
assembled, with the gear in the wells, so you can check the balance.
It will be likely you’ll need a few more weights in the front of the
nacelles.
You need more weight than you think because of the position of the
wings if you fold them, since they go fore and aft of the center point of
the main gear and will mess up your weight and balance.
So be sure before you close up those nacelles that you have fitted
the wings in the position you want them in, to check the balance.
 Don’t worry about the gear.
It is plastic, but it is molded strong enough that I do not foresee
it collapsing any time soon. If
you’re really worried, get metal gear from Scale Aircraft Conversions, but I
don’t think it’s really necessary.
Don’t worry about the gear.
It is plastic, but it is molded strong enough that I do not foresee
it collapsing any time soon. If
you’re really worried, get metal gear from Scale Aircraft Conversions, but I
don’t think it’s really necessary.
If you are going to build the model with the wings folded, be sure to
check the fit of the hinge parts, that they can slide into the holes right
with a minimum of fuss BEFORE you glue in the end plate to the inner wing.
It is far easier to get that right at this early point than it is to
try and get it to work right with the model assembled.
(Ask me how I know)
The bomb bay doesn’t have a lot of detail.
If you are going to assemble it closed, glue the bomb bay doors in
position before you glue the fuselage together, so you can work on getting
them in the right position from both inside and outside while they are
setting up. Putting a piece of
evergreen strip inside the bay door centerline is a good idea to get proper
fit.
Do not put the antennas and other little fiddly bits on until after
you have painted and decaled the model.
The one exception is the large blade antenna on the lower fuselage.
I scratched a “groove” in the proper position with an X-acto, which
will give a better attachment than just butt-fitting it as is the original
design.
If you do all that at the assembly points where it’s easy, the kit
presents no problems. I did
find that I wanted a nice solid attachment of the wing braces on top of the
fuselage, a strong attachment both to the fuselage and the wing, to get a
solid assembly.
| COLORS & MARKINGS |
| FINAL ASSEMBLY |
| CONCLUSIONS |
Copyright ModelingMadness.com. All rights reserved. No reproduction in any form without express permission from the editor.
If you would like your product reviewed fairly and fairly quickly, please contact the editor or see other details in the Note to Contributors.