Hobby Boss 1/72 AH-1S Cobra
| KIT #: | 87225 |
| PRICE: | 65 yuan RMB |
| DECALS: | Two options |
| REVIEWER: | Richard F |
| NOTES: |
| HISTORY |
 he
Cobra went on to fight in the Gulf War and again, this century, in Iraq
and Afghanistan (a modified two engine series flown by the US Marine
Corps). In all, the various models of the Cobra have been in service
getting on to fifty years, with the US Army, US Marines, Israel, Turkey,
Pakistan, Iran, Taiwan and Japan. The Israeli Cobras have seen plenty of
action and Iran reportedly used its choppers in the long, wasteful and
pointless war against Iraq. There are various claims and stories about
the Cobras engaging Iraqi Mi-24
he
Cobra went on to fight in the Gulf War and again, this century, in Iraq
and Afghanistan (a modified two engine series flown by the US Marine
Corps). In all, the various models of the Cobra have been in service
getting on to fifty years, with the US Army, US Marines, Israel, Turkey,
Pakistan, Iran, Taiwan and Japan. The Israeli Cobras have seen plenty of
action and Iran reportedly used its choppers in the long, wasteful and
pointless war against Iraq. There are various claims and stories about
the Cobras engaging Iraqi Mi-24| THE KIT |
 Our editor ably previewed this kit
right here on MM.
Our editor ably previewed this kit
right here on MM.
In a nutshell this is a really nice kit - well moulded, clear canopy, some
decent cockpit detail (though no panel decals which is a shame) and some
weaponry - a pair of quad pack TOW launchers for the outboard pylon and a choice
between a skinny and a fat rocket pod inboard. You can do the Japanese version
you see here or an Israeli version.
| CONSTRUCTION |
Well, I got this as far as the fuselage being sealed up when I discovered I
needed nose weight! It tail sits on the back of the skids if you don't add any.
Luckily I left the exhaust pipe off, so I could stuff some blu-tack in the rear
and jam it forward using a chopstick. That was pretty easy and it looks much
better sitting properly on its skids so it was worth the effort. Before that, I
constructed the basic cockpit. Unfortunately the kit doesn't come with
instrument panel decals and it really needs them because the canopy is so big and so clea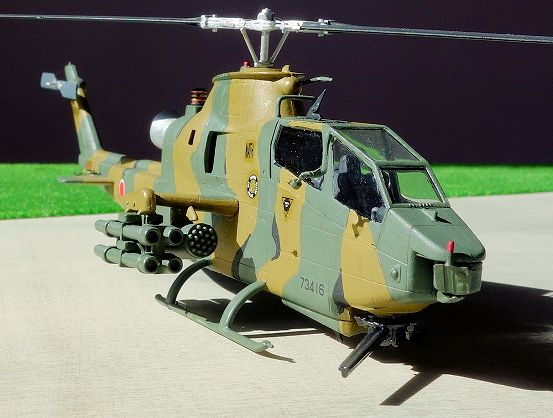 r. I painted some instrument panels but decals would look a lot
better. The rest of the interior is pretty basic and could use some detailing,
but I just painted some seatbelts and completed the kit parts.
r. I painted some instrument panels but decals would look a lot
better. The rest of the interior is pretty basic and could use some detailing,
but I just painted some seatbelts and completed the kit parts.
After painting the main fuselage, and doing the decals (see below), I went about
adding the various smaller parts. I lost one of the tail boom handles, but the
one I retained fit well as did the one that goes above and behind the canopy.
There are a couple of air data probes and some wire cutters, as well as, of
course, the main and tail rotors. The main one goes on nicely, but you need to
hold it for a bit so the smaller, diagonal rods stay correctly in the holes for
them underneath the rotor head.
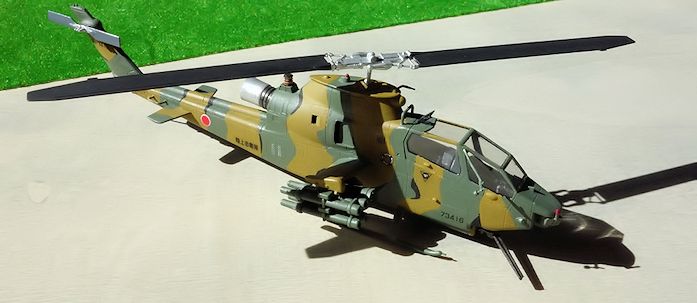
The canopy fits snugly and it really is very clear, so much so that I kind of
wish I'd made more effort in the cockpit. The gun barrel went on last, just
after the weapons pods. The outboard one is the TOW launcher, which is made up
of 7 parts. I chose the fatter rocket pod simply because it went together a
little more neatly than the skinny one.
| COLORS & MARKINGS |
You can build fairly generic looking Israeli or Japanese variants using the
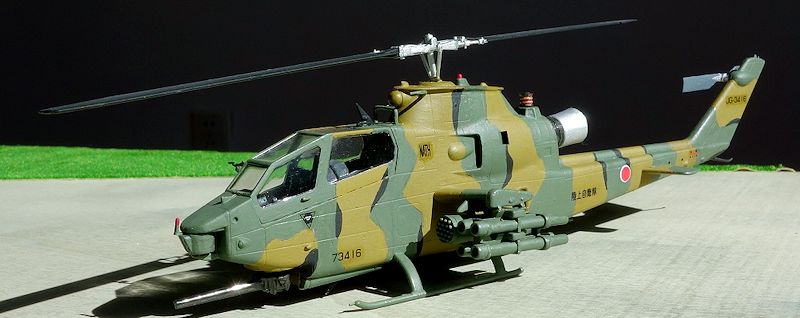
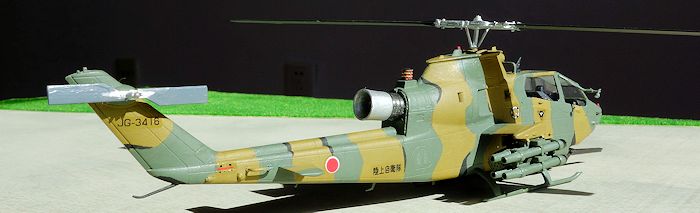
included decals. I went with the Japanese version because the camo scheme is a
little more interesting. The main colours are Tamiya XF-73 (JGSDF green) and
Vallejo 879 (the brown). Neither are what the instructions suggest
(XF-26/Vallejo 895 f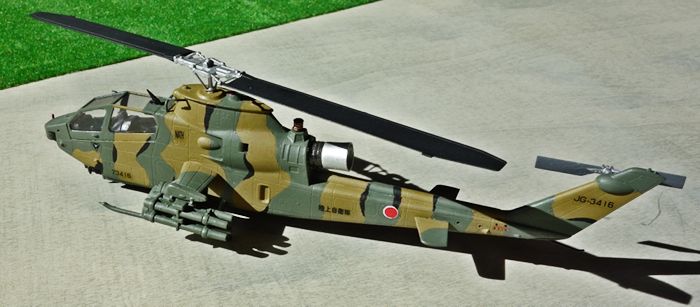 or the green and Vallejo 874 for the brown) but these are
what I could get and they are fairly close (see the pictures in the references).
The camo scheme has a few splashes of black too, and interestingly the entire
underside is green - the brown sections terminate at the base of the fuselage.
or the green and Vallejo 874 for the brown) but these are
what I could get and they are fairly close (see the pictures in the references).
The camo scheme has a few splashes of black too, and interestingly the entire
underside is green - the brown sections terminate at the base of the fuselage.
For the AN/ALQ-144 IR decoy - that little red thing on top of the engine exhaust
- I tried to replicate the mixed colours those things have in real life. They
look like a multi-faceted set of red/gold windows. It's tiny, I could hardly
mask it or anything, so I freehanded as best my eyesight could support. I think
it looks ok from a distance.
The decals, fortunately, are few, because unlike most HobbyBoss decals these
were a little bit shiny despite the best efforts of my good friend Mark. That's
Mr Mark Softer, to you. The red national markings are out of register, which is
pretty obvious as it's the only colourful thing on the whole helicopter.
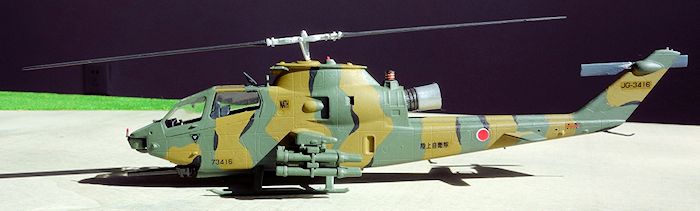
But I really like the camouflage scheme, especially the little ripples of black.
Overall the Cobra has a pretty sleek, menacing appearance, more graceful than
the more recent alternatives like the Mangusta I recently built, or the Apache
and Tiger.
| CONCLUSIONS |
 Any easy to assemble kit (not an EasyAssembly kit, but easy to build) which is
let down just a little bit by its basic cockplt and the out of register Japanese
national markings. But I enjoyed it and while I've not built a Cobra from other
brands I think most non-Cobra devotees will be happy with this, and the real
fans could use it as a sound base for something more detailed.
Any easy to assemble kit (not an EasyAssembly kit, but easy to build) which is
let down just a little bit by its basic cockplt and the out of register Japanese
national markings. But I enjoyed it and while I've not built a Cobra from other
brands I think most non-Cobra devotees will be happy with this, and the real
fans could use it as a sound base for something more detailed.
| REFERENCES |
http://en.wikipedia.org/wiki/
Picture: http://www.flying-wings.com/
Picture: http://static.panoramio.com/
March 2015
If you would like your product reviewed fairly and fairly quickly, please contact the editor or see other details in the Note to Contributors.