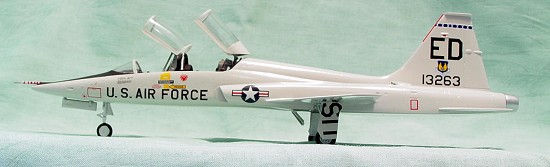
Sword 1/48 T-38A Talon
| KIT #: | SW 48004 |
| PRICE: | $36.00 MSRP |
| DECALS: | Two options |
| REVIEWER: | Kelly Jamison |
| NOTES: | Short run with resin parts. |
| HISTORY |
As the 1950’s rolled on the United
States Air Force put out a contract for a trainer aircraft with higher
performance than the T-33 in order to train pilots on the new hotter flying
aircraft showing up on the tarmac. The T-38 fit the bill for all the Air
Force needs and became the first supersonic trainer in the inventory. First
flown on the 10th of April 1959 and continued
 in production
until 1972, it is still in use today as the modern twin engine and avionics
modified T-38C Talon. Due to superior design, ease of maintenance and low
operational cost made it the perfect aircraft for the new supersonic air
force for the 1960’s. Generations of pilots learned how to tackle the
complexities of flying the next innovation in fighter designs. It has spent
time with the fabled USAF Thunderbirds and with the Navy’s Top Gun school
and as a chase plane for NASA among many of its other roles.
in production
until 1972, it is still in use today as the modern twin engine and avionics
modified T-38C Talon. Due to superior design, ease of maintenance and low
operational cost made it the perfect aircraft for the new supersonic air
force for the 1960’s. Generations of pilots learned how to tackle the
complexities of flying the next innovation in fighter designs. It has spent
time with the fabled USAF Thunderbirds and with the Navy’s Top Gun school
and as a chase plane for NASA among many of its other roles.
| THE KIT |
Many people were very happy when rumor of a new molded T-38 started sweeping the internet. Sword stood up to the plate and tackled this subject. Sword has also tackled such eclectic subjects as the V-173 “Flying Pancake”, Northrop N-1m Jeep and a FM-2 Wildcat in 1/48 scale and a Sikorsky S-43 and Grumman Goose in 1/72. All kits are not slap together kits but do make into wonderful subjects.
Now on to the kit. It is cast in a typical medium gray plastic. I found the plastic to be on the soft side. Easy to scratch but also easy to buff out as well. The clear parts are very scratched and cloudy right out of the box. This gave me some concern. The resin is very good. Well cast with no pinholes. The Northrop M-38 back ejection seat is a copy of the front ejection seat. I am not sure but I have been told from the experts at NASA at Edwards AFB that the two seats are different. I think it has something to do with the canopy breaker at the top of the seat but I could be wrong. (I believe Kelly is right concerning current Talons. When the type was first used and for a decade or two after, it was a standard T-38A as they were often swapped out when due of major overhaul. Ed) For a look at what's in the box, please visit this preview.
| CONSTRUCTION |
The resin parts got a bath in warm water with just a drop of soap in a pie tin. After all the mold release is washed away and the resin parts were dried I airbrushed everything Mr. Surfacer 1500 and then started the fitting process.
 The
nose wheel well needed lots of trimming and sanding to fit up in the nose
correctly. Once I glued it in, I also glued in nose weight. Knowing that
the tail exhaust are resin and the large resin main wheel wells were resin,
I decided to use more nose weight than I really needed. I didn’t want the
thing to be a tail sitter after all that work. A friend of mine discovered
his was a tail sitter after it was too late. He ended pouring Elmer’s Glue
down the intakes and then pouring buck shot down and then another cap of
Elmer’s glue. Then toped it off with scratch built intake covers to hide
the weights. So all is not lost if you do not put enough weight in the
tail.
The
nose wheel well needed lots of trimming and sanding to fit up in the nose
correctly. Once I glued it in, I also glued in nose weight. Knowing that
the tail exhaust are resin and the large resin main wheel wells were resin,
I decided to use more nose weight than I really needed. I didn’t want the
thing to be a tail sitter after all that work. A friend of mine discovered
his was a tail sitter after it was too late. He ended pouring Elmer’s Glue
down the intakes and then pouring buck shot down and then another cap of
Elmer’s glue. Then toped it off with scratch built intake covers to hide
the weights. So all is not lost if you do not put enough weight in the
tail.
A little trick I use is Elmer’s Glue to glue in the resin cockpit tubs to get the alignment right and then use superglue to glue the fuselage halves together. Any small gaps are then filled with your choice of thick superglue or putty. Next come the intakes, which need attention to get them to align up right. More work will be needed on the intakes later due to how they blend in with the landing gear wheel well plug..
I didn’t need too much fitting to get the wheel well area right. It is a nice piece and dropped in with no problem. This is where I stopped construction and puttied up all the seams. The area below the intakes that blend into the resin wheel well plug took lots of sanding and filling to get smooth. Working between the fuselage and engine intakes was a bit of a pain but made easier with Mr. Surfacer. If you can’t find it in your area, try using name brand liquid paper. I have used it in the past and have had no problem. Others say it will shrink and crack. The model I first used it on is over 5 years old and still looks great.
 The
wing is made of two parts. A top wing and a smaller “sub-wing” that gives
the wing some thickness depth to the wheel wells. It needs some more
filling and sanding to blend it to the bottom of the wing cleanly. Now
clean up the wings and take your time when gluing them on. I built a small
jig out of thick cardboard to get the wings perfectly straight. Then more
putty, sanding and blending the wings to the fuselage and bottom of the
aircraft. Use some photo reference to get the angle of incidence correct.
The wings are not perfectly parallel to the ground.
The
wing is made of two parts. A top wing and a smaller “sub-wing” that gives
the wing some thickness depth to the wheel wells. It needs some more
filling and sanding to blend it to the bottom of the wing cleanly. Now
clean up the wings and take your time when gluing them on. I built a small
jig out of thick cardboard to get the wings perfectly straight. Then more
putty, sanding and blending the wings to the fuselage and bottom of the
aircraft. Use some photo reference to get the angle of incidence correct.
The wings are not perfectly parallel to the ground.
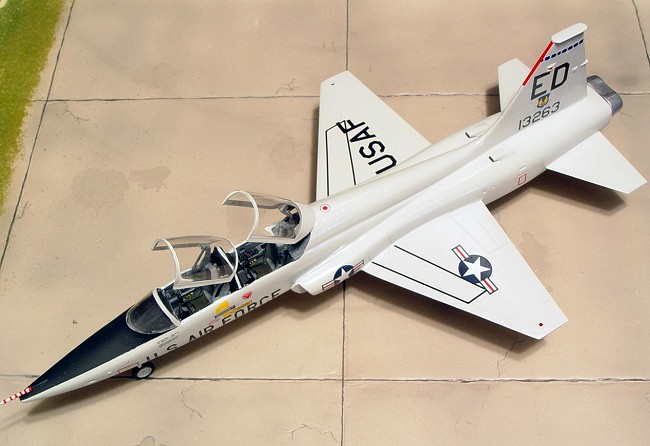
I glued the upper intakes after hollowing them out a bit and then I glued the pitot tube on and blended it into the nose. It makes it very easy to break off so you have to be especially careful. The plane got a polishing with a soft cotton cloth and another good cleaning. Then I superglued the front windscreen and got it blended into the nose. This is when I notice that the nose isn’t exactly the right shape. It should have a small half cone shaped ridge running up the nose to the fuselage. It almost looks like an afterthought and slightly changes the shape of the nose. I could have corrected it by making small sharp triangle pieces stacked on top of each other until the ridge area is built up.
| COLORS & MARKINGS |
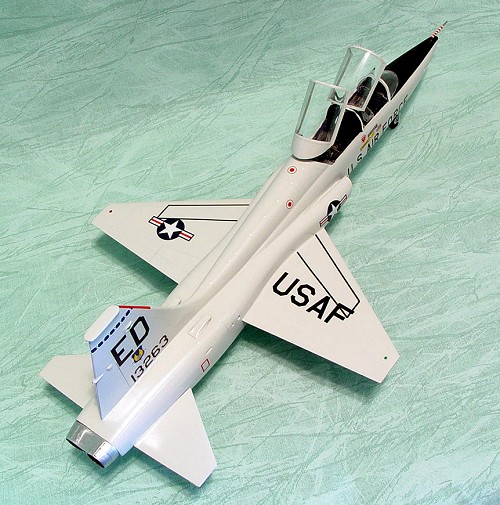
Next came the tail planes which fit just fine. I used Tamiya AS-20 Insignia White spray paint for the overall color. I was very surprised with this product. It painted on very well and dried fast. I airbrushed Tamiya gloss white for the wheel wells, landing gear, landing gear covers and inside the speed brakes to get a slight tonal difference. The plane got a good coating of Future over everything. I put the kit into a large Tupperware container to keep dust off of the paint. It really helps.
The
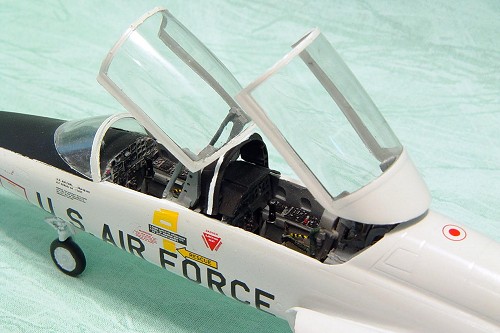
canopies got rubbed with Tamiya polishing compound and a soft cotton cloth
until they shined. A few dips into Future and they were crystal clear and
my fears ended up being unfounded. They got masked off and painted with the
same Tamiya Insignia White. The forward canopy lifting mechanisms do not
have a positive place to be glued. The instructions are
 vague and you just
take a shot as to where they belong. I had to use a good side profile of a
T-38 with the canopies open and a bottle of superglue with accelerator to
get it fixed into place.
vague and you just
take a shot as to where they belong. I had to use a good side profile of a
T-38 with the canopies open and a bottle of superglue with accelerator to
get it fixed into place.
I used Jet Exhaust and Silver Alclad II to paint the afterburner covers. The engine exhaust got flat black. One of the banes of this kit is the main gear tires. They are just wrong. I took the two wheel halves and sanded them down until they were much thinner. I think I could have sanded a bit more off. The main gear doesn’t have a very big axle to put the wheel on so be careful here.
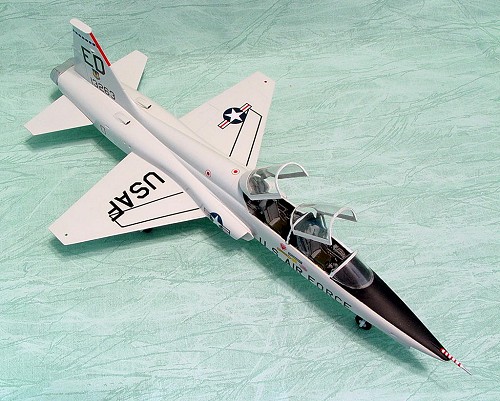
Next came my favorite part. The decals. I used a combo of Superscale Decals for the star and bars along with the USAF. TwoBob’s Decals for the “ED” and kit decals for the “U.S. Air Force” and rescue arrows gave the plane its identity.. After destroying a set by accident, I got another set from a kind soul on the internet. Another coat of Future. I used decal film to finish out the pitot tube.
| CONCLUSIONS |
This is a nice kit. The decals were nice but not great. The instructions were weak but this is not uncommon among Sword kits and an experienced modeler will not have any problem. It looks awesome on the shelf. I really wish they would re-issue different versions like an AT-38B and a T-38C. It has all the typical quirks of a limit production kit but has found its way into our modeling hearts and is a sought after kit now on the open market. Sword needs to be commended on this kit and please hear my plea to issue another run. I have a stash of NASA decals just waiting for it.
October 2004
Copyright ModelingMadness.Com. All rights reserved. No reproduction in any form without express permission from the editor.
If you would like your product reviewed fairly and fairly quickly, please contact the editor or see other details in the Note to Contributors.