| KIT #: | PD-19 |
| PRICE: | $ |
| DECALS: | Three Options |
| REVIEWER: | Rick Crabill |
| NOTES: | Kit includes two complete aircraft |
| HISTORY |
The Douglas A-4 was a
single-engine US Navy attack jet that first flew in 1954. It was originally
designated A4D before the Navy changed their nomenclature in 1962. Designed Ed
Heinemann sought to minimize size and weight. It was intended to do without wing
folding, which permitted a lighter and simpler wing structure. The Skyhawk’s
small size allowed it to be operated from Essex-class carriers which could not
support larger aircraft like the F-8 Crusader and F-4 Phantom II. The A-4 served
in the
 The A-4 received a new lease in life as a stand-in for the MiG-17 in the
US Navy’s “dissimilar
air combat training” program (Top Gun). Its excellent maneuverability and small
size made it a difficult target. Skyhawks served as “aggressors” well into the
21st century. The A-4E & F versions carried a dorsal ” hump” for
additional avionics, but this was often removed during the latter stages of the
Skyhawk’s service life.
The A-4 received a new lease in life as a stand-in for the MiG-17 in the
US Navy’s “dissimilar
air combat training” program (Top Gun). Its excellent maneuverability and small
size made it a difficult target. Skyhawks served as “aggressors” well into the
21st century. The A-4E & F versions carried a dorsal ” hump” for
additional avionics, but this was often removed during the latter stages of the
Skyhawk’s service life.
The
VA-164 “Ghost Riders” and
“Lady Jessie”:
VA-164 was formed in 1960 and was deployed exclusively in the Western
Pacific/
| THE KIT |
See Scott’s preview of this kit .
| CONSTRUCTION |
The kit was built “Out of Box”.
Because this is my first jet, and my first high-detail 1/144 build, my review
will cover all the steps in detail, so nobody will repeat my mistakes!
Step 1 - Drop tanks. Let the tanks halves
dry thoroughly before gluing on the tail fins. Big plus for Platz here – they
made the alignment peg/hole for the fin assemble square instead of round to
insure proper alignment. ( Note: I later broke one of the fins off, and had to
take them all off for symmetry).
 Step 2 -
Step 3 -
Wings and Fuselage. NOTE: make sure you open the holes in the underside
of the wings for the pylons BEFORE you glue wing top and bottom together. The
diagram for this step indicates that you glue the wing cannon in place before
gluing the wing to the fuselage assembly, but I do not recommend this. The
cannon are small and fragile. They could easily be broken. Let both the wing
assembly and fuselage assembly dry overnight before gluing them together.
Next we have the only unclear part of
assembly – the joining of wings to fuselage is not obvious by the diagram. The
wings have the nose gear bay built in. The gap in the nose of the Skyhawk
fuselage does not allow you to snap the wing/gear bay assembly in place.
What you want to do is slide the assembly into the fuselage from behind.
I can only liken the movement to putting your foot into a loafer – slide it in
at a slight downward angle (if you hold the fuselage upside down), and
everything should fit fine. When you glue the trailing edge of the wing to the
fuselage underside, make sure you clamp it good and let it sit overnight. NOTE:
the guns for the wing roots (parts 10 & 11) are not identical – dry fit before
gluing!
Step 4 - Fiddly bits. The main problem
here will be the two-part engine intakes on each side. This is where experience
with previous 1/144 kits will come in handy. NOTE: the bottom of the seat will
need to be filed down as it sits too high for the canopy to be closed. The
horizontal stabilizers went on without any problem. I left off the engine plug
(part 14) to allow me to insert a stick up the exhaust to make handling easier.
I also left off the refueling probe (part 21) until the model is complete.
| COLORS & MARKINGS |
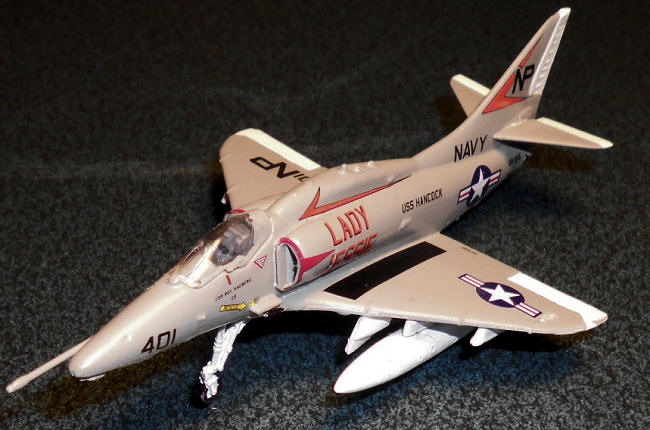
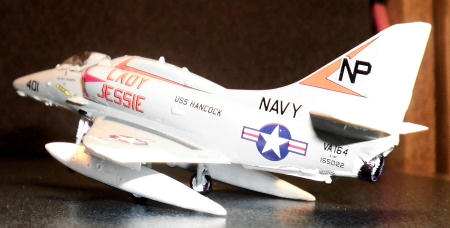
Color scheme chosen was that of
“Lady Jessie”
with VA-164 “Ghost Riders” in 1969, flying off of the USS Hancock. The serial
number of this Skyhawk is BuNo 155022. Colors are Light Gull Grey over White,
with White control surfaces. Wheel well
 interiors are also white. This scheme is
particularly attractive on the Skyhawk. I first sprayed the model with white
Krylon primer. After that had dried, I sprayed Tamiya TS-26 Pure White overall
.I masked off the underside of the model, and the upper side control surfaces.
Upper grey color was Tamiya AS-2 IJN Light Gray, which is very close to the USN
LGG and was what I had available on my bench! A fine-line Black Sharpie was used
for the tires, exhaust, and cannon. The ejection seat was painted primer gray.
interiors are also white. This scheme is
particularly attractive on the Skyhawk. I first sprayed the model with white
Krylon primer. After that had dried, I sprayed Tamiya TS-26 Pure White overall
.I masked off the underside of the model, and the upper side control surfaces.
Upper grey color was Tamiya AS-2 IJN Light Gray, which is very close to the USN
LGG and was what I had available on my bench! A fine-line Black Sharpie was used
for the tires, exhaust, and cannon. The ejection seat was painted primer gray.
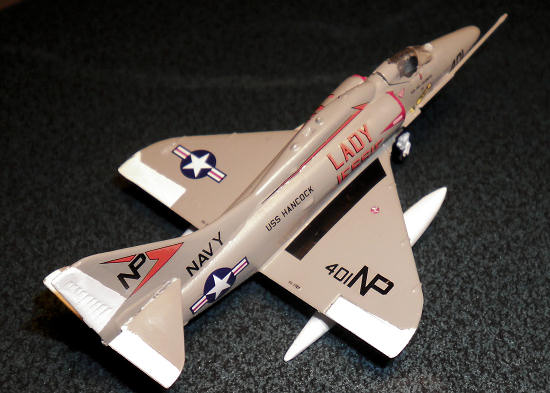
I took care with the decals – they are crisp and sharp, but VERY small.
Look at the decal sheet carefully before cutting as some of the insignia are
combined with the stenciling onto one piece of decal film. This aids in
placement. Wing markings were done first. For the fuselage, my procedure is to
start at the tail, working my way down one side, and then doing the same on the
other side. The most difficult decals were the red markings around the mouths of
the engine intakes.
| CONSTRUCTION CONTINUES |
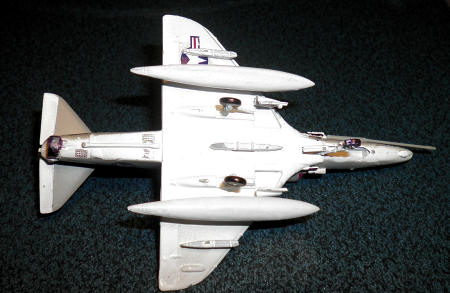
Step 5 – Weapons pylons and landing
gear. In retrospect, these parts should have been glued to the underside of
the wing BEFORE painting. My mistake, and not likely to be repeated! Fit is
good, if tight. I glued the pylons first, saving the stalky and somewhat
fragile gear legs for last. Adding the engine plug, fueling probe and canopy
completed the model.
| CONCLUSIONS |
| REFERENCES |
 http://en.wikipedia.org/wiki/A-4_Skyhawk
http://www.usshancockassociation.org/
http://www.va-164.org/lady_jessie.htm
http://www.amarcexperience.com/AMARCDB.asp?SessionId=75876555&Type=3&Include=3&SortOrder=1&Code=A004&Model=A004F
– listing of Skyhawk # 155022 at AMARC aerospace storage and maintenance
facility adjoining Davis-Monthan Air Force Base
http://www.modelingmadness.com/scotts/viet/previews/platz/pd19.htm - Retro Wings offers a “slick” fuselage conversion kit available from Starfighter Decals. This allows you to convert the Platz kit to a Blue Angels bird!
March 2012
Thanks to Platz for the preview kit. If you would like your product reviewed fairly and fairly quickly, please contact the editor or see other details in the
Note to
Contributors.