Matchbox 1/72 F-5A Freedom Fighter
|
KIT # |
PK 12 |
|
PRICE: |
$ cheap |
|
DECALS: |
Two options |
|
REVIEWER: |
Scott Wirz |
|
NOTES: |
|
HISTORY |
 The F-5 series began life as a privately funded lightweight
fighter development of the T-38 Talon. Because Northrop was paying for
the project out of its own pockets, they designed the new fighter with
the idea of using as many T-38 components as possible. The Department of
Defense supported the idea enough to supply $50 million for engineering
development and the new fighter flew for the first time in July of 1959.
Despite the promise of the new aircraft, it was not until 1962 that the
Kennedy Administration stepped in to order the F-5A for export to
friendly countries. F-5As would be flown by a number of nations,
including Canada, Taiwan, South Korea, and Iran. Later models would be
flown by an even greater number of nations and continue to remain in
service today.
The F-5 series began life as a privately funded lightweight
fighter development of the T-38 Talon. Because Northrop was paying for
the project out of its own pockets, they designed the new fighter with
the idea of using as many T-38 components as possible. The Department of
Defense supported the idea enough to supply $50 million for engineering
development and the new fighter flew for the first time in July of 1959.
Despite the promise of the new aircraft, it was not until 1962 that the
Kennedy Administration stepped in to order the F-5A for export to
friendly countries. F-5As would be flown by a number of nations,
including Canada, Taiwan, South Korea, and Iran. Later models would be
flown by an even greater number of nations and continue to remain in
service today.
|
THE KIT |
Copyrighted 1973, the Matchbox F-5A has been around for a long
time. Most modelers looking to build an F-5 will rightfully go for the
Esci/Italeri F-5 family-the best of the 1/72 scale lot. I purchased this
kit several years ago as part of a lot and kept it as a kit I could try
new techniques on. In this case, I experimented with Gunze's Mister
Surfacer and Alclad's aluminum lacquer.
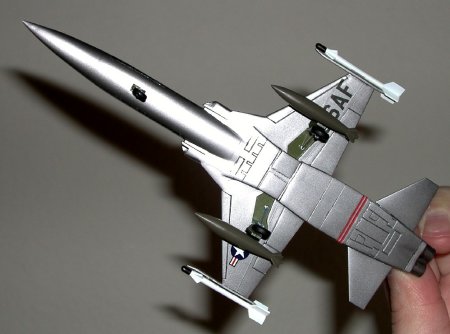
 The kit is "quality engineered" (their phrase) in white and blue plastic
with decals for a bare metal USAF prototype and a neatly camouflaged 433
Squadron Canadian bird. Most of the panel lines are raised, but those
that aren't consist of deep trenches. Your only option is to add
Sidewinders or fuel tanks to the wingtips.
The kit is "quality engineered" (their phrase) in white and blue plastic
with decals for a bare metal USAF prototype and a neatly camouflaged 433
Squadron Canadian bird. Most of the panel lines are raised, but those
that aren't consist of deep trenches. Your only option is to add
Sidewinders or fuel tanks to the wingtips.
|
CONSTRUCTION |
Construction is very straight-forward. You don't get much for a
cockpit, just a seat and pilot, and the wings and horizontal stabilizers
are simple, one-piece units. Fit is generally o.k., but I used filler on
most of the seams. Since I was trying Mr. Surfacer for the first time,
that was a good thing. In certain instances, such as the wing join on
the fuselage bottom, I used a LOT of filler. During this time, the
overscale nose pitot departed the airframe. I thought about replacing
it, but have since decided to bag it.
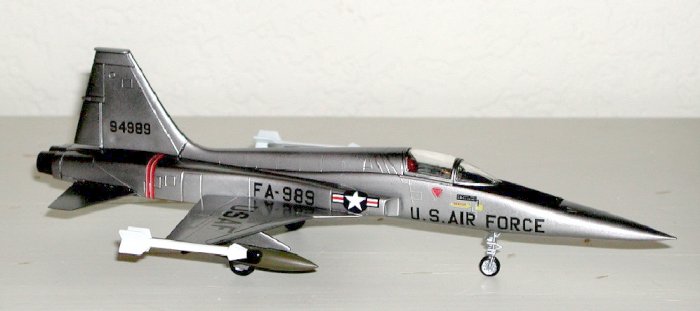
Since I was wanting to try the Alclad paint range, I elected to build the
USAF version. I primed the model with Gunze Gloss Black, waited a few
days, then gave Alclad Aluminum a shot. I like the Alclad very much, but
the next time I try the aluminum color, I'll prime the model with a light
to medium grey. Because of the primer coat, the finish turned out darker
that I care
for.
|
COLORS AND MARKINGS |
 This version of the kit supplied the full color markings guide
on the bottom of the box. I suspected the decals might fall apart, so I
picked one of the stars and bars for a test. The decal held together in
the water and didn't complain when I mashed it over the rivets of an old
wing section. Test passed! Since I now had three national insignias and
needed four, I replaced the lot with Superscale markings.
This version of the kit supplied the full color markings guide
on the bottom of the box. I suspected the decals might fall apart, so I
picked one of the stars and bars for a test. The decal held together in
the water and didn't complain when I mashed it over the rivets of an old
wing section. Test passed! Since I now had three national insignias and
needed four, I replaced the lot with Superscale markings.
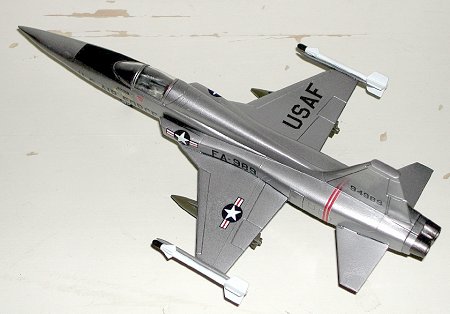
I applied the remaining kit decals as directed with one variation. I
didn't want to cut the USAF decal on the bottom wing (it's supplied as
one piece in the kit), so I just moved it over. It's not at all
accurate, but I wasn't out to build the world's best Freedom Fighter, so
I can live with fudging things a little bit.
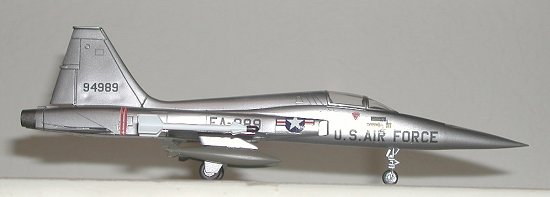
After the decals had set for a day or so, I gently washed them using a
Q-Tip and water, then overcoated with Gunze gloss clear. I next masked
off the anti-glare panel with Tamiya masking tape, painted it olive drab,
added the remaining bits and called it done. I was very impressed that
the Tamiya tape created a nice, sharp edge and did not lift the Alclad.
(I've heard
great things about Alclad and, having used it, am sold on it!)
|
CONCLUSIONS |
This model is not nearly perfect, but it didn't have to be. The
natural metal finish highlights surface imperfections and the
 Mr. Surfacer filler shrinkage and that's o.k., too. I've learned a great
deal about the benefits and limitations of both and have a reasonable
looking model to boot. When I one day get around to building my Esci
F-5A, I'll hang this one in my son's room. He won't care about the
imperfections one bit.
Mr. Surfacer filler shrinkage and that's o.k., too. I've learned a great
deal about the benefits and limitations of both and have a reasonable
looking model to boot. When I one day get around to building my Esci
F-5A, I'll hang this one in my son's room. He won't care about the
imperfections one bit.
If you're looking to try out natural metal finishes, new fillers or
techniques, this is a great kit. If you're looking to build the
definitive model of an F-5A, buy the Esci/Italeri kit. 'Nuf said.
|
REFERENCES |
Despite being a beautiful and widely used aircraft, I've found only
a few books specifically dedicated to the F-5. Because I wasn't overly
concerned with accuracy, I was happy to follow the kit's instructions for
the painting scheme. For the more dedicated, here are a few of the
references available:
F-5 in Action, Aircraft Number 38, Lou Drendel, Squadron/Signal
Publications, 1980
F-5: Warplane for the World, Robbie Shaw, Motorbooks International, 1990
F-5 Tigers Over Vietnam, Anthony J. Tambini, Branden Publishing Co., 2000
Vietnam Air War Debrief, Robert F. Dorr, Airtime Publishers, 1996 (While
not specifically devoted to the F-5, Dorr's book puts its use in context
and is a good introduction to the air war over Vietnam.)
March 2004
If you would like your product reviewed fairly and fairly quickly, please contact the editor or see other details in the Note to Contributors.