Revell 1/72 Morane-Saulnier Type N
| KIT #: | 644 |
| PRICE: | AU$5.00 |
| DECALS: | One option |
| REVIEWER: | George Oh |
| NOTES: | A basic, but buildable kit |
| HISTORY |
Early in WWI, aircraft were used to spy on the
enemy - reconnaissance. Opposing pilots would carry a pistol or rifle to
discourage reconnaissance flights. Soon, they tried to mount a machinegun in
an aeroplane. But pilots knew that machinegun bullets fired through an
aircraft’s propeller would eventually strike and damage a propeller blade,
which would soon cause the aircraft to crash. The pilot would  have
essentially shot himself down. So machineguns were mounted to be fired
sideways by the pilot, or in other directions by a second crewman. Still,
pilots quickly learnt that the place to be safest from an enemy machinegun
was directly in front of the enemy aircraft's propeller.
have
essentially shot himself down. So machineguns were mounted to be fired
sideways by the pilot, or in other directions by a second crewman. Still,
pilots quickly learnt that the place to be safest from an enemy machinegun
was directly in front of the enemy aircraft's propeller.
But this all changed when French pilot Roland Garros fitted armoured-steel wedges to the back of his propeller blades. These protected the propeller blades by deflected the bullets that would have struck them. Now, he could attack an enemy aircraft by flying straight at it. Garros’ aircraft of choice was a parasol-type Morane-Saulnier Type L.
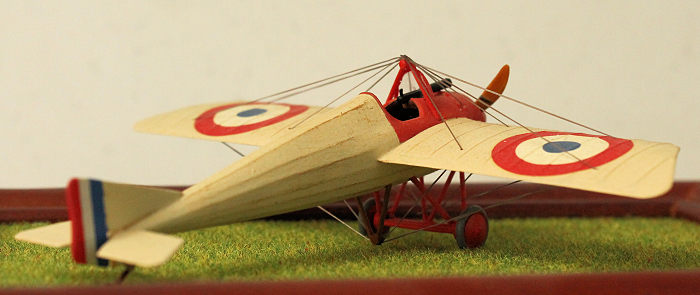
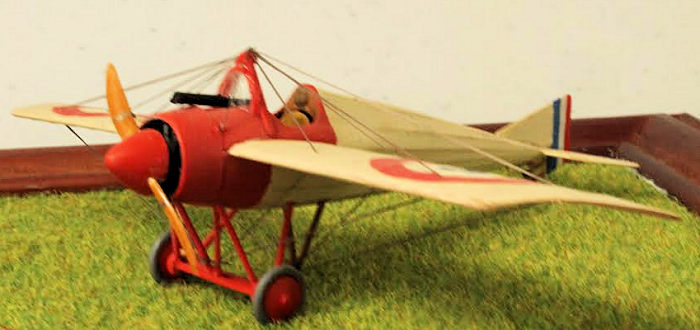
The later Morane Saulnier Type N was a French-built single-seat monoplane designed around a machinegun and deflector plates, so it was one of the first purpose-designed fighter-planes (or scout). The Type N was a small, but streamlined (for its day) aircraft that was nimble, but difficult to fly because it was controlled in-flight by changing the position of the wing-tip trailing edges – a method known as wing warping. Yet it was sensitive because of its whole tail-plane moved (called a flying tail today), and had a high (for its day) landing speed. It was known as the ‘Bullet’ in RFC service because of a huge ‘casserole’-type spinner that streamlined it, but impeded cooling air from getting to the engine. It was quickly removed without hurting the aircraft’s performance.
In 1915, it was flown by the French, the British RFC and the Imperial Russian Air Force. Only 49 were built, because it was soon rendered obsolete by better technology. Wing warping gave way to ailerons, and deflector wedges gave way to interrupter gear that stopped the machinegun from firing when a propeller blade was just entering the line of fire.
| THE KIT |
 This is an ancient mould that has been
released in at least two iterations – French and Russian. I built the boxed
French version (in cream plastic) some time ago 'cos I liked the red front.
Then recently, I re-discovered this header-and-bag Russian version (in
silver/grey plastic), in my stash. I bought it way back when (because I
thought that the fin-and-rudder markings looked cool) and built it in five
days. So now I’ve built both iterations and present both here.
This is an ancient mould that has been
released in at least two iterations – French and Russian. I built the boxed
French version (in cream plastic) some time ago 'cos I liked the red front.
Then recently, I re-discovered this header-and-bag Russian version (in
silver/grey plastic), in my stash. I bought it way back when (because I
thought that the fin-and-rudder markings looked cool) and built it in five
days. So now I’ve built both iterations and present both here.
Of the 24 parts, many of the parts showed mould slip and/or flash. Though the plane should have a windscreen, the kit provides only an ill-fitting frame. The kit provides a spinner (though not the large casserole-type one) for the French version, but only the painting guide indicates that it is not required on the Russian version. For the rest, the fit of the parts was pretty good. I started the Russian version of this model because I was catching my breath after a 3-day model show and then a Club kit-sale. I knew that it’d be a quick, relaxing build (experience, you know), so why not.
| CONSTRUCTION |
On both models, the first step was to paint the
insides with a light yellowish-brown. Next, I joined the fuselage halves then
added the single-piece wing to its front while the paint on the seat dried. I
forgot to add seatbelts in the Russian version – Rats!! Care was taken with the
wings because, on the French
one, the starboard wing drooped noticeably. On the
Russian version, I carefully rechecked that the wing roots were correctly
lined-up with the sides of the fuselage to get the wings straight. Throw-in t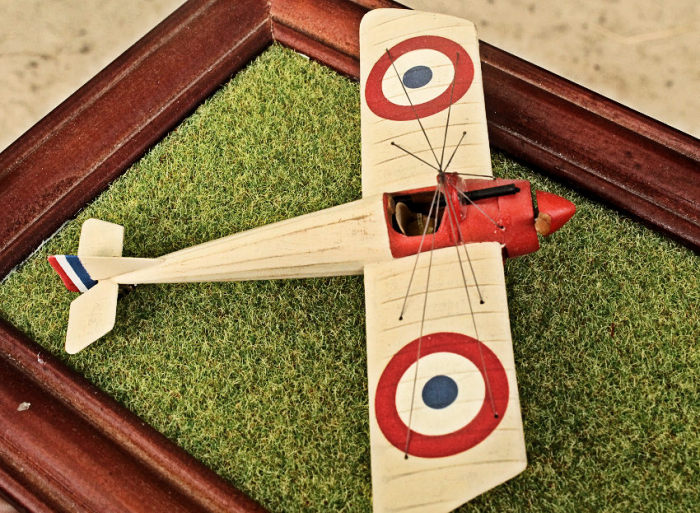 he
seat, then position the cockpit deck and cowling, and the airframe was pretty
complete. To make painting easier, I left-off the engine. Instead, I positioned
the engine-retaining ring behind the cowling to provide a deep foundation for
the engine’s mounting pin. Positioning the tail planes at right-angles to the
fixed tail skid revealed that, like on the French version, the wings were out of
kilter. When I tried to bend the offending wing into its correct position, it
cracked at the wing-root. I hastily slathered Tamiya quick-setting glue over the
cracked area and within a minute, it had solidified into the correct position.
Yay me!!
he
seat, then position the cockpit deck and cowling, and the airframe was pretty
complete. To make painting easier, I left-off the engine. Instead, I positioned
the engine-retaining ring behind the cowling to provide a deep foundation for
the engine’s mounting pin. Positioning the tail planes at right-angles to the
fixed tail skid revealed that, like on the French version, the wings were out of
kilter. When I tried to bend the offending wing into its correct position, it
cracked at the wing-root. I hastily slathered Tamiya quick-setting glue over the
cracked area and within a minute, it had solidified into the correct position.
Yay me!!
The top and underside king posts were correctly identified (both are similar in shape, but not in size) and positioned, then the undercarriage was assembled in-situ. One of the Russian plane’s undercarriage hanger struts was warped, but by gluing it in-place last, it straightened-up because the others held firm. Yay me, again! It is quite sturdy for a bunch of thin plastic sticks.
| COLORS & MARKINGS |
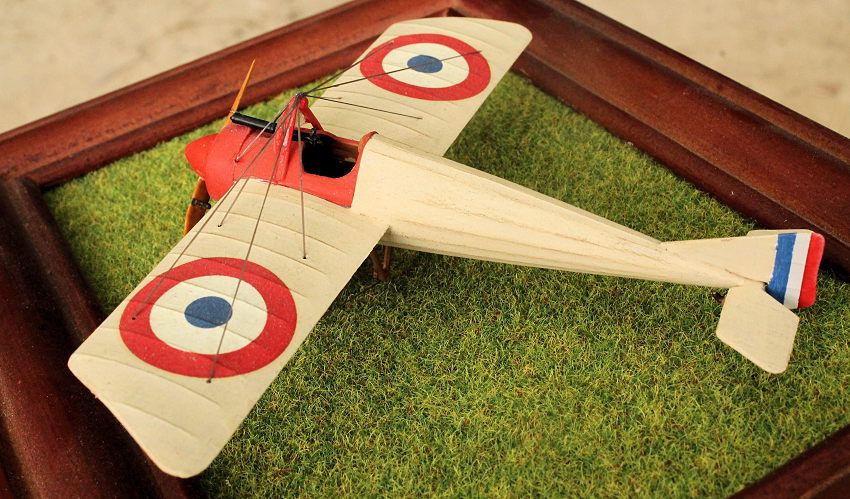
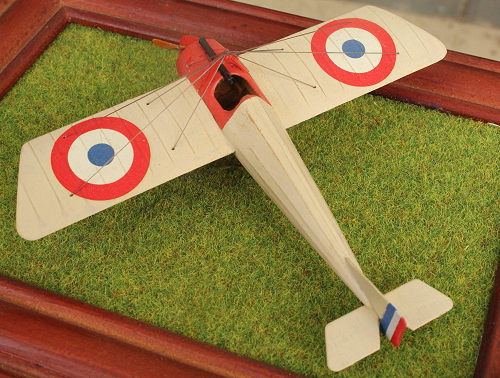
Before painting the French version, the rudder was
painted white. This was then masked down the centre to allow me to brush-paint
the red and blue stripes. The rest of the airframe was brush-painted with
Citadel Miniatures (CM) bleached bone that is my stand-in for a linen colour,
then the front portions were painted with CM blood red. For the Russian version,
the instructions called for an overall coat of silver on the airframe (I assume
that the aircraft was silver-doped), so I squirted it with T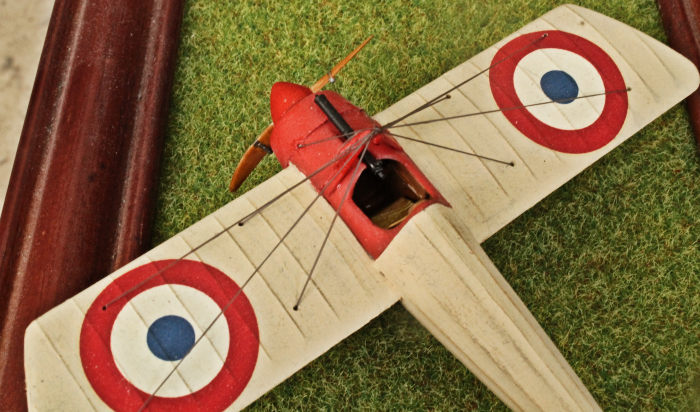 amiya silver. The
single-piece tailfin-and-rudder was brush-painted with CM chaos black. As usual,
Future was applied to the airframes in preparation for the decals.
amiya silver. The
single-piece tailfin-and-rudder was brush-painted with CM chaos black. As usual,
Future was applied to the airframes in preparation for the decals.
Both engines were painted CM chaos black, then the cylinder pots were drybrushed with silver. Their exhaust pipes were brush-painted with a brick red then drybrushed with bronze. Detail-wise, the propellers were brush-painted a brown leather colour with the French one receiving its red spinner, and the Russian one receiving some tiny plastic dots in-lieu of the hub nuts, and a bronze hub plate. The wheels were brushed CM shadow grey. I can't remember which CM dark brown was used on the padded-leather cockpit rim and the tail skid (apart from the metal retaining bands).
On the both models there were four identical roundels for the wings and the Russian one had the two skull-and-cross-bone decals for the rudder. All decals went down onto the dry Future, and were settled with a liberal application of Microsol. A little care is needed to ensure that the roundels don’t cover the pre-drilled rigging holes, and the death-heads should be trimmed of their carrier film so that it doesn’t extend over the trailing edge of the rudder.
| FINAL CONSTRUCTION |
Before fitting into place, the machinegun was painted black then rubbed all-over with an HB lead pencil. On the French model, I tried to replicate the wind screen by dumping the empty frame and using a piece of vacform packaging. It was not very successful in my opinion (FAIL!! Double Rats!!). Having learnt THAT lesson, I took another track with the Russian model. I painted the thick windscreen frame black, then I superglued it to a curved piece of vacformed packaging (from a small battery) to replicate the glass. When all was dry, I trimmed the packaging and superglued it into place under the top king post. Fit is iffy and I needed a (24th-scale?) shoe-horn to get it in to place.
On both models, I did only half of the rigging
with fine black EZ-Line by trying to follow the vague rigging diagram. My method
was to anchor the ends of the EZ-Line to the bottom king post or undercarriage
struts, winding it around the model by passing it through the
 pre-drilled holes
in the wings, and then attaching the loose end to the other side of the anchor
point. Tension was provided by stretching it when I lifted the strand onto the
dot of superglue atop the upper kingpost. The wing holes were eventually filled
with Krystal Kleer, but they are still visible (Rats and double rats!!). Because
I judged it too small and fussy to do, I left-off the rudder and tail plane
control wires - besides, control horns were absent and they would have been too
small to add.
pre-drilled holes
in the wings, and then attaching the loose end to the other side of the anchor
point. Tension was provided by stretching it when I lifted the strand onto the
dot of superglue atop the upper kingpost. The wing holes were eventually filled
with Krystal Kleer, but they are still visible (Rats and double rats!!). Because
I judged it too small and fussy to do, I left-off the rudder and tail plane
control wires - besides, control horns were absent and they would have been too
small to add.
The last bits to be attached were the propeller to the engine, to press-fit this assembly into the cowling, and then to glue the wheels & outer covers to the axle. This completed the model. Nope – paint the deflector wedges with CM boltgun metal. To hide the drooping wing of the French version, I mounted it obliquely on a base. It’s nothing fancy – just a sheet of railway grass. But digging a slight depression under the correct wheel seems to have tilted the model slightly and levelled the wings (to some degree).
| CONCLUSIONS |
 This is a simple little kit of a frail-looking
butterfly of an aircraft (when put next to, say, an F.15 Eagle). There are other
kits of this aircraft in other scales, but I like 72-scale. To my mind, it would
look incomplete without its rigging, so to help older modellers (like me), I
would have liked a better rigging diagram. But, in the end, the Russian build
was the quick (4-day) yet relaxing build that I sought because there were no
show-stopper problems encountered. Additionally, it looks like a Type N, so I’m happy to
recommend it to other modellers.
This is a simple little kit of a frail-looking
butterfly of an aircraft (when put next to, say, an F.15 Eagle). There are other
kits of this aircraft in other scales, but I like 72-scale. To my mind, it would
look incomplete without its rigging, so to help older modellers (like me), I
would have liked a better rigging diagram. But, in the end, the Russian build
was the quick (4-day) yet relaxing build that I sought because there were no
show-stopper problems encountered. Additionally, it looks like a Type N, so I’m happy to
recommend it to other modellers.
| REFERENCES |
Just the instructions and the boxart.
The upar of the cockpit that was fashioned from an offcut of plastic card.
Avro Man
21 December 2017
Copyright ModelingMadness.com
If you would like your product reviewed fairly and fairly quickly, please
contact
the editor
or see other details in the
Note to
Contributors. Back to the Main Page
Back to the Review
Index Page
Back to the Previews Index Page