| KIT #: | SP008 |
| PRICE: | around $10.00 |
| DECALS: | None |
| REVIEWER: | Chris Peachment |
| NOTES: | Basic vacuformed kit |
| HISTORY |
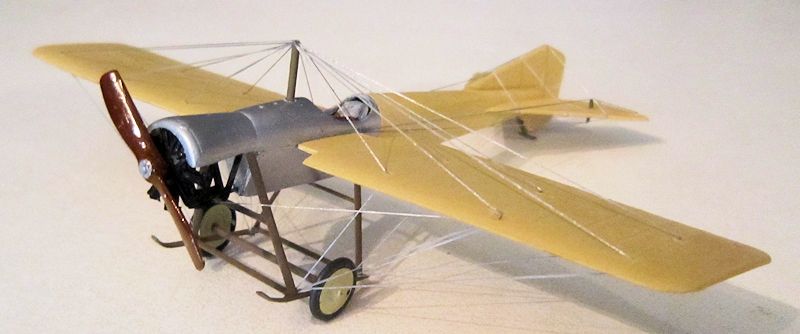
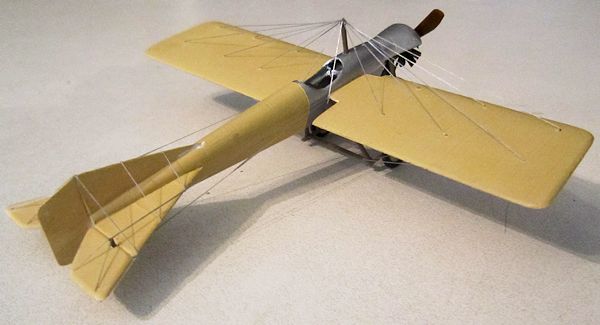
The Blackburn Monoplane, also know as Type D was built as a single engined mid
wing monoplane by Robert Blackburn at Leeds in 1912. It was powered by a 50 hp
Gnome rotary engine. Although the tailplane has conventional rudder and
elevators, wing warping was employed rather than ailerons. The wing has
 wire
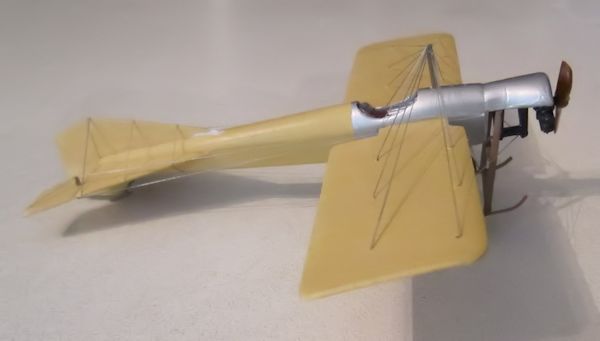
bracing via an ash kingpost set just ahead of the cockpit The fuselage has a
triangular cross-section, with rounded upper decking and aluminium covering at
the front and engine cowl, which is half rounded and designed to contain oil
spillage. The undercarriage is a pair of wheels and skids, the wheels being
joined by the axle mounted above the skids.
wire
bracing via an ash kingpost set just ahead of the cockpit The fuselage has a
triangular cross-section, with rounded upper decking and aluminium covering at
the front and engine cowl, which is half rounded and designed to contain oil
spillage. The undercarriage is a pair of wheels and skids, the wheels being
joined by the axle mounted above the skids.
Harold Blackburn flew it from March to July 1913, and on three days in July delivered bundles of the Yorkshire Post newspaper. The aircraft crashed in 1914 on the family farm at Wittering, where the remains lay untouched until discovered by Richard Shuttleworth in 1938. The restored version first flew on 17 September 1947, and still flies with the Shuttleworth Collection. It is Britain's oldest flying aircraft.
| THE KIT |
I found this in the second hand box of a dealer at an IPMS model meeting at RAF Hendon in North London. The kit dates from some time in 1980s at a guess, and while straightforward, presents the usual problems of constructing a vacform. The plastic is white and medium soft, which helps with the carving and sanding.
| CONSTRUCTION |
Began with the usual careful cutting around the edges of the vacformed parts and
separation from the carrier sheet, and then a full six hours of carving and
sanding down the mating edges to achieve a reasonable fit.
The moulding is good for a vacform and includes raised ribs in the wings
and tail which were acceptable. The tailplanes are moulded as one piece, but it
best to separate the elevators and rudder, sand down the joint then re-attach
them. Leading and trailing edges must be sanded down to a very thin edge. Once
sanding is complete, I went over the whole thing using one of my wife's nail
polishing
 sticks to get rid of the scratches and restore a smooth surface.
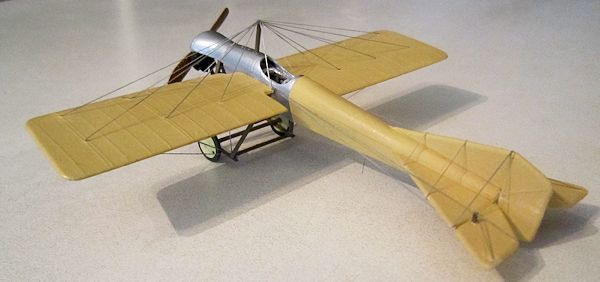
The area forward of the cockpit and engine cowl can now be sprayed silver. I
used Humbrol number 11, then masked
it off and painted the rest of the
fuselage and tail Clear Doped Linen. The wings too can be painted at this stage.
 ing into an anhedral. More of that later.
It would have been impossible to use metal tubing to make an insert into the
wing roots, as the wings are too thin. One solution would have been to add
mounting tabs of plastic to the ing roots and carve holes in the fuselage side
for them. But I didn't think I needed them until too late. Be warned and do it
early on.
ing into an anhedral. More of that later.
It would have been impossible to use metal tubing to make an insert into the
wing roots, as the wings are too thin. One solution would have been to add
mounting tabs of plastic to the ing roots and carve holes in the fuselage side
for them. But I didn't think I needed them until too late. Be warned and do it
early on.
 the king post. This had the effect of pulling the wing up to the right
angle, and since the rest of the rigging is elastic, it took up the slack. A
good exercise in not plunging into the first thing you think of, but trying a
different approach. Had it not worked, I would have had to start again from
scratch. Or consigned the whole project to the shelf of doom until I had my
patience restored.
the king post. This had the effect of pulling the wing up to the right
angle, and since the rest of the rigging is elastic, it took up the slack. A
good exercise in not plunging into the first thing you think of, but trying a
different approach. Had it not worked, I would have had to start again from
scratch. Or consigned the whole project to the shelf of doom until I had my
patience restored.
The kit provides a vacformed engine which is an unsightly blob, and only useful
to judge the right size. An injection moulded one was found from the spares box,
and glued in place under the cowl, after painting it matt black with some
gunmetal dry brushing. The tailskid was cut from two lengths of plastic rod,
painted wood brown and fitted on the under side fin.
| COLORS & MARKINGS |
| CONCLUSIONS |
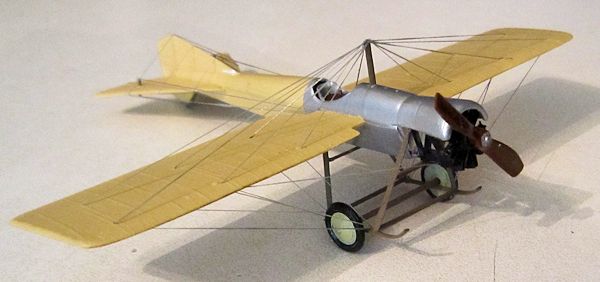
 One very nice looking little monoplane from a period which is sadly neglected by
mainstream kit manufacturers. The aircraft is fairly well known in UK aviation
circles and I wanted this kit for that reason.
One very nice looking little monoplane from a period which is sadly neglected by
mainstream kit manufacturers. The aircraft is fairly well known in UK aviation
circles and I wanted this kit for that reason.
I would recommend it to someone who wanted to cut their teeth on a vacform,
because there are few parts, with no complex or compound curves. The wing joints
do need some forethought, but that is all part of the process of vacform and
scratch building. It is pleasing to the eye, and makes a nice companion to all
those other pointy-nosed avgas-burning jobs that you have on your shelves. And
in terms of aerodynamic design it is not so very different from any modern
fighter. It all began here.
| REFERENCES |
The sole surviving example is with the famous Shuttleworth collection and there
are numerous pictures of it on the internet. Just type Blackburn Monoplane 1912
into your search engine. Since Google refuse to pay their taxes in the UK, I use
one of the others. It isn't much by way of protest but it is the best I can do.
There is a superb film of it in flight on youtube at
http://www.youtube.com/watch?v=vICLdoWFopw
August 2013
Thanks to for the review kit. You can find this kit at your favorite hobby shop or on-line retailer.
If you would like your product reviewed fairly and fairly quickly, please contact the editor or see other details in the Note to Contributors.