|
BACKGROUND |
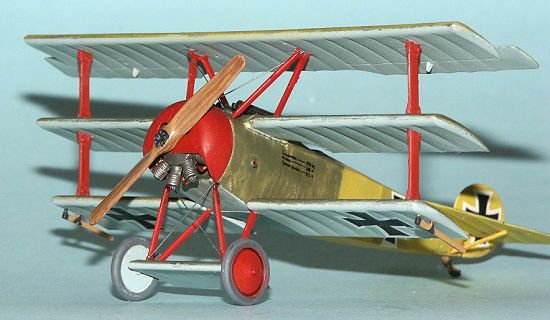
For history of the Fokker Dr. I and for a description of what you find in the box please take a look at the preview.
|
CONSTRUCTION |
 Construction starts with the cockpit. For a model
of this scale the cockpit is nicely furnished. The only thing I added
were seat belts cut from metal foil. For cockpit painting I prefer to use
acrylic paints so fuselage sides, cockpit floor and rear bulkhead were
painted in wood, linen and gray using Vallejo acrylics. Acrylic paints
have the advantage of shorter drying time and easier handling -
especially if only small amounts but in many different shades are needed.
After painting the seat, 'instrument panel' (more like a rod with a
single instrument on top of it) and control column the cockpit was
assembled and enclosed between the fuselage halves.
Construction starts with the cockpit. For a model
of this scale the cockpit is nicely furnished. The only thing I added
were seat belts cut from metal foil. For cockpit painting I prefer to use
acrylic paints so fuselage sides, cockpit floor and rear bulkhead were
painted in wood, linen and gray using Vallejo acrylics. Acrylic paints
have the advantage of shorter drying time and easier handling -
especially if only small amounts but in many different shades are needed.
After painting the seat, 'instrument panel' (more like a rod with a
single instrument on top of it) and control column the cockpit was
assembled and enclosed between the fuselage halves.
For easier painting I decided to mount the lower and top wings after painting so only the middle wing was glued to the fuselage. The cowling was thinned down on the inside for a more realistic effect. Only minimal filling and sanding were required before the model could go to the paint shop.
|
COLORS AND MARKINGS |
Now it was time to do something against that
terrible red color of the plastic and so the model and all parts got a
coat of Resurfacer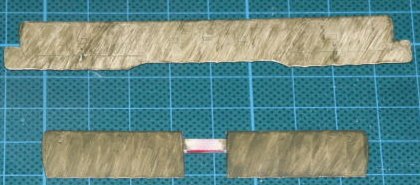 1000 applied by airbrush. Next step was to paint wing,
fuselage and tail plane under surfaces light blue using Model Masters RLM
65. This was close enough to the German WW I light blue for me. Now it
was time for my first attempt on that streaky olive green finish for the
upper surfaces. I started with a coat of yellowish linen color (Humbrol
71). Like on the original the streaking was done using a brush. First
step using unthinned olive green paint (Revell SM361) and a paintbrush
with its tip cut off. A small amount of paint was applied in strokes on
an area of approx. 1 cm width. Repeated stroking results in a streaky
finish with somewhat high contrast. To reduce this contrast, after a
drying time of 24 hours a second coat, this time using somewhat thinned
paint was applied. The photo shows the upper wing after application of
the first and the lower
1000 applied by airbrush. Next step was to paint wing,
fuselage and tail plane under surfaces light blue using Model Masters RLM
65. This was close enough to the German WW I light blue for me. Now it
was time for my first attempt on that streaky olive green finish for the
upper surfaces. I started with a coat of yellowish linen color (Humbrol
71). Like on the original the streaking was done using a brush. First
step using unthinned olive green paint (Revell SM361) and a paintbrush
with its tip cut off. A small amount of paint was applied in strokes on
an area of approx. 1 cm width. Repeated stroking results in a streaky
finish with somewhat high contrast. To reduce this contrast, after a
drying time of 24 hours a second coat, this time using somewhat thinned
paint was applied. The photo shows the upper wing after application of
the first and the lower 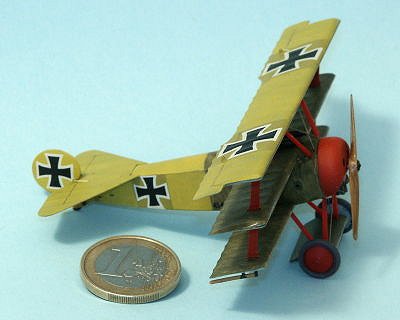 wing after application of the second coat. In the
last step the upper front decking was airbrushed in solid olive green.
wing after application of the second coat. In the
last step the upper front decking was airbrushed in solid olive green.
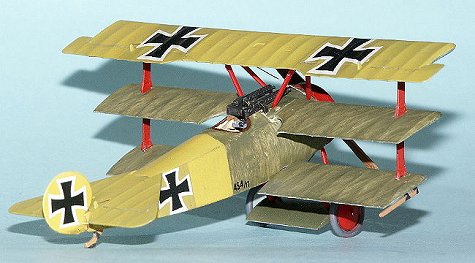
Since I decided to build the model in Lothar von Richthofens colors it was now time to apply the red (Humbrol 60 for wheels, struts, cowling) and yellow (Humbrol 24 for rear fuselage, tail planes and upper wing). The yellow was applied only a thin coat to allow the streaky camouflage to show through. The overpainted areas on upper wing and rear fuselage were masked with PostIt and airbrushed in yellow which was mixed with a small amount of olive green. After a coat of clear gloss the model was ready for decaling. The decals went on fine and with the help of Microset/Microsol confirmed nicely to the model surface. A final matte coating helps to reduce the surface shine to a reasonable level.
Engine and machine guns were airbrushed with Model Master burnt metal Metallizer and then washed and drybrushed. Some final weathering - especially on the fuselage underside - was done with thinned dark brown paint.
|
FINAL CONSTRUCTION |
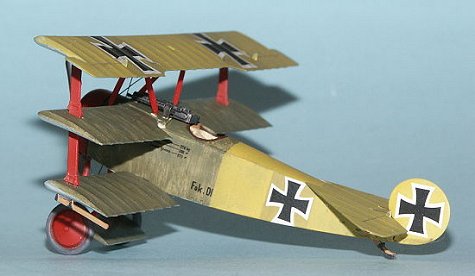 In the final assembly step the landing gear and
tail planes were mounted. Before the wings are mounted also the machine
guns have to be attached. For the wings I started with inserting the
outer wing struts into the middle wing and then mounting the lower wing.
As with all biplane/triplane models attaching the upper wings is somewhat
fiddly. Especially since the alignment of the mounting holes in the upper
wing is not really consistent with the position of the wing strut
location pins. Some dry fitting with drilling new holes or shaving off
the location pins helps here to improve the alignment. Also the engine
needs some dry fitting and sanding down on the rear side - otherwise the
fit inside the cowling will tight at best. The propeller, tail and
underwing skids were painted in wood color and attached. The last step is
rigging - but since this is a late Fokker construction, the necessary
amount of rigging is minimal. I used thin aluminum wire held in place
with cyanoacrylate glue.
In the final assembly step the landing gear and
tail planes were mounted. Before the wings are mounted also the machine
guns have to be attached. For the wings I started with inserting the
outer wing struts into the middle wing and then mounting the lower wing.
As with all biplane/triplane models attaching the upper wings is somewhat
fiddly. Especially since the alignment of the mounting holes in the upper
wing is not really consistent with the position of the wing strut
location pins. Some dry fitting with drilling new holes or shaving off
the location pins helps here to improve the alignment. Also the engine
needs some dry fitting and sanding down on the rear side - otherwise the
fit inside the cowling will tight at best. The propeller, tail and
underwing skids were painted in wood color and attached. The last step is
rigging - but since this is a late Fokker construction, the necessary
amount of rigging is minimal. I used thin aluminum wire held in place
with cyanoacrylate glue.
|
CONCLUSIONS |
 Building this little kit is a lot of fun. Fit is
good, the level of detailing excellent and there are no clear parts to
worry about and only minor amount of rigging. So if you want to start
small scale WW I aircraft modeling this would be an ideal kit. If you are
already an enthusiast you might also consider the Eduard or Roden kits
but I can’t really decide which one of the kits is the best. From the
point of what you get for your money Revell wins in any case. For the
price of one Eduard or Roden kit you get two or three Revell kits (at
least here in Germany). There are some points of minor criticism - mostly
the red plastic and the questionable wing underside rib detail, but which
kit is perfect?
Building this little kit is a lot of fun. Fit is
good, the level of detailing excellent and there are no clear parts to
worry about and only minor amount of rigging. So if you want to start
small scale WW I aircraft modeling this would be an ideal kit. If you are
already an enthusiast you might also consider the Eduard or Roden kits
but I can’t really decide which one of the kits is the best. From the
point of what you get for your money Revell wins in any case. For the
price of one Eduard or Roden kit you get two or three Revell kits (at
least here in Germany). There are some points of minor criticism - mostly
the red plastic and the questionable wing underside rib detail, but which
kit is perfect?
So I give this kit a ‘Highly recommended’.
|
REFERENCES |
There is surely more but that’s what I used:
N. Franks, G. vanWyngarden: ‘Fokker Dr I aces of World War 1’, Osprey Aircraft of the Aces No 40
P. Leaman: ‘Fokker Aircraft of World War One’, The Crowood Press, 2001
H. J. Nowarra: ‘Fokker Dr. I in action’, ‘in action’ series No 98, Squadron/Signal Publications