|
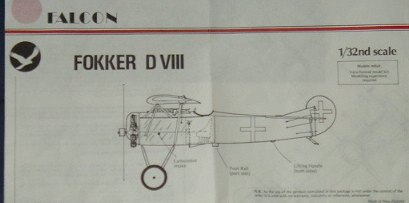
KIT: |
Falcon 1/32 Fokker D.VIII |
|
KIT # |
? |
|
PRICE: |
About $13.00 |
|
DECALS: |
None |
|
REVIEWER: |
John Tooley |
|
NOTES: |
Vacuform |
|
HISTORY |
AHHH Yes! The Fokker DVIII (/E.V.). Cute little parasol monoplane of WWI vintage as I recall!? On the serious side, it started as an experiment to try and see if the Fokker DVII could be flown without the bottom wing. At the request of Anthony Fokker, the DVII; minus its’ bottom wing, was flown by test pilot Kühlisch. Reinhold Platz designed a parasol monoplane for Anthony Fokker to be flown at the Mai/Juni 1918 Flieger competition at Adlershof. Several types were tried as the V26 & V28 were rotary-engine designs, and the V-27 had a stationary engine. The V.26 was accepted after the design “flew away” with the competition. It had a very (faster than before) rapid take-off. It’s climb and maneuverability were actually better than the Fokker DVII. It was designated the E.V. The E. (Eindecker) pre-fix was given due to the single wing. The plane was originally purchased as the Fokker Eindecker V. Or to us more commonly the Fokker E.V.
The construction was a welded steel tube box girder wire braced type. Although the wing had been previously tested and found sufficient at the Fokker Werke, the aircraft board demanded that the wing spars be brought up to the current Bi-plane standards for bracing. After the rear wing spar was strengthened to do this,( as no standards were in place for cantilever wings), production commenced. After the modification was carried out, the first 6 aircraft were sent to the front in August of ‘18. Within several weeks at the front, several E.V.’s crashed due to wing failure killing the pilots! As a result of these unexplained accidents, some 60 machines were withheld, and production halted, until the cause could be determined.
The problem turned out to be the Air ministry’s OWN fault!!! The design strength involving the second wing spar demanded had caused the problem. The second wing spar being strengthened had inadvertently caused an inflexibility in the wing that when stressed in flight, caused a disastrous failure because the front spar under NORMAL flexing, wasn’t allowed by the strengthened rear spar, resulting in a catastrophic failure of the ENTIRE wing! After determining the problem the original wings were re-introduced into production. The entire aircraft was re-designated as the Fokker DVIII. The only difference being the wing design.
|
THE KIT |
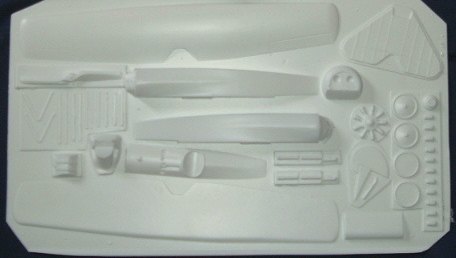
THE FALCON KIT, is actually a very plain vacuform kit. No frills! I mean this literally as well as figuratively! It comes in a plain plastic bag with a simple white paper instruction sheet/ cover picture with red and black highlights. It also comes with a one sheet plastic vacuform of the kit, including the fuselage halves, top decking, horizontal stabilizers, fin/rudder, cowling,motor halves and cylinder halves, MG. Halves, struts, seat, and the top WING HALVES!!!! The top wing halves are important as the bottom half doesn’t have the scribings for the flaps. The sheet also contains (after a closer inspection) a VERY detailed propeller half that you are instructed to backfill with modeling epoxy! I’m going with Supa Filla, as it is made from super glue and talc.
There are several other parts that need to be backfilled including the engine, wheels ,and struts ; as well as the engine cylinder halves. The kit instructions tell you to backfill and shape these parts, as well as to make some of your own on some , of the others. The vac seat however is superb. I only can tell from the references I have that it is immaculate. But just to be sure, do your own research for this aircraft, as there isn’t a LOT of regular info, but online research (if you’re diligent) can be very rewarding!
The kit also includes a small clear plastic piece that’s supposed to be used for the windscreen. My personal ( I’m not sure it shows up in the pics) opinion, is to find and use a piece of clear plastic from a parts holder bubble that comes from the tool section at WALLY WORLD; as these are MUCH thinner.
The engine halves and cylinder parts, say to use FUSE WIRE (?) to replicate the cooling fins on the engine. I’ve done some experimenting and come up with an equivalent. It has to be something small to wrap the cylinders with. I think 1lb or (even better if you can work it depending on your eyesight) smaller monofilament test line. This is ONLY to recreate the fin effect on the cylinder halves.
The cockpit is a very strange affair, that
is just a printed section of the instruction sheet that is supposed to be
glued to .030 card stock, cut and folded to shape and the instrument
faces cut half-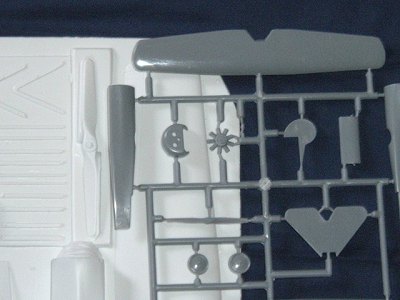 way out and bent to be seen inside. You’re also supposed
to make your own control stick from sprue. The vac seat is very nicely
done, and only needs some sprue or wire seat adjusters/ mounting
mechanisms. Lap and shoulder belts are not included or mentioned.
way out and bent to be seen inside. You’re also supposed
to make your own control stick from sprue. The vac seat is very nicely
done, and only needs some sprue or wire seat adjusters/ mounting
mechanisms. Lap and shoulder belts are not included or mentioned.
It doesn’t have decals, but then again, you don’t need them. You do, however, need the Lozenge decals either from Battle Axe or (preferably) Americal/Gryphon. I say preferably as you will need the interior reversed Lozenge that is only available from Americal/Gryphon. I would personally recommend replacing the motor and MG’s from the spares box .
In my honest opinion, the Falcon kit, though somewhat lacking, has more than great possibilities. I’m also including a comparison picture of the Eduard 1/72nd fuselage next to the Falcon propeller. As you can see, its tiny. I can’t see things that small. This will give you an idea of the difference in the two scales.
|
CONCLUSIONS |
As a conclusion, I would recommend this kit to anybody that wants a larger than 1/72nd or 1/48 scale kit.
If you would like your product reviewed fairly and quickly by a site that has over 250,000 visitors a month, please contact me or see other details in the Note to Contributors.