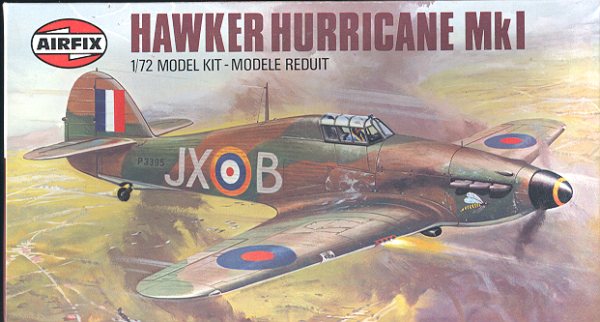
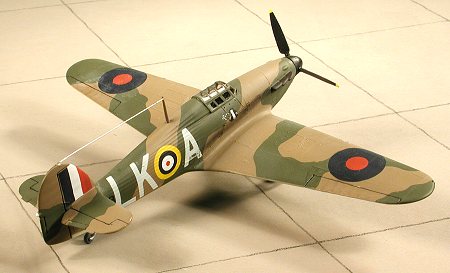
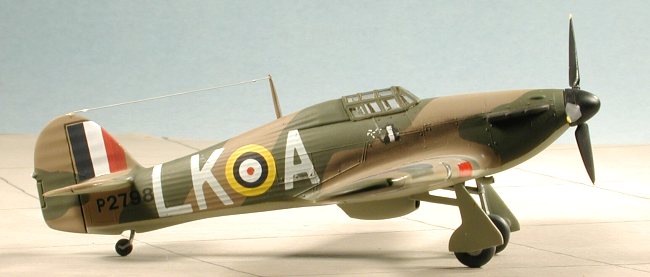
Airfix 1/72 Hurricane I
|
KIT # |
2067 |
|
PRICE: |
$6.50 |
|
DECALS: |
Two aircraft |
|
REVIEW : |
|
|
NOTES: |
` |
|
INTRODUCTION |
For a look in the box and a brief history, see the preview.
|
CONSTRUCTION |
There really isn't much to the construction of this kit. Airfix didn't want to bother us with a bunch of parts so there aren't that many. However, there is a cockpit of sorts so the seat/bulkhead was glued to the floor. This was then painted RAF Interior green using Model Master enamels. This same color was painted on the inside of the fuselage and the wheel wells, though those may be repainted later.
 With the cockpit painted, it was glued in place and the fuselage
halves glued together, trapping the prop shaft and back spinner section so it
could spin. While this was drying, I tackled the wings. They fit together very
nicely with no troubles. There is some flash that needs to be sanded off the
trailing edge when you get the wings together. I also noticed that there are no
gun ports or shell ejection chutes on the wing. The gun ports will be drilled
out later and decal squares used for ports based on other late Hurricane I kits
that I have.
With the cockpit painted, it was glued in place and the fuselage
halves glued together, trapping the prop shaft and back spinner section so it
could spin. While this was drying, I tackled the wings. They fit together very
nicely with no troubles. There is some flash that needs to be sanded off the
trailing edge when you get the wings together. I also noticed that there are no
gun ports or shell ejection chutes on the wing. The gun ports will be drilled
out later and decal squares used for ports based on other late Hurricane I kits
that I have.
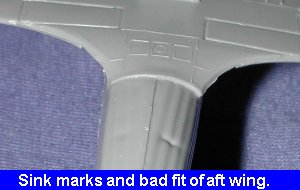
The
wing was then glued to the fuselage. To say the fit is perfect would be a fib as
there are gaps on both sides of the fuselage and at the back. The front section
also has a gap or two so you need to be handy with filler on this one. I used
stretched sprue to fill the largest gaps on the wing. With gaps of this size,
filler is just not going to provide the kind of bond that is needed and will
later crack as the wing flexes through handling. The fact that the sprue tends
to melt under the assault of today's modern liquid cements
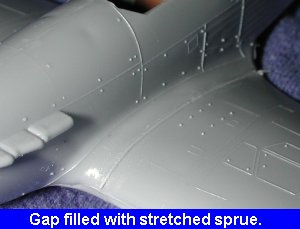 makes it even more of
a useful material to use for these things.
makes it even more of
a useful material to use for these things.
Of course, it didn't eliminate the need for filler, as there were still small gaps that needed filled after the kit was sanded down in those areas. I fear that the sink marks on the back meant that the ribbed detail was pretty well destroyed in sections, but it couldn't be helped. With the fuselage and wings being sanded down, the tailplanes were added. These fit quite well though there were the now-expected gaps that needed filled. There were also some mold release pin marks that needed sanded off on the underside of the tailplanes.
With a completed fuselage, the canopy was attached and masked and the kit was ready for a coat of paint.
|
PAINT & DECALS |
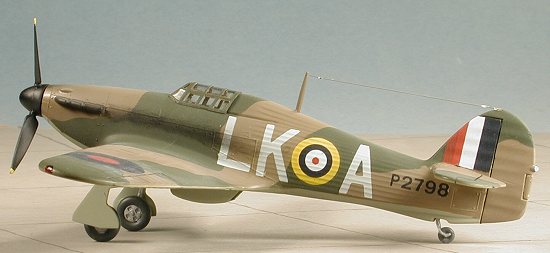
Painting this kit was a breeze. First the underside color was done using Sky acrylic from Aeromaster. That was taped off when dry and the upper Dark Earth was painted on using Xtracolor enamel. When dry, it was masked and the Dark Green was sprayed on using the last of my Aeromaster enamel in this color.
When it was all done, the masking was taken off and the undercarriage was glued
into place. This proved to be simplicity in itself as it is a sturdy construct.
The retraction struts fit well but sort of hang off in space, not really
attaching themselves to anything sturdy. The tail wheel was also slid into place
and glued. Then the prop/forward half of the spinner was glued in place and when
dry somewhat smoothed off. The prop blades were
 painted black using a brush and
the radio antenna glued on. Then the kit was given a coat of Future clear gloss
in preparation for decals.
painted black using a brush and
the radio antenna glued on. Then the kit was given a coat of Future clear gloss
in preparation for decals.
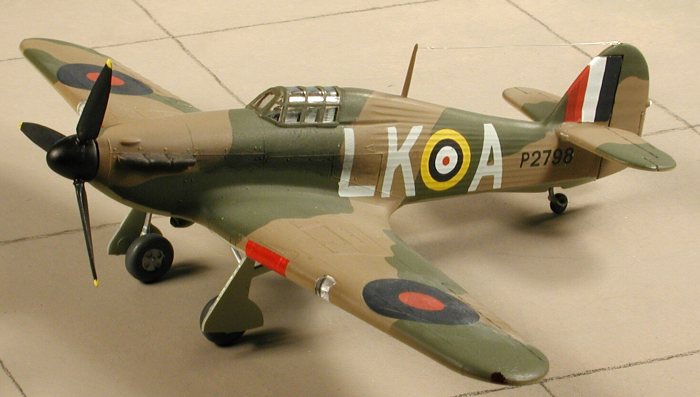
If you recall from the preview, this kit had the wrong decals included. Searching through my decal stash I found Almark sheet C2 that had a couple of Battle of Britain schemes. One had a white and black wing so it wasn't used as I didn't feel like repainting. The other was LK*A for Squadron Commander Gleed of 87 Squadron and so that is what I used. These Almark decals were some of their first and had a continuous clear coat over all the markings. I carefully cut the ones needed out and despite being over a quarter century old, they worked rather well. A bit brittle at times, but nothing that couldn't be used.
|
CONSTRUCTION CONTINUES |
Once the decals were on and dry, the kit got a coat of clear matte. Then the
spinner was painted black, the wheels glued in place and the masking taken off
the canopy. Then the landing lights were glued in place and a radio wire made
from stretched sprue. To disguise the fact that the kit has no gun ports, a
sliver of red decal was cut and placed where the guns should be. This represents
the tape that was often put over the gun ports to keep out dirt after rearming.
|
CONCLUSIONS |
 Unlike some of the other more
recent reviews, this kit wasn't built 15 years ago but completed just a few days
ago. It took me back to my younger days when building a model meant having it
together in a relatively short time and not sweating the details. Sure, it isn't
the most detailed Hurricane around in this scale. Both the Hasegawa and Revell
kits have it beat hands down in that area. It has some inaccuracies, but in 1978
when it was molded, it was the best around. I enjoyed the relatively
trouble-free construction and lack of fussy parts. Those who obsess over
minutiae and are really into detail wouldn't get near it. However, it is a kit
that I would heartily recommend to even the bare beginner. They won't care too
much about the sink marks and will like the easy construction.
Unlike some of the other more
recent reviews, this kit wasn't built 15 years ago but completed just a few days
ago. It took me back to my younger days when building a model meant having it
together in a relatively short time and not sweating the details. Sure, it isn't
the most detailed Hurricane around in this scale. Both the Hasegawa and Revell
kits have it beat hands down in that area. It has some inaccuracies, but in 1978
when it was molded, it was the best around. I enjoyed the relatively
trouble-free construction and lack of fussy parts. Those who obsess over
minutiae and are really into detail wouldn't get near it. However, it is a kit
that I would heartily recommend to even the bare beginner. They won't care too
much about the sink marks and will like the easy construction.
November 2001
Review kit courtesy of me and my wallet!
Copyright ModelingMadness.com. All rights reserved. No reproduction in part or in whole without express permission from the editor.
If you would like your product reviewed fairly and quickly, please contact the editor or see other details in the Note to Contributors.