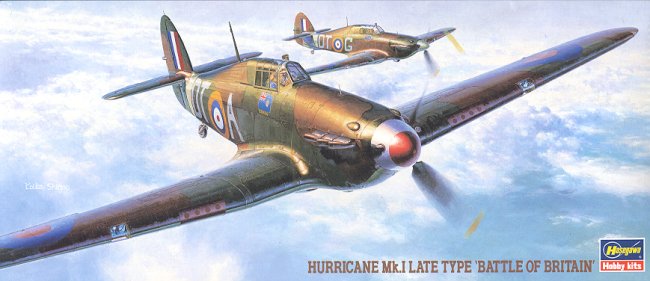
Hasegawa 1/72 Hurricane I (late type)
|
KIT # |
51338 (AP38) |
|
PRICE: |
$14.98 |
|
DECALS: |
Two Aircraft |
|
REVIEW : |
|
|
NOTES: |
` |
|
CONSTRUCTION |
First thing I
did was to start gluing together subassemblies. The Hurricane is a pretty basic
kit so there are not a plethora of them. What I did was to glue the nose section
and the wings. This was followed by the three piece interior. You'll notice that
Hasegawa does not like to have gun ports appearing from wings. This is
undoubtedly to assist in having multiple uses for a single wing. Before gluing
the wings, one needs to notch the gun port areas so they can be drilled out
later. No other holes need to be drilled out as the Mk I was a pure fighter. My
wings had some sink marks outboard of the landing lights that had to be filled.
The outer shell ejector chutes were also filled in as the 12 gun wing is not
applicable to this variant.
With the fuselage glued together, it was time to glue on the
nose section. I needed filler where it attached as the diameter of the nose and
fuselage mount was not the same. Next on to the wings. Fit here is not bad, but
not exactly perfect either. I found that I needed more filler than I would have
liked on the wing roots as they just didn't match up well. I also had some
filler needs at the front section of the wing as well. If it sounds as if I
needed filler on each join, then you are correct. In some cases a lot and in
others very little. I needed none, however on the tailplanes. Those attached
with no trauma at all. I now had a complete airframe. Turning to the underside, the
carb intake was glued on and then the belly radiator. This last part was a two
piece affair that fit well, though I did end up doing a lot of sanding as the
front section was larger than the aft. It fit into the depression on the
underside of the wing with no problems. As is typical of many Hasegawa 1/72
kits, the canopy is a single piece. This was masked off using Tamiya tape, and
after a bit of touchup painting was done to the interior, the canopy was glued
in place. I should mention that the gunsight is molded onto a fuselage half and
not a very strong attachment as it disappeared during one of the many sanding
sessions! With the canopy in place and masked, it was time to add some
paint.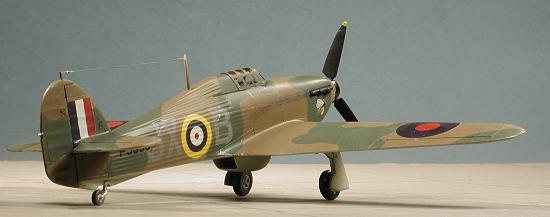 Once the basic assemblies were done, the interior
bits and wheel wells were painted RAF Interior Green. Undoubtedly, I'll read
later that the wheel wells were supposed to be underside color! The cockpit was
then given a bit of painting and the decal placed on the instrument panel. This
was then glued to a fuselage half along with the interior. The fuselage halves
were then glued together. Prior to this, the tail wheel was removed as per
instructions since it was not applicable to the Mk I.
Once the basic assemblies were done, the interior
bits and wheel wells were painted RAF Interior Green. Undoubtedly, I'll read
later that the wheel wells were supposed to be underside color! The cockpit was
then given a bit of painting and the decal placed on the instrument panel. This
was then glued to a fuselage half along with the interior. The fuselage halves
were then glued together. Prior to this, the tail wheel was removed as per
instructions since it was not applicable to the Mk I.
|
PAINT & DECALS |
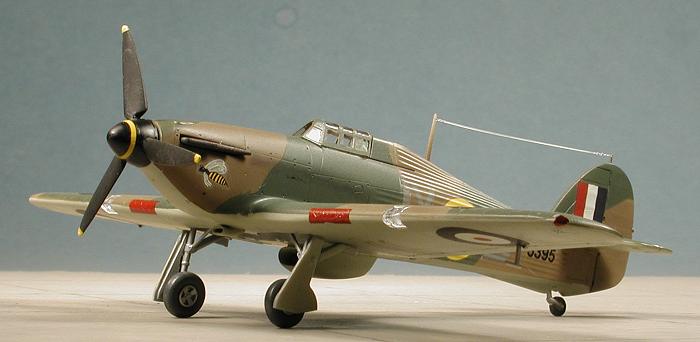
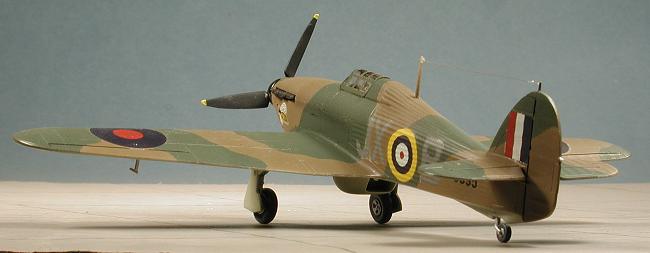
I had decided to do the other decal option in the box; the one for 1 squadron. Two reasons: one is that I don't have a model from this unit, and the other is that it didn't have a sky fuselage band! Colors for this aircraft are Dark Earth and Dark Green uppers with Duck Egg Blue undersides. There is much new material on underside colors for aircraft of this period, so you can probably use any of the pale blue or green underside colors without too much fear of being told you are wrong. Not having and Duck Egg Blue, I used good old Sky for this color. The Dark Earth was an Aeromaster color, the Dark Green was Xtracolor and the Sky was Gunze, so all sorts of different paint types were used.
 For the upper surfaces, the camo was hard edge masked as in this
scale that would be the best way to do it. Once that was done, the wheel wells
were hand painted in aluminum as that seems to have been the standard color.
Then the kit was taken back to the work bench and had the landing gear glued in
place. The holes for the main gear are quite a bit larger than the gear legs so
you need to be careful on how these dry. Even though I thought mine were
initially even, after several hours one of them had managed to move a bit during
drying and they are not perfectly aligned!
For the upper surfaces, the camo was hard edge masked as in this
scale that would be the best way to do it. Once that was done, the wheel wells
were hand painted in aluminum as that seems to have been the standard color.
Then the kit was taken back to the work bench and had the landing gear glued in
place. The holes for the main gear are quite a bit larger than the gear legs so
you need to be careful on how these dry. Even though I thought mine were
initially even, after several hours one of them had managed to move a bit during
drying and they are not perfectly aligned!
Once 'slicked' up it was time for the decals. As I mentioned, I wanted to use the markings for 1 Sq. As with most Hasegawa decals, the number of data markings is at a minimum so decaling is not a lengthy process. I used Solvaset on them and had no unusual problems or disasters when applying them, which is unusual in itself! Once the decals had dried, the kit was sprayed with matte clear and it was back to the bench for the final bits.
|
FINAL STEPS |
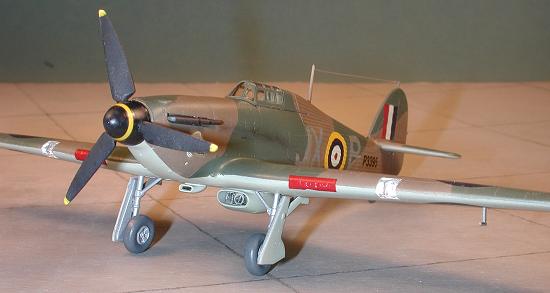
The masking was removed from the canopy and the clear landing lights were simply
press fit into place (they really fit tight). Flipping the model on its back,
the gear doors were glued in place and fit rather poorly. The carb and radiator
intakes were given a bit of paint treatment to make them look better and the
underwing pitot tube glued on. The final assembly step was the addition of the
stretched sprue radio antenna wire. I use clear sprue for this as the antennas
are just about invisible in photographs. Final touch was some staining with
pastels and outlining the control surfaces with a Rapidograph.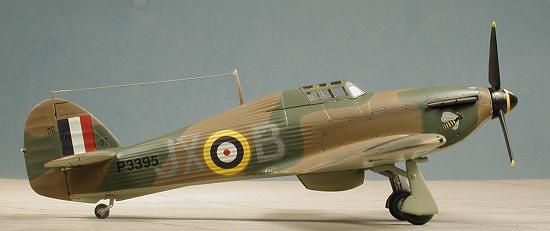 There were a
few
bits and pieces that were not glued on for fear of breaking them when doing
decals and matte coat. One of these was the prop assembly. Now to me the prop
blades look a bit odd, but I have been assured that they are correct for the
type. I also had a devil of a time getting the blades aligned. I really do not
like these separate blade setups unless they have a very positive alignment,
which this kit does not. The spinner and blades were sprayed flat black and the
yellow tips brushed on. Then the spinner was given a coat of Future gloss clear
as the matte color just didn't look right. It was then pressed onto the shaft.
There were a
few
bits and pieces that were not glued on for fear of breaking them when doing
decals and matte coat. One of these was the prop assembly. Now to me the prop
blades look a bit odd, but I have been assured that they are correct for the
type. I also had a devil of a time getting the blades aligned. I really do not
like these separate blade setups unless they have a very positive alignment,
which this kit does not. The spinner and blades were sprayed flat black and the
yellow tips brushed on. Then the spinner was given a coat of Future gloss clear
as the matte color just didn't look right. It was then pressed onto the shaft.
|
CONCLUSIONS |
Really a very nice model. Typical of Hasegawa, it is a bit fiddly in places and one does end up sanding off some detail. I didn't think the rear fuselage canvas effect was that terrible and overall it is one that I can recommend. If you are into super-detailing, there are a myriad of aftermarket things available for it.
August 2001
Review kit courtesy of me and my wallet!
If you would like your product reviewed fairly and fairly quickly, please contact the editor or see other details in the Note to Contributors.