| KIT #: | A02065 |
| PRICE: | $3.00 from the 'junk kit' table |
| DECALS: | Two options |
| REVIEWER: | Scott Van Aken |
| NOTES: |
| HISTORY |
The Supermarine Spitfire was one of
those few aircraft that were produced from the first day of WWII right
until the end of hostilities. The other that comes to mind is the Bf-109.
Both of these aircraft underwent huge trans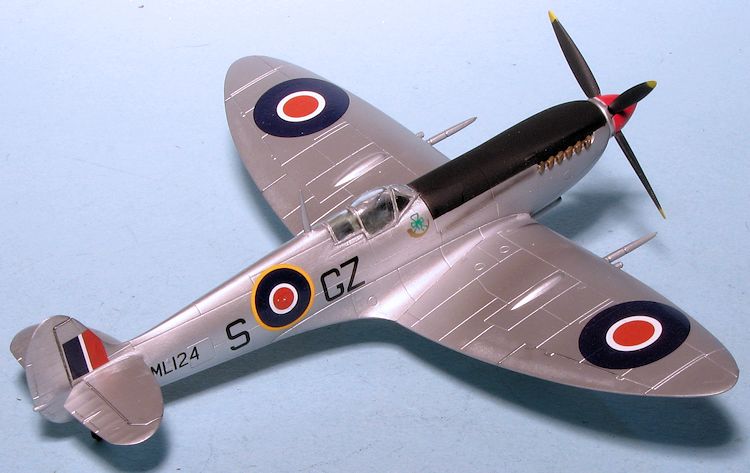 formations and in the end, there
were few, if any, parts interchangeable from the first versions to the
last.
formations and in the end, there
were few, if any, parts interchangeable from the first versions to the
last.
Along the way, a number of 'stop-gap' versions were developed, some of which were produced in greater numbers than the originally designed variant. One of those was the Spitfire IX. While awaiting the definitive Mk VIII airframes to be ready, the more powerful Merlin 60 series engines were attached to MkV airframes (some of which had previously been Mk II or Mk I airframes), and the Spitfire IX was born.
The inclusion of the Merlin 60 engines gave the Spitfire what it had been seeking; parity and even superiority over the German's FW-190A series. Such was the success of the Mk .IX that it saw action right until the end of the war and afterwards; this despite even more powerful versions being produced.
| THE KIT |
Spitfire boffins have been on the quest of the holy Spitfire; a kit that is perfect and meets all their needs. A kit that even they cannot find anything to complain about. This is not that kit.
It is, however, a very nice 1/72 kit of one of the most important variants; the Mk IXc. In fact, it is a rather interesting mixture of parts making it a nearly late version of the Mk IX. You see, it has the thin cannon fairings, wheel fairings, late elevators mixed in with an early fin/rudder. Now as we know, that may limit just what can be done with this kit, unless you don't care about such niceties.
 Overall, the molding is quite good with nicely engraved panel
lines. These are a bit more pronounced than you may have expected, but still not
too badly overdone. The cockpit is rather
sparsely detailed with little more than a seat, three part pilot figure and a
gun sight. In fact, the interior is really in need of upgrading, however, you
won't see much of it through the rather thick, one-piece canopy.
Overall, the molding is quite good with nicely engraved panel
lines. These are a bit more pronounced than you may have expected, but still not
too badly overdone. The cockpit is rather
sparsely detailed with little more than a seat, three part pilot figure and a
gun sight. In fact, the interior is really in need of upgrading, however, you
won't see much of it through the rather thick, one-piece canopy.
The landing gear are molded in with the gear doors, making for a sturdy construct, even if it isn't really accurate. You will get a nice pair of four spoke wheels and there is a wheels up option, which many will appreciate. A stand would be nice, but one is easy enough to make and you can order one from Hornby if in flight is your desire.
The instruction sheet is huge providing well drawn construction steps and the usual Humbrol number-only paint references. Markings are provided for two planes. One is Johnny Johnson's 144 Wing aircraft complete with invasion stripes. All of the various stripes are provided as decals, including the wing leading edge ones. The second option is a desert scheme as shown on the box art. This is Stanislaw Skalski's 145 Squadron plane from May 1943, in the standard desert scheme. The decals are quite well printed with only the white parts off register (Skalski's unit codes).
| CONSTRUCTION |
I am not really that much of a fanboy when it comes to the Spitfire. I like
it as much as any other, but generally do not go all goofy when a new kit is
announced nor get all flustered if it isn't 'perfect'. This particular kit was
on the 'junk kit' table at the LHS. The previous owner had built up the cockpit
and assembled the wings. For some reason, he had sanded down the wheel bulges on
the upper wing. He had
 also apparently dropped the canopy in paint or did
something horrible to it as it was a mess. I don't blame him for giving up. He
had also chucked all the wheels up optional bits.
also apparently dropped the canopy in paint or did
something horrible to it as it was a mess. I don't blame him for giving up. He
had also chucked all the wheels up optional bits.
However, I like to resuscitate kits like this and so I picked it up. The first thing I did was to see if I could in any way restore the canopy. I spent quality time chipping at the paint with a sharpened toothpick and managed to get most of the paint of the areas where it shouldn't have been. I then set it aside in preparation for a dip in Future to try to restore some of its clarity. As a backup, I had a Pavla canopy set on standby.
I then installed the interior and closed the fuselage halves. The seams were dealt with and the tailplanes glued on. The next step was gluing on the wing. So far, this was the worst fitting assembly and it wasn't bad. The usual filler was needed at the front and rear, not helped by the way the front of the wing was designed with the carb intake. The lower wing tips had a big gap that needed filled as well.
 In the mean time, I painted the prop with the spinner getting a coat of white
and then painted red. The backing plate was painted silver using Floquil Old
Silver. I'd had issues with this paint in the past, but thought I'd give it a go
once more as I needed a painted aluminum.
In the mean time, I painted the prop with the spinner getting a coat of white
and then painted red. The backing plate was painted silver using Floquil Old
Silver. I'd had issues with this paint in the past, but thought I'd give it a go
once more as I needed a painted aluminum.
Once the wing was on, I installed the cannon bits. I found the fit to be quite tight, a situation that seemed to be common with other parts. The landing gear were then installed. These have the gear doors and legs molded as one. If you want separate gear doors, I suggest the SAC replacement metal gear as they have done this for you. The tail wheel was then glued in as was the pitot tube. The scraping with a toothpick and dip in Future helped out the canopy quite a bit, though it still has some glitches. This was masked then installed. I used liquid mask for the 'bubble' portion. This was then cemented in place.
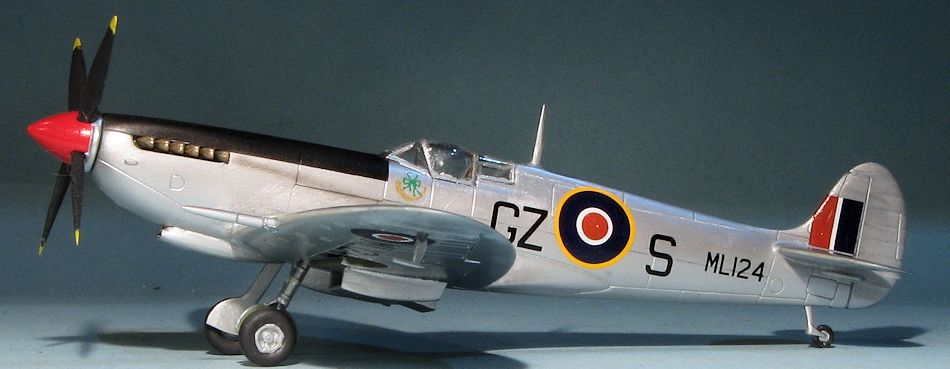
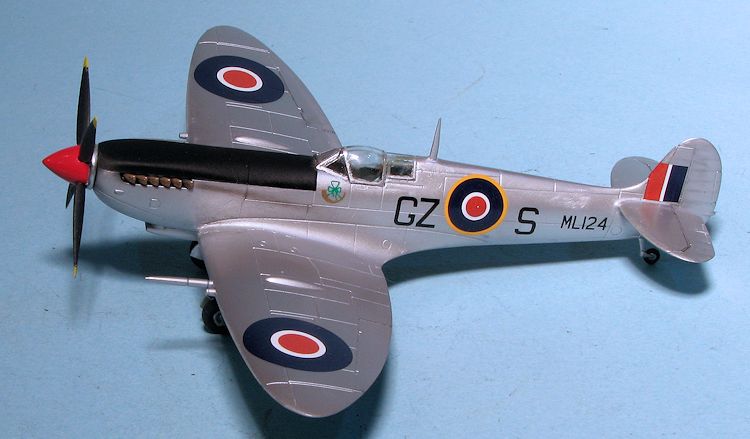
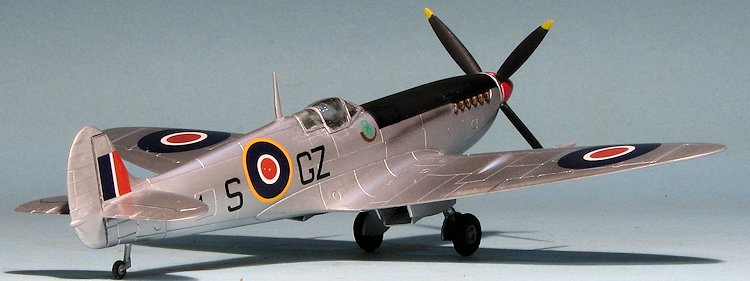
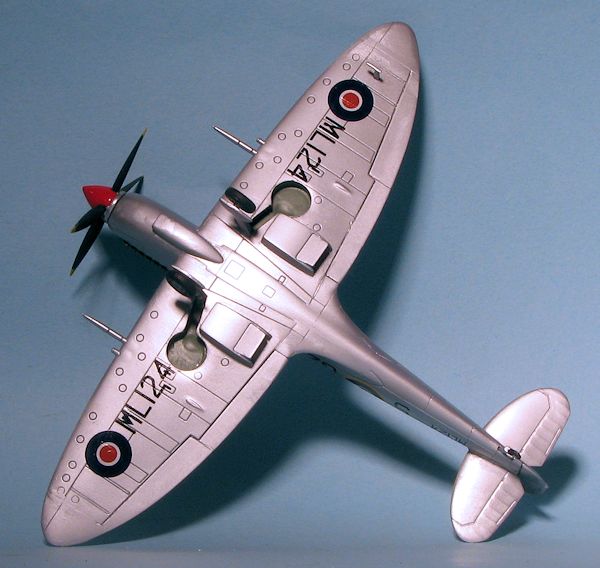
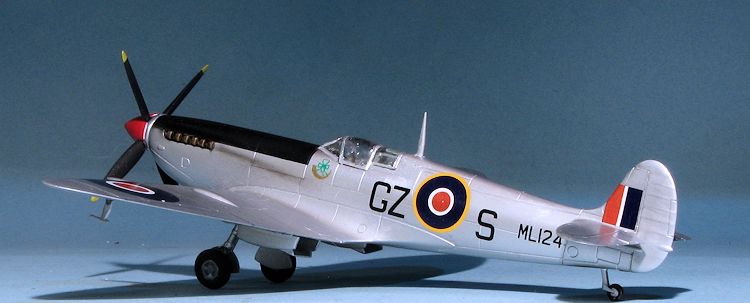
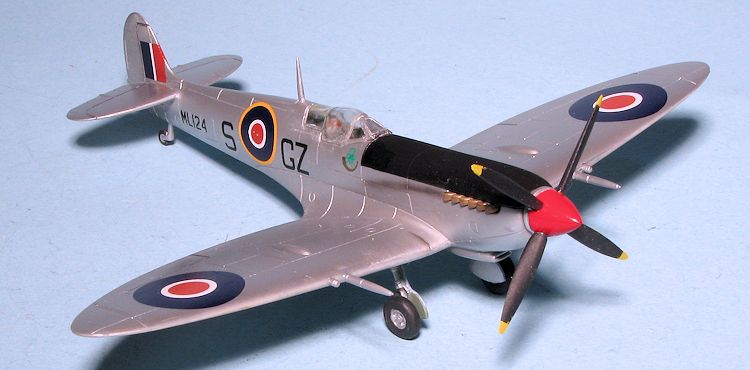
| COLORS & MARKINGS |
Most of my stash of Spitfire decals in this scale are not
appropriate for the late war, but I do have a few post-war offerings that will
work. For this build, I chose Freightdog Models sheet 72-008 which covers a
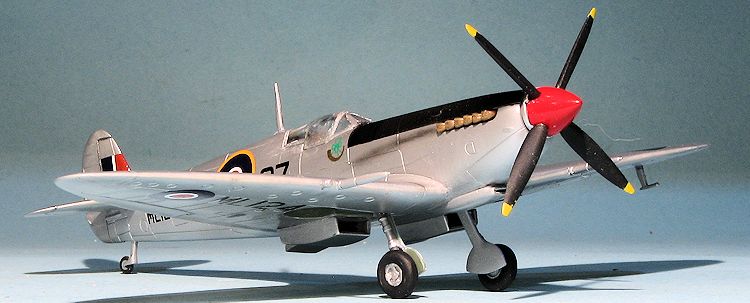 number of Spitfire types. The one with 32 Squadron when based in Palestine
during early 1947 caught my eye. It was overall high speed silver with a red
spinner and black anti-glare panel.
number of Spitfire types. The one with 32 Squadron when based in Palestine
during early 1947 caught my eye. It was overall high speed silver with a red
spinner and black anti-glare panel.
This scheme also makes painting pretty easy as I simply sprayed the Floquil Old Silver on it and let it dry. Thinning this paint with lacquer thinner seems to have taken away the 'weeks to dry' issues I had with it before. I did the underside first then added the radio mast and did the upper surfaces. This showed a few lines that I missed so those were fixed with super glue and then repainted. Some detail painting regarding the wheel wells and radiators was done and I started applying the decals.
Not really all that much in terms of markings as it was basically insignia, serials and a unit badge. The insignia have separate red centers to put all the blame for off register roundels on the builder! I used Mr Mark Softer to help them snuggle down.
 Once the
decals were in place, I sprayed most of the airframe with Model Master
Metallizer Sealer. This not only helped to seal in the decals, but slightly, and
I mean very slightly, dulled the finish to where it looked more like aluminum
paint. Perhaps I should have used a semi-gloss clear, but this seemed to work
well enough.
Once the
decals were in place, I sprayed most of the airframe with Model Master
Metallizer Sealer. This not only helped to seal in the decals, but slightly, and
I mean very slightly, dulled the finish to where it looked more like aluminum
paint. Perhaps I should have used a semi-gloss clear, but this seemed to work
well enough.
With that done, the wheels were installed as were the exhaust. I also reattached the pitot which I probably broke away a half dozen times! A bit of pastel work was done for stains and then the prop was pushed in place. The last thing done was removal of the masking material from the canopy. This doesn't look great, but it is a ton better than what I started with so I'm pleased enough and another 'junk kit' has been rescued and resuscitated.
| CONCLUSIONS |
 Overall, this
is a very nice kit. It is competitively priced and despite lacking outer wing
gun openings, looks quite nice when one is finished. Those wishing to do earlier
variants of this kit can look to Pavla and others for the detail bits needed to
backdate this one. There are a considerable number of decals out there as well
so if one is a Spitfan, there are many reasons to buy several. The kits major
fit issue to me is the large gap between the lower and upper wing at the
wingtip. I expect the lower rear fuselage to wing join to be an issue and
really, neither one of these is all that bad. Thanks to Airfix's softish
plastic, steps are rather easily smoothed out and filler will take care of the
gaps. In all, it is a kit that I can easily recommend to modelers of all
capabilities.
Overall, this
is a very nice kit. It is competitively priced and despite lacking outer wing
gun openings, looks quite nice when one is finished. Those wishing to do earlier
variants of this kit can look to Pavla and others for the detail bits needed to
backdate this one. There are a considerable number of decals out there as well
so if one is a Spitfan, there are many reasons to buy several. The kits major
fit issue to me is the large gap between the lower and upper wing at the
wingtip. I expect the lower rear fuselage to wing join to be an issue and
really, neither one of these is all that bad. Thanks to Airfix's softish
plastic, steps are rather easily smoothed out and filler will take care of the
gaps. In all, it is a kit that I can easily recommend to modelers of all
capabilities.
| REFERENCES |
Visit http://en.wikipedia.org/wiki/Supermarine_Spitfire_%28late_Merlin_powered_variants%29 for oodles of info on late Merlin powered Spits.
October 2015
Thanks to me for digging around to find this one.
If you would like your product reviewed fairly and fairly quickly, please contact the editor or see other details in the Note to Contributors.