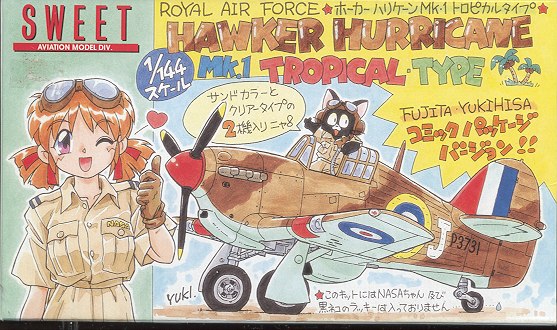
Sweet 1/144 Hurricane I (tropical)
|
KIT # |
14105 |
|
PRICE: |
¥1,000 in Japan, but I paid $12 at a show |
|
DECALS: |
5 (!) versions |
|
REVIEWER: |
|
|
NOTES: |
Two kits, one in clear plastic! |
|
BACKGROUND |
For a brief history and a look in the box, please visit the preview.
|
CONSTRUCTION |
For some reason, I decided to build the clear plastic one first.
It does make for an interesting experience not being able to see the join areas
that well and watching the liquid cement find its way into the various nooks and
crannies!
Next step was to glue the wings and tail planes in place. The radiator was then
glued to the lower wing. These offered no problems at all and fit quite well. I
sanded the seams, but again, couldn't tell if I got them all. This necessitated
a trip to the paint shop for a light coat of primer. Once I could see the areas
that needed help, I sanded them as needed. No filler was used on this kit at any
time as it just wasn't needed. Never thought I'd actually say that, but it's
true. The nose filter was then glued in place as was the proper radio
mast, and before I knew it, it was time for some paint. CAMOUFLAGE You are probably wondering why I airbrushed the colors. After
all, it is a 1/144 kit and rather small. Yes, I thought about hand brushing the
paint, and I'm sure that many of you will do just that. However, I'm not good at
hand brushing large areas, finding that I usually make a mess of things. So
rather than goof it up, I went through the tedious stages of masking and then
airbrushing the colors.
A BIT MORE WORK
ON TO THE DECALS
Once the plane was on its gear, the areas to get decals were brush painted with
Future. This makes the area nice and gloss and helps to cut down on any decal
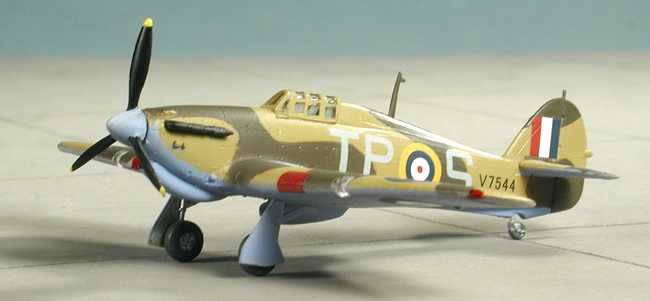
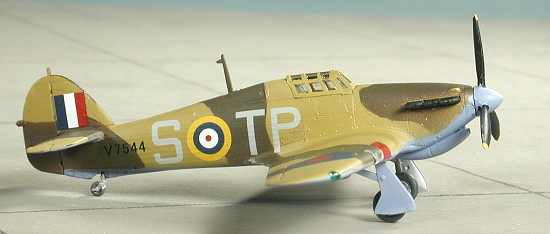
silvering. I chose the first scheme for a 73 Sq Hurricane. It is pretty straight
forward with little more than code letters to distinguish itself from the
others. In fact, it is the only one on the sheet with a full set, others having
abbreviated codes or none at all.
DOING THE LAST BITS
With the decals on and dry, there were more
parts still to be added. One was to glue on the wheels. These fit quite well and
offered no traumas. The final item was the prop. I painted it as shown in the
instructions and then pushed it onto the prop shaft. The shaft is a bit too long
and left a rather large gap. The prop was then pried off (be careful) and the
shaft had a bit nipped from the end. The prop was then pushed on again and it
fit quite well. It was at this time that the kit was given a coat of matte clear
using my usual Future and flat base formula. Last bits were the clear ones. The landing lights were just pushed into place
after the back area was painted aluminum. The canopy was masked and spray
painted the proper color. A very tedious job as the panes are quite tiny. Before
gluing this in place, the cockpit was repainted Interior Green using Testors
Model Master enamels. I know it is probably a waste of time as there is nothing
there, but it just looks better that way. A final dab of paint for the wing tip
lights and that was it!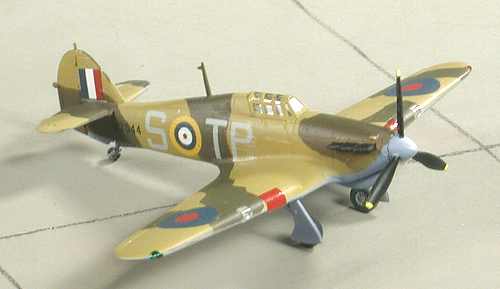 The first thing I did was to paint the interior RAF
interior green using Model Master enamels. I then glued the wings together and
when the interior was dry, the fuselage halves were glued together trapping the
very large prop shaft between them. Then I glued the radiator assembly and set
this all aside to dry. Once dry, the seams were sanded, but I really couldn't
tell if I got them all or not. A problem when working with clear plastic!
The first thing I did was to paint the interior RAF
interior green using Model Master enamels. I then glued the wings together and
when the interior was dry, the fuselage halves were glued together trapping the
very large prop shaft between them. Then I glued the radiator assembly and set
this all aside to dry. Once dry, the seams were sanded, but I really couldn't
tell if I got them all or not. A problem when working with clear plastic!
 It is a desert
Hurricane, so my choices of colors were rather limited, especially on the upper
surface. I started by painting the underside of the plane and the gear doors
Azure Blue using Aeromaster Acrylics. With that dry, the upper surface was
painted Middle Stone, also using Aeromaster, but their enamel paints this time.
When all that had dried, I masked off the areas I wanted to keep the lighter
color and sprayed Dark Earth on the rest of it. Actually, it is French Brown
that I had thought I'd lightened, but it turned out a bit darker than I'd have
wanted. Not really a problem as it matched the colors in the instructions, but
still not really Dark Earth. '
It is a desert
Hurricane, so my choices of colors were rather limited, especially on the upper
surface. I started by painting the underside of the plane and the gear doors
Azure Blue using Aeromaster Acrylics. With that dry, the upper surface was
painted Middle Stone, also using Aeromaster, but their enamel paints this time.
When all that had dried, I masked off the areas I wanted to keep the lighter
color and sprayed Dark Earth on the rest of it. Actually, it is French Brown
that I had thought I'd lightened, but it turned out a bit darker than I'd have
wanted. Not really a problem as it matched the colors in the instructions, but
still not really Dark Earth. '
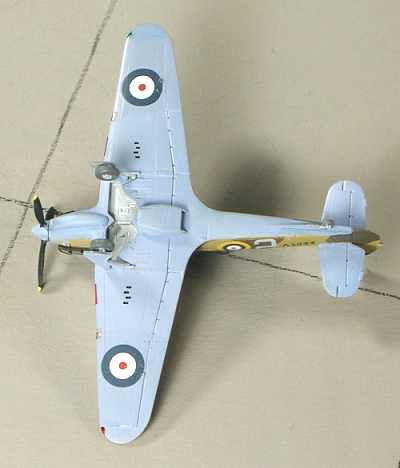
 With all the colors in place and
dry, the model was returned to the work bench. There, I glued in the gear doors.
The doors and landing gear are a single piece, which makes sense in this scale.
There are many theories of wheel well colors for Hurricanes. Some state that the
wells and inner gear doors are the same color as the underside of the plane.
Others go with them being unpainted aluminum. Still others think they should be
Interior Green. I went with the unpainted aluminum and so brush painted the
wells and gear/gear door insides with Aluminum Metalizer. I also painted the
tail wheel strut and wheel hubs this color. The wheels themselves were painted
with RLM 66 dark grey. I like that there is a distinct ridge for the wheels. It
makes painting the tires much easier. I do wish ALL kit makers would do this,
regardless of scale as it really helps a lot
With all the colors in place and
dry, the model was returned to the work bench. There, I glued in the gear doors.
The doors and landing gear are a single piece, which makes sense in this scale.
There are many theories of wheel well colors for Hurricanes. Some state that the
wells and inner gear doors are the same color as the underside of the plane.
Others go with them being unpainted aluminum. Still others think they should be
Interior Green. I went with the unpainted aluminum and so brush painted the
wells and gear/gear door insides with Aluminum Metalizer. I also painted the
tail wheel strut and wheel hubs this color. The wheels themselves were painted
with RLM 66 dark grey. I like that there is a distinct ridge for the wheels. It
makes painting the tires much easier. I do wish ALL kit makers would do this,
regardless of scale as it really helps a lot
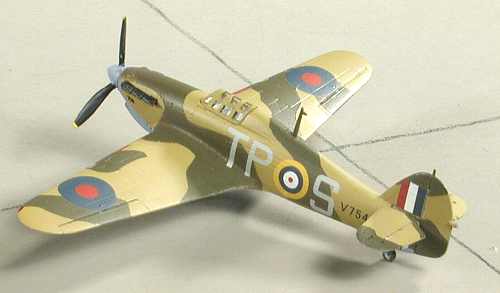
 The decals themselves are quite glossy and have a bit of carrier around them
that you may wish to remove. I didn't, thinking they would help the decal blend
in more, but it really didn't seem to. The fuselage decal with the code letters
and roundel is really quite large so that one was put in place first. The rest
followed and offered no problems. You are offered red patches to put over the
gun ports if you want to use them. They reacted well to Solvaset and are quite
opaque, so that none of them disappeared into the background nor did they let
the colors behind them show through.
The decals themselves are quite glossy and have a bit of carrier around them
that you may wish to remove. I didn't, thinking they would help the decal blend
in more, but it really didn't seem to. The fuselage decal with the code letters
and roundel is really quite large so that one was put in place first. The rest
followed and offered no problems. You are offered red patches to put over the
gun ports if you want to use them. They reacted well to Solvaset and are quite
opaque, so that none of them disappeared into the background nor did they let
the colors behind them show through.
|
CONCLUSIONS |
 This really is an excellent little kit. Yes, it is a bit pricey
for the size, but when you look at the detail and realize that you get two kits,
you'll find it well worth the cost. I find it interesting that there is being
more attention paid to this scale, especially in the production of military
models. Sweet has a number of other kits scheduled to join the current Hurricane
and MC.200. Eduard has just released a Ju-52 in 1/144 and others are on the way.
This really is an excellent little kit. Yes, it is a bit pricey
for the size, but when you look at the detail and realize that you get two kits,
you'll find it well worth the cost. I find it interesting that there is being
more attention paid to this scale, especially in the production of military
models. Sweet has a number of other kits scheduled to join the current Hurricane
and MC.200. Eduard has just released a Ju-52 in 1/144 and others are on the way.
The nice things about these small kits is that they are relatively quick builds and you can do a plethora of different camouflage schemes with them. They are also such that it is tough to get a good case of AMS going on them as they really are nearly too small to super-detail! :o)
Copyright ModelingMadness.com. All rights reserved. No reproduction in part or in whole without express permission from the editor.
If you would like your product reviewed fairly and fairly quickly, please contact the editor or see other details in the Note to Contributors.