Azur/FRROM 1/72 Ikarus IK-2 "VVKJ"
| KIT #: | FR015 |
| PRICE: | $28.75 |
| DECALS: | Seven Options |
| REVIEWER: | Scott Van Aken |
| NOTES: | Short run with resin, photo etch and vacuform parts |
| HISTORY |
The prototype, designated the IK-L1, of the design was ordered from
Ikarus A.D. in 1934, and was delivered for test in 1935. The aircraft was
powered by a Hispano-Suiza 12Ycrs inline engine. The
forward-firing armament consisted of a 20 mm HS-404 cannon mounted under the
engine, and two 7.92 mm Darne machine guns, mounted under and to each side of
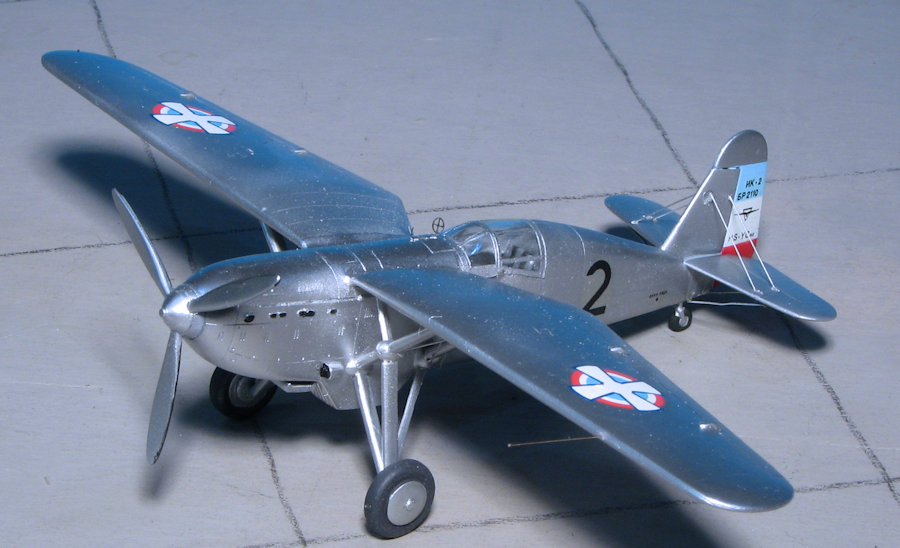
the engine. The design was similar to the Polish PZL P.8, sharing its Pulawski
wing (gull-wing) design, giving the pilot an excellent view.
The wing on each side was braced with two struts; the fixed conventional landing
gear was spatted and mounted off the wing
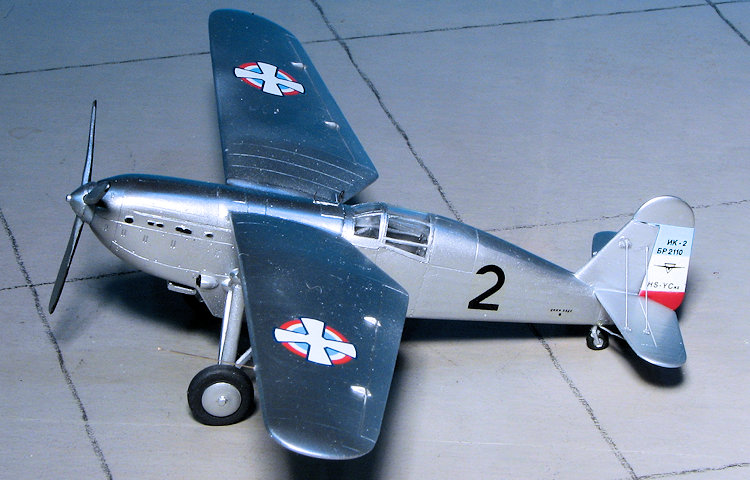
struts. The fixed tailwheel was also spatted. The pilot was installed aft of the
wing in an enclosed cockpit. The horizontal stabilizer on each side was braced
from below with two rigid braces from the lower
 tailcone, and tied from above
with two flying wires from the vertical stabilizer. The three-bladed propeller
was manually adjustable in pitch.
tailcone, and tied from above
with two flying wires from the vertical stabilizer. The three-bladed propeller
was manually adjustable in pitch.
Captain Leonid Bajdak, a biplane advocate, tested the IK-1 in flight. During a full range of tests on the third flight the aircraft failed to pull out of a power dive and crashed. Bajdak bailed out and survived but claimed the IK-1 was not suitable as a fighter. Investigation of the wreckage disclosed that the failure was due to negligence in sewing a seam on one of the fabric-covered wings, and therefore a decision was made to proceed with the second prototype, designated IK-2. The second prototype had metal-skinned wings and a shallower cooling radiator. The IK-2 was ready for test in June 1936. A new test pilot, Dobnikar, performed the preliminary flight tests, including a mock battle against a Hawker Fury, a biplane, flown by Captain Bajdak. The IK-2 outperformed the biplane in all respects, thereby confirming the hopes of the young designers.
Based upon results of preliminary testing, the Royal Yugoslav Air Force
ordered a production batch of 12 IK-2 fighters, which were all delivered in
1937. When German forces invaded Yugoslavia on 6 April 1941, the only unit of
the Yugoslav Air Force armed with the IK-2 was the 4th fighter regiment,
composed of 33rd
 and 34th air force groups stationed at Bosanski Aleksandrovac
airfield, in northwest Bosnia. The 4th fighter regiment was equipped with 18
Hawker Hurricanes and eight Ikarus IK-2 fighter aircraft.
and 34th air force groups stationed at Bosanski Aleksandrovac
airfield, in northwest Bosnia. The 4th fighter regiment was equipped with 18
Hawker Hurricanes and eight Ikarus IK-2 fighter aircraft.
Rovine airfield, situated north of Banja Luka, was the base of the Yugoslav 8th bomber regiment and its 24 Bristol Blenheim I bombers. During a German attack on the base on 7 April, five IK-2s together with five Hawker Hurricanes engaged German Messerschmitt 109 fighter aircraft. In the ensuing dogfight, the Yugoslav fighters managed to repel the 27 attacking German fighters, destroying two in the process at the cost of two Hurricanes and one IK-2. For the rest of the short conflict IK-2s were used for strafing advancing German columns and on several occasions they scrambled in pursuit of German reconnaissance aircraft, but to no effect. At the end of the brief campaign the four surviving IK-2s were overhauled at the Ikarus aircraft plant in Zemun before being transferred by the Germans to the newly formed Air Force of the Independent State of Croatia.
| THE KIT |
Along with AZ Models and a few others, Azur/MPM has been producing some rather interesting central European aircraft under the Azur/FRROM label. This one is a pre-war Jugoslav fighter that one rarely finds in kit form in any scale. It is a typical new mold MPM brand kit with very nice external detailing and some ejector towers to remove on the large bits. Due to the lack of complexity of the design, there are no resin parts and photo etch has been kept to a minimum. This latter consists basically of an instrument panel, seat harness and some external struts for the tail plane and one pair for the main wing struts.
 As mentioned, the kit is simplicity in itself
with a cockpit that has the basics; seat, stick and instrument panel. The
wing struts and landing gear may look daunting, but should not be an
obstacle to most builders. The kit provides both injected and vacuformed
canopies for the builder. There is minimal rigging required for the wing struts
and for the horizontal stabilizer.
As mentioned, the kit is simplicity in itself
with a cockpit that has the basics; seat, stick and instrument panel. The
wing struts and landing gear may look daunting, but should not be an
obstacle to most builders. The kit provides both injected and vacuformed
canopies for the builder. There is minimal rigging required for the wing struts
and for the horizontal stabilizer.
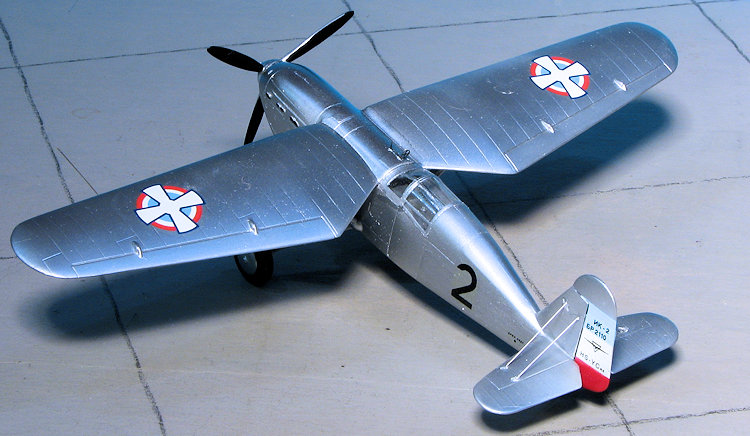
Instructions are well done with the usual Gunze paint references. A rigging guide is provided and the build steps include reference drawings to be sure all gets aligned properly. There are seven markings options. Five of them are overall aluminum aircraft with the 6th Fighter Regiment in late 1939. The other two are with the 4th Fighter Regiment in 1940 in the then standard camouflage. These last two options differ in insignia size and placement. The decal sheet is very nicely done and will probably require some care in applying thanks to their thinness. If the box art colors can be believed, the blues look to be too light.
| CONSTRUCTION |
 future bits might be affected by what is
currently being done.
future bits might be affected by what is
currently being done. 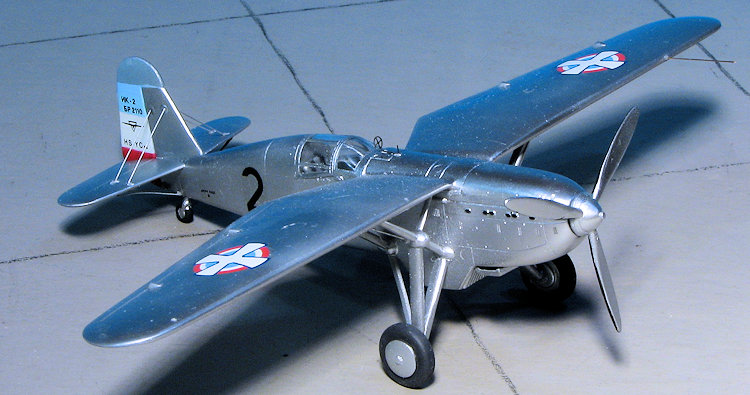 canopy until all seemed to fit fairly well. I then glued on
the wing, which let me know how many pieces of plastic to use for the
instrument panel as it had to fit flush with the end of the wing. Once the
canopy was in place (I used the plastic one), it was masked.
canopy until all seemed to fit fairly well. I then glued on
the wing, which let me know how many pieces of plastic to use for the
instrument panel as it had to fit flush with the end of the wing. Once the
canopy was in place (I used the plastic one), it was masked. | COLORS & MARKINGS |
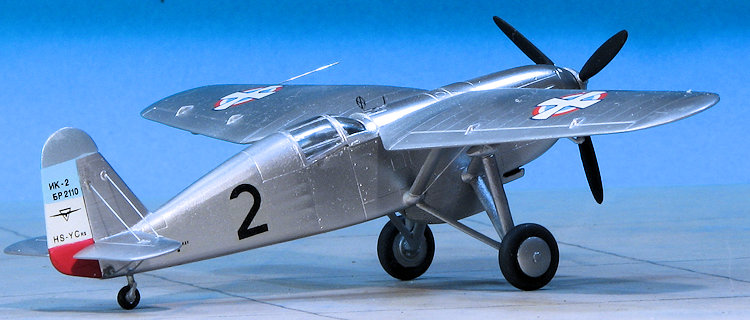
 With the airframe painted, I started applying decals. Much to my disgust,
I'd lost the kit's sheet, but was able to salvage things with Lift Here
decals #737-LH which includes markings for several IK-2 aircraft, including
an overall silver version. While I paid almost as much as the kit for these
markings, it is just punishment for losing the originals! The Lift Here
decals are admirably thin, but not to the point where tearing and folding
over is an issue. I used the weak Microsol setting solution to help prevent
silvering and applied them without a clear coat under them.
With the airframe painted, I started applying decals. Much to my disgust,
I'd lost the kit's sheet, but was able to salvage things with Lift Here
decals #737-LH which includes markings for several IK-2 aircraft, including
an overall silver version. While I paid almost as much as the kit for these
markings, it is just punishment for losing the originals! The Lift Here
decals are admirably thin, but not to the point where tearing and folding
over is an issue. I used the weak Microsol setting solution to help prevent
silvering and applied them without a clear coat under them.
| CONCLUSIONS |
| REFERENCES |
http://en.wikipedia.org/wiki/Ikarus_IK_2
If you would like your product reviewed fairly and fairly quickly, please contact me or see other details in the Note to Contributors.