| KIT #: | 48001 |
| PRICE: | $68.95 SRP |
| DECALS: | Two options |
| REVIEWER: | Scott Van Aken |
| NOTES: | Short run with photo etch parts |
| HISTORY |
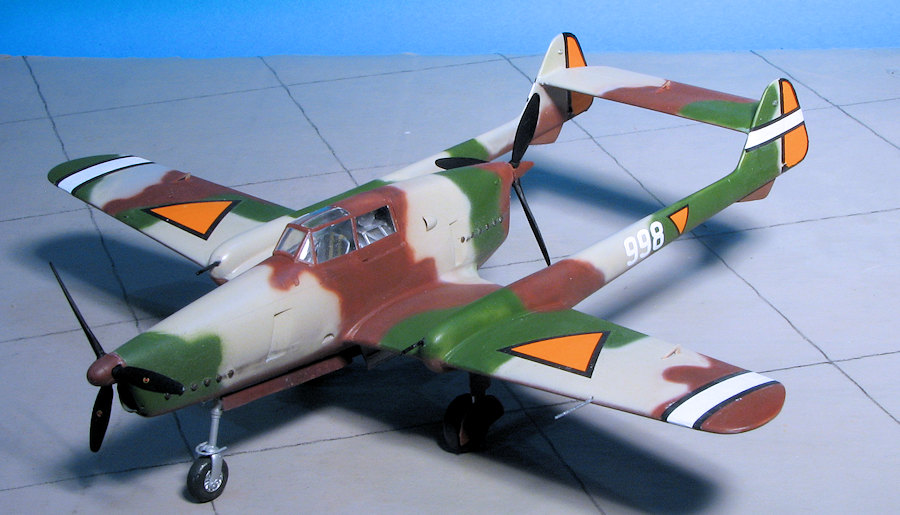
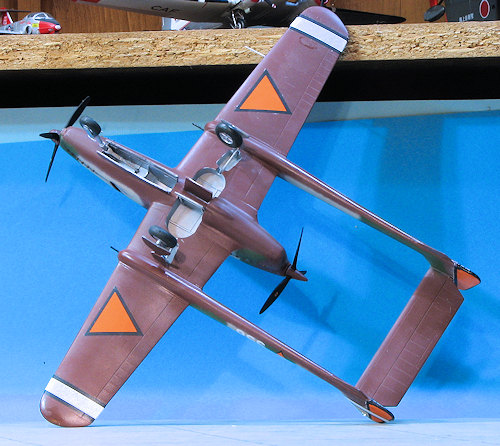
The Fokker D.XXIII was designed as a twin-engined
single-seat aircraft. To overcome the problems of asymmetric flight it
had a tractor engine at the front and a pusher engine at the rear. The
D.XXIII was a cantilever monoplane with the twin tail units on booms.
The pilot had an enclosed cockpit in betwee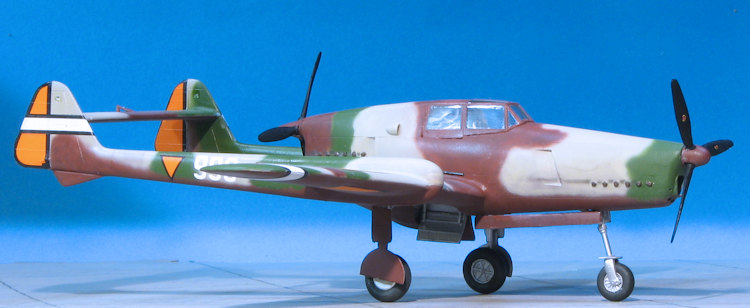 n the tractor and pusher
engines and it had a retractable tricycle landing gear.
n the tractor and pusher
engines and it had a retractable tricycle landing gear.
The prototype first flew on 30 May 1939 powered by two Walter Sagitta I-SR liquid cooled vee piston engines. The trial flights identified problems with the cooling of the rear engine and general engine performance. It was proposed to use Rolls-Royce or Daimler-Benz engines in the production aircraft. Concerns were also raised about the pilot clearing the rear propeller if he had to bail out and an ejector seat was studied. The programme was abandoned in May 1940 when the German forces invaded the Netherlands. The lone prototype had flown a total of four hours in the year since its initial flight.
| THE KIT |
Those of you with better memories that most, will recall that RS Models produced this kit in 1/72 scale a short while back. They chose this kit to begin their foray into 1/48 scale and picked a rather neat subject for that. I can only assume that their 1/72 kit sold well. The kit comes with two large sprues of grey plastic with very nicely molded parts. There are not any rivets and what panel line detail is there is crisply formed. You will find the several parts have ejector towers on the inside of them and in some cases, these will need to be removed to get the parts to fit properly.
 A photo etch
fret is included that is mercifully brief. It contains parts for the seat
harness and for the roll over bar assembly behind the pilot which contains some
sort of gizmo that I couldn't identify. The clear sprue includes a single-piece
canopy and six formation lights for the fins.
A photo etch
fret is included that is mercifully brief. It contains parts for the seat
harness and for the roll over bar assembly behind the pilot which contains some
sort of gizmo that I couldn't identify. The clear sprue includes a single-piece
canopy and six formation lights for the fins.
The cockpit is well appointed with the usual bits such as seat, control column, rudder pedals and instrument panels. These panels have raised detail. A decal would have been nice, but one will just have to paint it. This all fits atop the nose gear well piece. Sidewalls are included and have some detail to add to them, such as the throttle quadrant. One will need to install the exhaust stubs prior to closing the fuselage halves. There is a section of inverted vee engine to place behind the forward cowoling piece which will eat up some of the room you'll need for nose weight as I can see this being a major tail sitter. No indication of how much weight is needed is provided.
Wings consist of a one-piece lower section and two
upper halves. Main gear wells are molded into the lower wing. Aileron control
rods are provided. None of the control surfaces are separate. There are ledges
on the 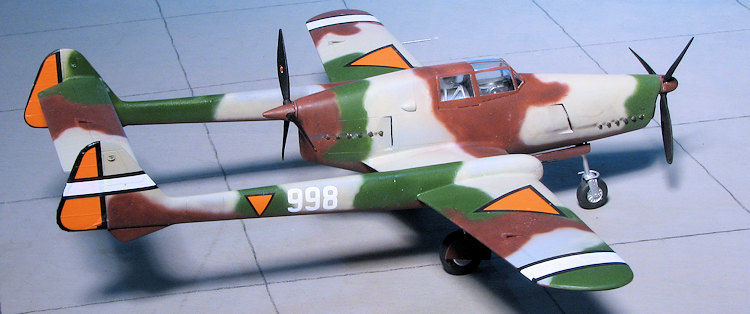 back of the boom roots on the wings over which the tail booms will be
placed. The horizontal stabilizer is two halves and also has a control rod
piece. The kit includes two piece main wheels, the struts and all the various
retraction struts needed as well as gear door struts.
back of the boom roots on the wings over which the tail booms will be
placed. The horizontal stabilizer is two halves and also has a control rod
piece. The kit includes two piece main wheels, the struts and all the various
retraction struts needed as well as gear door struts.
Nose gear has a split fork into which one plces the nose wheel. Nose wheel is also in two pieces. There are some little bits that stick down from the lower wing which could be shell ejector chutes, but with only one gun per wing it seems odd that these are there. The two props each have different spinners with the rear one being much more pointed as on the Do-335.
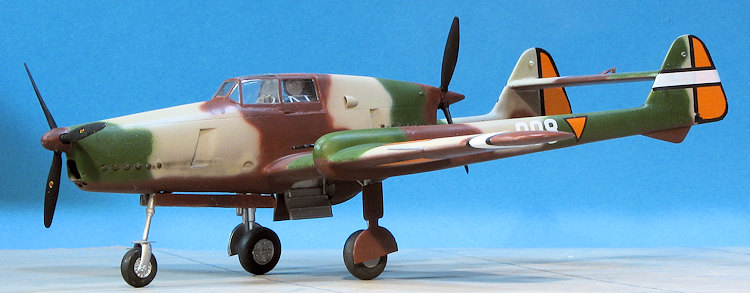
Instructions are well drawn and provide generic color references. It also includes some detail drawings, particularly helpful when it comes the landing gear as the main wheels are quite toed in. Markings are for the single prototype in two stages of its life. Both have the same camouflage scheme and just differ in markings. The full color painting and marking guide provide FS 595 color references, though I don't think there are any premixed paints with these shades. The decals are quite nicely done and in register. I'm sure most will choose the box art plane as it is very much more colorful.
| CONSTRUCTION |
 ramps appear to be higher vertically in the instructions, but on
one side of them are xxxx marks that show what side is to be glued. These
need to be thinned down a bit or the rudder pedal pieces will not fit. There
is no exact placement marks so just glue them where they look right. In
between these fits the control column. With this done and the details
painted, it was set aside.
ramps appear to be higher vertically in the instructions, but on
one side of them are xxxx marks that show what side is to be glued. These
need to be thinned down a bit or the rudder pedal pieces will not fit. There
is no exact placement marks so just glue them where they look right. In
between these fits the control column. With this done and the details
painted, it was set aside. 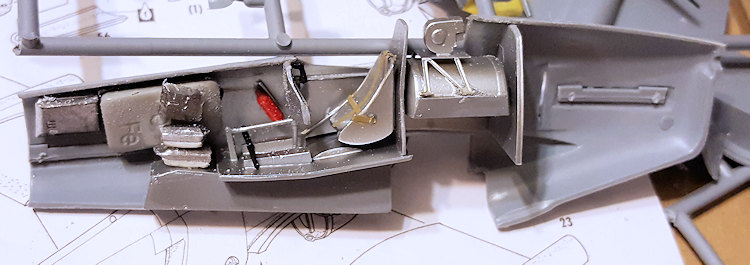 I then taped the booms, horizontal stab, wings and fuselage bits together to
see how much weight I'd need. The area is quite cramped so one has to be
inventive. It turned out that 17 grams seems to be enough, but we'll see.
With the weights installed, I kept the fuselage halves taped and test fit
the forward cowling/engine piece. It seems that the engine bit would not fit
all the way because it bumped up against some of the weights. Unfortunately,
one cannot get lead weights as easily as it used to be, these things now
being made of iron. Iron cannot be easily cut or bent so the only choice was
to sand the snot out of the outside of the engine bit. Thanks to Blap's
Super Sanding Blocks, this was a fairly easy task and finally it got to
where it fit.
I then taped the booms, horizontal stab, wings and fuselage bits together to
see how much weight I'd need. The area is quite cramped so one has to be
inventive. It turned out that 17 grams seems to be enough, but we'll see.
With the weights installed, I kept the fuselage halves taped and test fit
the forward cowling/engine piece. It seems that the engine bit would not fit
all the way because it bumped up against some of the weights. Unfortunately,
one cannot get lead weights as easily as it used to be, these things now
being made of iron. Iron cannot be easily cut or bent so the only choice was
to sand the snot out of the outside of the engine bit. Thanks to Blap's
Super Sanding Blocks, this was a fairly easy task and finally it got to
where it fit. 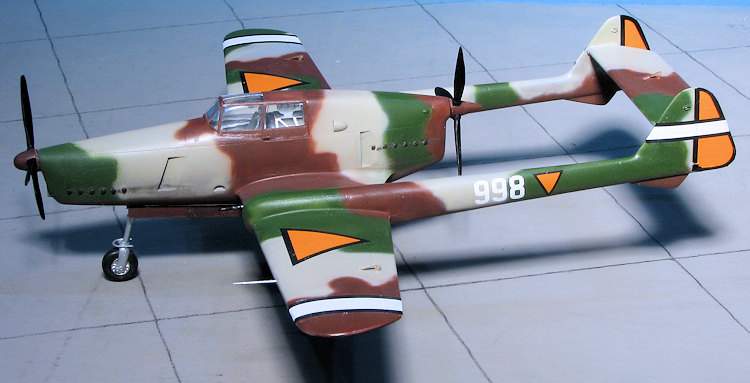
| COLORS & MARKINGS |
 Brown that looked the part for the underside and part
of the upper colors so that was sprayed on first. Then I sprayed on the tan
and for this I used another Gunze paint, while the green was FS 34102 from
Testors. There was a lot of back and forth painting as you can imagine.
Perhaps masking this would have been better, but it turned out just fine.
Brown that looked the part for the underside and part
of the upper colors so that was sprayed on first. Then I sprayed on the tan
and for this I used another Gunze paint, while the green was FS 34102 from
Testors. There was a lot of back and forth painting as you can imagine.
Perhaps masking this would have been better, but it turned out just fine.
 the
backing. They also would tear very easily and the white is not as opaque as
one would hope. However, you are not going to find aftermarket for this one
so you'll have to use what is available.
the
backing. They also would tear very easily and the white is not as opaque as
one would hope. However, you are not going to find aftermarket for this one
so you'll have to use what is available. | CONCLUSIONS |
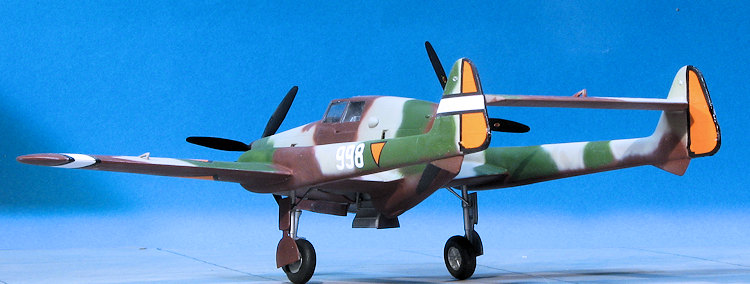
This was not an easy build. There are a number of areas where one has to do quite a bit of work to get parts to fit properly, but it is what one expects when one builds short run kits. If they did not have dodgy fit, they wouldn't be short run and most of us know this going into them. Despite all the issues, the end result is a nice looking model of a one-off aircraft.
| REFERENCES |
http://en.wikipedia.org/wiki/Fokker_D.XXIII
April 2016
Copyright ModelingMadness.com
My thanks to, well, me for providing this kit and getting it on sale.
If you would like your product reviewed fairly and fairly quickly, please contact the editor or see other details in the Note to Contributors.