| KIT: | Classic Airframes 1/48 Bloch MB.152 |
| KIT #: | ? |
| PRICE: | $29.98 MSRP |
| DECALS: | Two options |
| REVIEWER: | Scott Van Aken |
| NOTES: | Short run kit with resin and vacuformed parts. |
| HISTORY |
The Bloch MB-150 was a French low-wing, all-metal monoplane fighter aircraft with retractable landing gear and closed cockpit developed by Société des Avions Marcel Bloch as a contender in the 1934 French air ministry competition for a new fighter design.
Although the competition was won by the prototype Morane-Saulnier M.S.406, development proceeded culminating in the first attempted flight of the MB.150.01 prototype in 1936. Unfortunately, the plane proved unable to leave the ground! With modifications consisting of a strengthened wing of greater area, revised landing gear, and installation of a 940 hp (701 kW) Gnome-Rhone 14N-0 radial engine with a three-blade constant speed propeller, the MB.150 finally flew in October of 1937.
Handed over to the Centre d'Essais du Materiel Aerien (CEMA) for service trials, its performance proved sufficiently interesting to warrant further development. This brought, at the very beginning of 1938, a small increase in wing span and installation of a 14N-7 engine. When trials were completed in the late spring of 1938, SNCASO was awarded an order for a pre-production batch of 25 of these aircraft.
No such production of the MB-150.01 ever occurred, the plane being totally unsuitable to mass production. Redesign would lead to the MB.151 and MB.152 prototypes, developed and produced in parallel. By the outbreak of World War II, some 120 had reached the Armée de l'Air, but few of them were flyable, most missing their gunsights and propellers.
The MB.153 and MB.154 were intended as test-beds for American engines, but only the former flew, and when it crashed a few days later, damaged beyond repair, pursuit of these alternatives also ceased. Instead, attention shifted to extending the range of the MB.152. This was achieved by moving the cockpit aft in order to make room for a new fuel tank. Other modifications included a slightly broader wing and revised aerodynamics around the cowling. The result, designated MB.155 performed favourably in flight tests and was ordered into production in 1940, however only 10 aircraft had been completed by the fall of France. Under the terms of the armistice, the remaining 19 on the production line were completed and delivered into Vichy service. From there, some eventually made their way into the Luftwaffe after 1942.
The final member of the family, the MB.157 utilised a far more powerful engine and eventually became a very different aircraft as the design evolved to accommodate the larger and heavier powerplant. Unfinished at the time of the armistice, it was ordered to be completed and flown under German supervision. Demonstrating superb performance, it was taken to Orly where it was dismantled for testing. The engine was shipped to Germany, and the airframe evaluated in a wind tunnel, confirming the excellence of the design. It was later destroyed in an air raid.
MB.151s and MB.152s equipped six fighter Groupes during the Battle of France, but proved completely outclassed by the Messerschmitt Bf 109E. They continued to fly in the Vichy air force until this was disbanded. Some of these aircraft were then supplied to Romania, which flew them against the Russians.
Nine MB.151s were exported to Greece. They flew against the Italian and Germans scoring several air-to-air victories.
| THE KIT |
 This
is the 22nd kit produced by Classic Airframes and as such, it not totally
typical of their current line. However, what is the same is that it is a short
run kit with resin parts and as such, along with the FM kit, is the only 1/48 injected kit of this most
interesting, but ill-fated French fighter.
This
is the 22nd kit produced by Classic Airframes and as such, it not totally
typical of their current line. However, what is the same is that it is a short
run kit with resin parts and as such, along with the FM kit, is the only 1/48 injected kit of this most
interesting, but ill-fated French fighter.
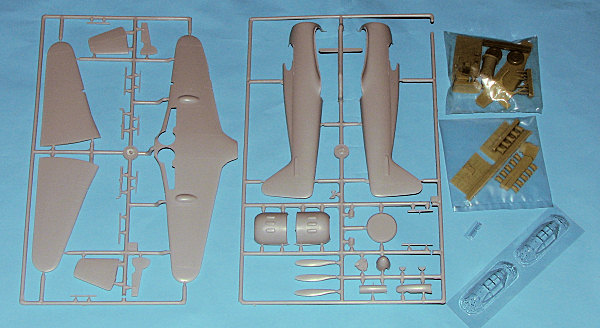
Molded by the MPM group in a light grey plastic, it is
so very typical of what MPM was producing at the turn of the century. The
detailing is engraved but rather lightly so and somewhat soft. The mold seams
are somewhat thick, bordering on flash in some cases, and all the large plastic
parts have ejector towers on the inside that will need to be removed prior to
assembly. It also has individual injected prop blades that fit into the base of
the spinner. The cowling is in two halves, and oddly, not all of the rocker
panel clearance humps are molded in place. This was probably done to make it
easier to sand smooth the seam as there are easy to see placement engravings.
Two nicely molded vacuformed canopies are provided. There is no dedicated wing
landing light cover, the instructions telling you to heat a piec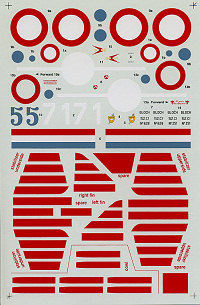 e
of scrap clear and bend it around. I recommend using a section of clear rod
(like sprue), glue it in place, and then sand it down. It will probably look a
lot better in the long run.
e
of scrap clear and bend it around. I recommend using a section of clear rod
(like sprue), glue it in place, and then sand it down. It will probably look a
lot better in the long run.
The rest of the kit is in resin and that includes the entire cockpit, wheels, wheel wells, and engine. The engine consists of a central block and separate cylinders. There are small scalloped areas on the block to show you where to put the various cylinders. Speaking from personal experience doing a similar task on a 1/72 Wellington. I found that this was not the easiest thing to do as the cylinder mounting area is also where the cylinder attaches to the resin pour stub. This makes it paramount that one gets a clean and level cut when removing the cylinders. The resin is generally very nicely done, though I did spot a few air bubbles and these parts are 'old school' resin with large attachment surfaces for many of the bigger bits.
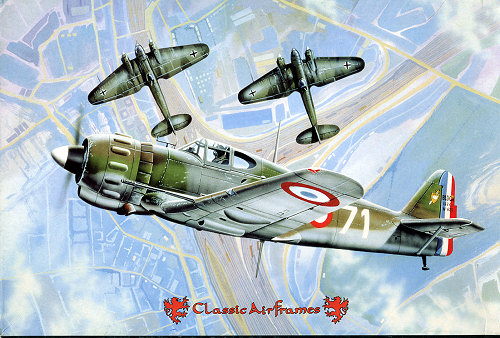
Instructions are well drawn and a bit basic, with colors provided in generic, and where applicable, FS 595 references. markings are given for two aircraft. One is the box art plane from GC II/9 at Clermont-Ferrand in 1940 and the other is a Vichy aircraft of GC I/8 at Montpelier in 1942, complete with the full Vichy stripes. On this latter one, the kit provides the red stripes and the modeler will provide the yellow for the cowling and tailplanes. Be sure when building your model to cant the engine slightly off to the left as that was done to help cut down on torque steer when taking off. The instructions don't mention this but the markings images do show it.
| CONCLUSIONS |
Despite its simplicity, the experiences of myself and others have shown that these kits require careful building. Basically you need to test fit every single piece to be sure that it will fit and to plan a bit ahead. This is particularly true of the resin parts. When the owner was asked several years ago why the resin didn't seem to fit the plastic parts, I was told that they are made separately and that no one sees the other bits together until they are put into the boxes. Apparently that was done to prevent theft of the kit, but it also means that generally, you'll have difficulty getting all the bits to fit without resorting to some additional work.
Regardless, it is not impossible to build as you can plainly see from the reviews section and while long out of production, it can be found. I got mine from a store that had it sitting on the shelves since it was new
| REFERENCES |
http://en.wikipedia.org
May 2007
Thanks to me for this one.
If you would like your product reviewed fairly and quickly by a site that has over 350,000 visitors a month, please contact me or see other details in the Note to Contributors.