Kitty Hawk 1/32 P-39Q/N Airacobra
| KIT #: | KH 32013 |
| PRICE: | € |
| DECALS: | Five options |
| REVIEWER: | Scott Van Aken |
| NOTES: | New tool kit |
| HISTORY |
The Bell P-39 Airacobra was one of the principal American fighter aircraft in service when the United States entered World War II. The P-39 was used with great success by the Soviet Air Force, which scored the highest number of individual kills attributed to any U.S. fighter type. Other major users of the type included the Free French, the Royal Air Force, the United States Army Air Forces, and the Italian Co-Belligerent Air Force.
Designed by Bell Aircraft, it had an innovative layout, with the engine installed in the center fuselage, behind the pilot, and driving a tractor propeller via a long shaft. It was also the first fighter fitted with a tricycle undercarriage. Although its mid-engine placement was innovative, the P-39 design was handicapped by the absence of an efficient turbo-supercharger, limiting it to low-altitude work. As such it was rejected by the RAF for use over western Europe and passed over to the USSR where performance at high altitude was less important.
Together with the derivative P-63 Kingcobra, the P-39 was one of the most successful fixed-wing aircraft manufactured by Bell.
The P-39N and P-39Q were the most numerous versions of the Airacobra with the Q alone having a plethora of subvariants, so it is a good idea to do some research before building your model. While the Airacobra was handicapped by the lack of the turbocharger, it was quite a nimble aircraft at low level. Unfortunately, most of the plane's opponents were not operating at low altitude except on the Eastern Front, hence the success that Soviet pilots had with the aircraft. A large number of US Airacobras were used in training, getting units up to speed, and in areas where air combat was not expected. Though a bit of a dud as a fighter, it was quite good as a fighter bomber.
| THE KIT |
 Kitty
Hawk's latest release is not the first P-39 to have been done in this scale as
MPM/Special Hobby did the earlier variants, but this is one that can be done as
the later versions and has a lot more detail. Molding is quite good and I was
very pleased to see none of the ejector towers that were so prevalent on their
F-86D kit. However, there are still a lot of ejector pin depressions on many
parts such as the inside of gear doors, flaps and the various covers for the
engine and guns. Some of these will be particularly difficult to remove as they
are in the middle of framework detail.
Kitty
Hawk's latest release is not the first P-39 to have been done in this scale as
MPM/Special Hobby did the earlier variants, but this is one that can be done as
the later versions and has a lot more detail. Molding is quite good and I was
very pleased to see none of the ejector towers that were so prevalent on their
F-86D kit. However, there are still a lot of ejector pin depressions on many
parts such as the inside of gear doors, flaps and the various covers for the
engine and guns. Some of these will be particularly difficult to remove as they
are in the middle of framework detail.
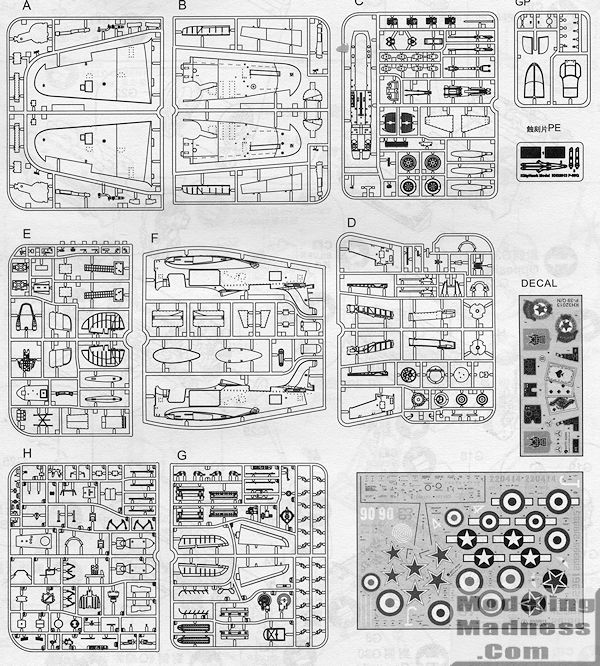
I'll state from the beginning that the kit is pretty well
designed to have everything opened up on it. That is one of its reasons for
being so it is expected that there will be a lot of stuff. There is a very
complete engine and an equally detailed nose gun bay. In fact, the first several
pages of the instructions are devoted to building up the engine. The cockpit is
equally well detailed with a nicely done radio rack behind the pilot as well as
a multi-piece instrument panel. Decals are provided for instruments. For the
seat there is a multi-section seat harness. What Kitty Hawk has done in this
case is to provide the buckles and the belts as separat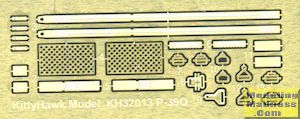 e
items. One then threads the p.e. belt through the buckles and add the various
straps. It will end up looking a lot better than the flat belts one usually
sees, but will require a bit more work to assemble. Speaking of p.e., there are
two screens on the set that I've not been able to figure out where they go. They
look like radiator screens, but I've somehow missed finding them in the
instructions.
e
items. One then threads the p.e. belt through the buckles and add the various
straps. It will end up looking a lot better than the flat belts one usually
sees, but will require a bit more work to assemble. Speaking of p.e., there are
two screens on the set that I've not been able to figure out where they go. They
look like radiator screens, but I've somehow missed finding them in the
instructions.
All of the interior bits, engine and gun bay bits fit onto a long interior floor assembly. This gets additional bits and pieces attached to it such as the nose gear assembly and items like the O2 bottles. All of this is fit into the fuselage halves. There are other access panels near the tail and just behind the intake scoop so you can leave these off to show off the additional pieces. One thing you may be wondering is where does one put weight? Well, the instructions are mum on this, but I'm betting you will need some so cram it into spots where you think it will not be seen. Another alternative is to build the model with all the panels closed. Doing this means you don't need to install all the gun bay bits and you could probably leave out the engine as well to save weight behind the main gear. The choice is yours.
Back to the features. There are two different prop spinners and two different nose gun barrels, though no indication of which markings options uses which. This is an area that I think Kitty Hawk could make improvements. When offering options, one should indicate what markings option is appropriate for which bits. The lower radiator exhaust has hingles that allow it to be posed open. Doors are also separate items, but note that the left door was usually kept closed due to a lot equipment in the way.
Separate rudder, ailerons, elevators, and flaps are provided. Wing gun access panels are also separate as are the main gear wells. One has the option of using the wing cannon pods or not. Thankfully, Kitty Hawk has left all the attachment holes for things under wings and fuselage closed so you will need to remember to open these as the instructions do not remind you about it. For that reason it would be wise to decide what you'd like dangling from the underside, study the instructions and then open the holes for these items prior to construction. I should mention that you can put either a fuel tank or bomb under the centerline.
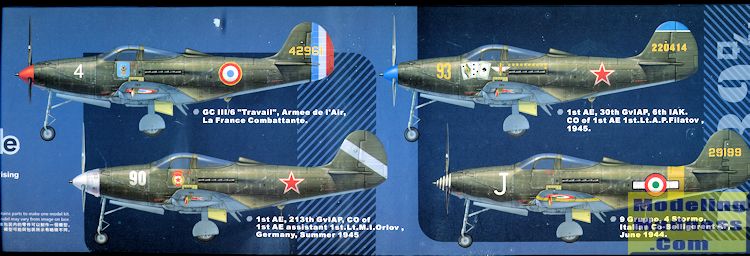
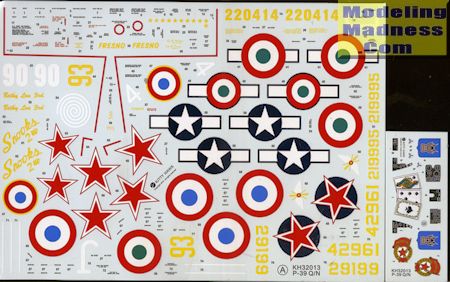 Markings
are for five aircraft, all in OD over Neutral Grey. Many have color bands and
all that will need to be painted in place. The
box art plane is the only US version, that being Snooks 2nd with the 71st TRS in
New Guinea. This has a white empennage and wing leading edges.
You
also have a nice French plane with GC III/6 'Travail' in the last year of the
war, an Italian aircraft with 9 Gruppo, 4 Stormo, in mid 1944, and two
Soviet planes. White 90 is post war and with the 213 GvIAP and yellow 93 is with
the 30th GvIAP, also in 1945. The decals are nicely done and those KH markings
I've used on other builds have been well done, but very thin so care is needed.
There may already be aftermarket sheets out there for these versions, but if
not, I'll bet we'll see a number of new ones.
Markings
are for five aircraft, all in OD over Neutral Grey. Many have color bands and
all that will need to be painted in place. The
box art plane is the only US version, that being Snooks 2nd with the 71st TRS in
New Guinea. This has a white empennage and wing leading edges.
You
also have a nice French plane with GC III/6 'Travail' in the last year of the
war, an Italian aircraft with 9 Gruppo, 4 Stormo, in mid 1944, and two
Soviet planes. White 90 is post war and with the 213 GvIAP and yellow 93 is with
the 30th GvIAP, also in 1945. The decals are nicely done and those KH markings
I've used on other builds have been well done, but very thin so care is needed.
There may already be aftermarket sheets out there for these versions, but if
not, I'll bet we'll see a number of new ones.
| CONCLUSIONS |
| REFERENCES |
August 2015
If you would like your product reviewed fairly and fairly quickly, please contact the editor or see other details in the Note to Contributors.