Revell 1/72 F-4A Lightning
|
KIT # |
4521 |
|
PRICE: |
$5.00 (in the late '70s) |
|
DECALS: |
one aircraft |
|
REVIEW : |
|
|
NOTES: |
|
|
HISTORY |
The only really successful US twin-engined fighter of WWII was the P-38 Lightning. Often, the addition of the second engine rarely resulted in a superior fighter aircraft. The additional weight of the engine and surrounding airframe along with the need to carry a greater amount of fuel often negated any real benefit of the second engine. However, the P-38 was one of those rare exceptions to the rule.
 The P-38 could be
found in all US theaters of operation. The Lightning was well liked by those who
flew it, mainly due to the safety factor of the second engine. If one stopped
operating, either due to combat damage or other malfunctions, the remaining
engine was enough to bring the aircraft home. The larger airframe also meant
that the Lightning had a greater range than most other US fighters and so was
particularly useful in the Pacific where long distances were the norm. It is
probably no surprise that the top two US aces of that conflict were in the
Pacific and flew the P-38.
The P-38 could be
found in all US theaters of operation. The Lightning was well liked by those who
flew it, mainly due to the safety factor of the second engine. If one stopped
operating, either due to combat damage or other malfunctions, the remaining
engine was enough to bring the aircraft home. The larger airframe also meant
that the Lightning had a greater range than most other US fighters and so was
particularly useful in the Pacific where long distances were the norm. It is
probably no surprise that the top two US aces of that conflict were in the
Pacific and flew the P-38.
However the design of the plane did have a drawback or two. For one, it wasn't as maneuverable as most of the opposition. It also had a very large blind spot, thanks to the design of the airframe. It was easier to sneak up on than others as it had a huge blind spot to the rear and aft as well as to the side where the engines blocked a lot of the pilot's view.
Despite these, the aircraft went on to perform beautifully. A real benefit of the uncluttered nose section of the P-38 was the ability to carry a rather heavy offensive armament of 4 .50 cal and a 20mm gun. This large area also made it a perfect candidate for a photo recon aircraft. A number of cameras could be carried in the nose and the speed of the P-38 meant that most enemy aircraft would have a tough time catching the unarmed photo recce version.
|
THE KIT |
 Revell produced the
1/72 version of the P-38 in several boxings, including one that would allow the
modeler to do not only a regular P-38J but also the night fighter P-38M and the
early photo recon version, the F-4A. The F-4A kit was also boxed by itself. This
version is not exactly the easiest to find, but can be located at swap meets for
around $10 or so. Frankly, despite its age, it is a worthwhile model to try to
locate.
Revell produced the
1/72 version of the P-38 in several boxings, including one that would allow the
modeler to do not only a regular P-38J but also the night fighter P-38M and the
early photo recon version, the F-4A. The F-4A kit was also boxed by itself. This
version is not exactly the easiest to find, but can be located at swap meets for
around $10 or so. Frankly, despite its age, it is a worthwhile model to try to
locate.
This kit was molded in the early '70s when raised panel lines were the norm. The kit consists of all that is needed to do the F-4A and includes a pair of drop tanks for under the wings. As you can imagine, the wheel wells are devoid of any detail and the doors a bit thick, but it doesn't detract from the kit.
The instructions are more than adequate, though the color callouts were all in generic colors rather than FS 595 as is the norm today. Decals were for one aircraft, based in India. These were slightly off register, but I had to use them as there really wasn't and still isn't any real aftermarket option. While there are some sheets for regular P-38s, I have not seen any for the photo recce versions.
|
CONSTRUCTION |
The cockpit is surprisingly well detailed for the time and fits very well. This kit was built many years ago before I became more concerned about things like proper interior and wheel well colors so those areas were painted using Testors chromate green, which really is much to bright for either the location! Other details in the cockpit were painted black.
 Fit of the engine
booms to the fuselage itself was quite good as was the installation of the tail
plane. This item simply slides into slots in the tails, making construction
quite simple. Probably the most difficult part of this kit was getting the recce
nose properly installed as well as the lower intakes on the boom. These both
required quite a bit of filler and sanding to look proper. I was also less
than thrilled with the spinner arrangement and did not get the smooth finish I
would have hoped for. One thing I did do was to put as much nose weight as
possible in to prevent tail sitting. The P-38 is a notorious tail sitter!
Fit of the engine
booms to the fuselage itself was quite good as was the installation of the tail
plane. This item simply slides into slots in the tails, making construction
quite simple. Probably the most difficult part of this kit was getting the recce
nose properly installed as well as the lower intakes on the boom. These both
required quite a bit of filler and sanding to look proper. I was also less
than thrilled with the spinner arrangement and did not get the smooth finish I
would have hoped for. One thing I did do was to put as much nose weight as
possible in to prevent tail sitting. The P-38 is a notorious tail sitter!
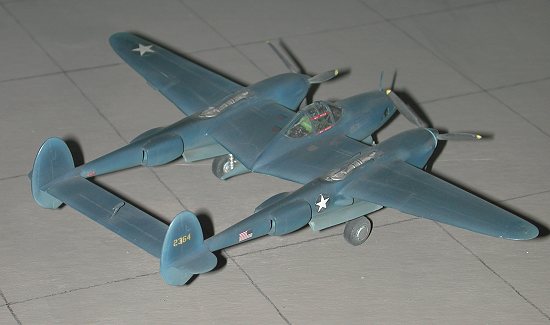
The landing gear and wheels were painted aluminum and glued in the wheel wells. You get the option of spoked wheels or wheel covers. I chose the wheel covers. A real benefit of this kit is that the main wheel wells and gear doors are a single piece so they can be left off until after painting. The tiny elevator balances were glued in place and despite a number of moves, have yet to break off! The turbochargers and intakes were painted aluminum and left off until after the rest of the aircraft was painted. Same with the gear door covers. The canopy was install and then masked and it was off to the paint shop
|
PAINT & DECALS |
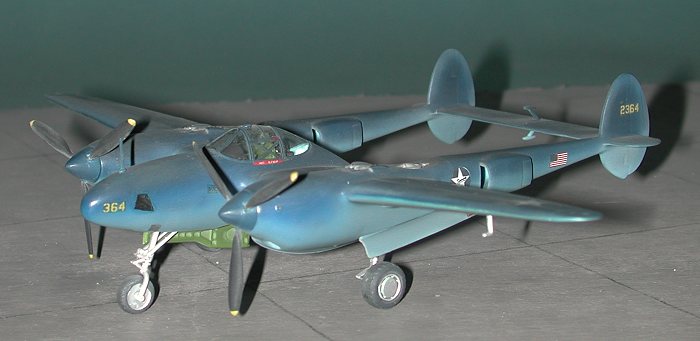
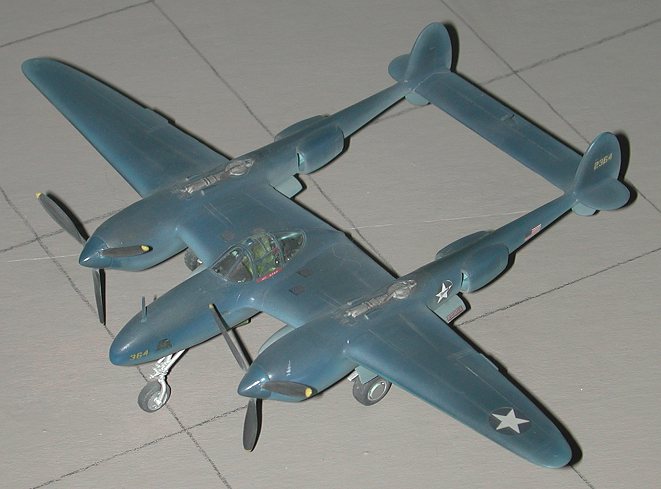
Painting this kit was really a lot of fun. What I was trying to do was to duplicate the 'haze' paint scheme carried by these early PR Lightnings. From all my research, the paint itself was the devil to apply to the real plane and had to be constantly touched up. However, from all reports, the plane was nearly invisible at high altitude. This was due as much to the special pigment of the paint as to the method of application.
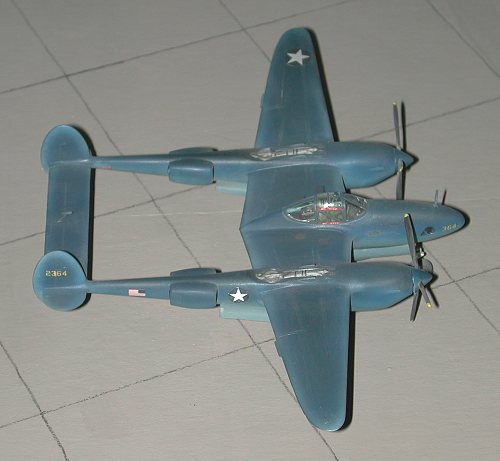
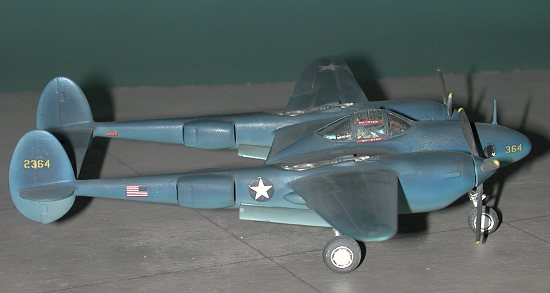
 Basically, the aircraft was painted
overall black and varying shades of blue were then applied to the black
undercoat. The blues were slightly transparent, allowing the black to show
through in some places. The aircraft was a much darker blue on the top as it was
on the underside. The edges of the aircraft were painted a lighter blue than the
center sections of the upper fuselage and wings. Underside of the plane was a
pretty constant blue-grey.
Basically, the aircraft was painted
overall black and varying shades of blue were then applied to the black
undercoat. The blues were slightly transparent, allowing the black to show
through in some places. The aircraft was a much darker blue on the top as it was
on the underside. The edges of the aircraft were painted a lighter blue than the
center sections of the upper fuselage and wings. Underside of the plane was a
pretty constant blue-grey.
Fortunately, there are a number of color photos of those P-38s painted in the Haze scheme. There are really no sharp demarcation lines between colors and the entire application looks like it has a lot of overspray in the blending of colors.
I decided to paint my aircraft pretty much the way the prototypes were. I used Testor's paints and did a lot of custom mixing to get the colors I wanted. First, the entire airframe was painted black. Then the bottom was painted and using darker and darker blues, the upper surface was done. There was the usual back and forth painting until I got an overall pattern that I liked. It was really a lot of fun applying this scheme. Since I was using glossy colors, there was no need for a clear coat prior to applying decals.
The decals themselves went on with little fuss. Actually, there aren't many decals to apply. I mentioned they were off register, but there was no other option. They reacted well to the Microscale system. Then the airframe was matte coated with a Pactra semi-matte acrylic clear. The camera windows were then painted gloss black.
Then the other bits like main wheel wells and nose gear door were glued in place and the masking removed.
|
CONCLUSIONS |
The end result is a very nice model. Like several of the oldies that I have reviewed here, this one has held a place of honor on my display shelves. If you can find the kit and have an interest in the subject, I can recommend it to you.
November 2000
Copyright ModelingMadness.com. All rights reserved. No reproduction in part or in whole without express permission from the editor.
Review kit courtesy of me and my wallet!
If you would like your product reviewed fairly and fairly quickly, please contact the editor or see other details in the Note to Contributors.
Back to Reviews Page 2016