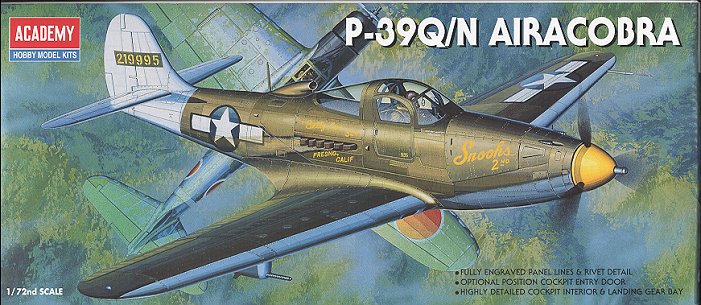
Academy 1/72 P-39N/Q Airacobra
|
KIT # |
2177 |
|
PRICE: |
$9.00 when new |
|
DECALS: |
2 aircraft |
|
REVIEW : |
|
|
NOTES: |
|
|
THIS AIRCRAFT & UNIT |
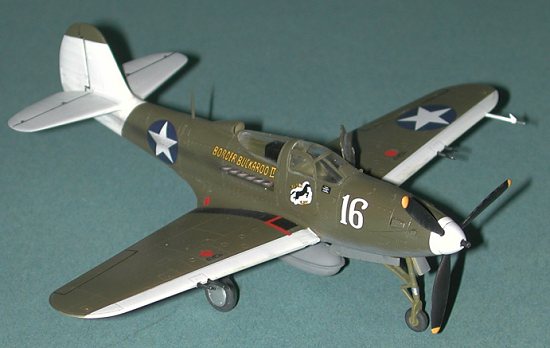
This particular aircraft was operated in New Guinea by the 110 Tactical Reconnaissance Squadron from Gusap, New Guinea circa 1942/3. Now I know that the aircraft had no cameras, so you are saying, "what's a P-39 doing in a recce unit"? Frankly, I haven't a clue except to say the perhaps the unit was used to escort the real photo birds on their missions and to help suppress enemy ground fire. It could also be that these guys just eyeballed things and didn't take photos. They could also have been used to help spot artillery fire or used just in support of ground troops. If anyone knows, let me in on it, will you?
 The 110 TRS was an Air National Guard unit that was called to
active duty. Most ANG units ended up flying similar types of mission. These guys
were from Missouri and were flying O-47s when the war broke out. It was obvious
that the O-47 would not be able to survive in an area with active enemy
resistance, so the unit was transitioned to the P-39 prior to shipping out. They
later transitioned to P-40s when they moved to the Philippines and during the
last months of the war, were flying F-6D/P-51Ds from Iwo Jima.
The 110 TRS was an Air National Guard unit that was called to
active duty. Most ANG units ended up flying similar types of mission. These guys
were from Missouri and were flying O-47s when the war broke out. It was obvious
that the O-47 would not be able to survive in an area with active enemy
resistance, so the unit was transitioned to the P-39 prior to shipping out. They
later transitioned to P-40s when they moved to the Philippines and during the
last months of the war, were flying F-6D/P-51Ds from Iwo Jima.
The 110th returned to the States after the war and flew P-51Ds before transitioning again to B-26 Invaders in the late 40s. They then went on to fly F-84Fs during the late 50's and F-100s until the early 70s when the F-4C and later F-4E entered the inventory. In 1990, they started getting F-15A Eagles and are still flying them.
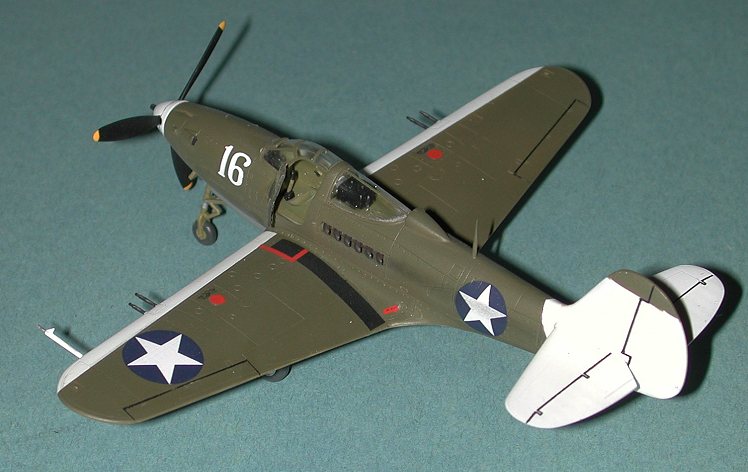
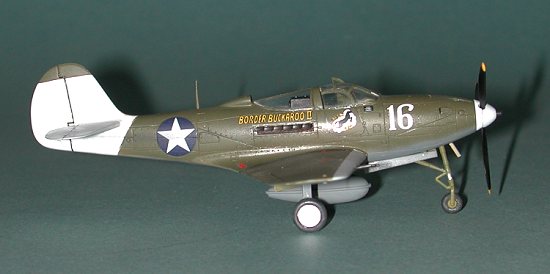
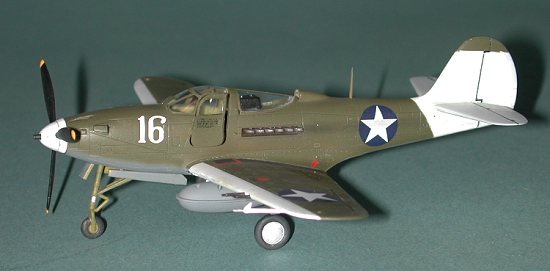
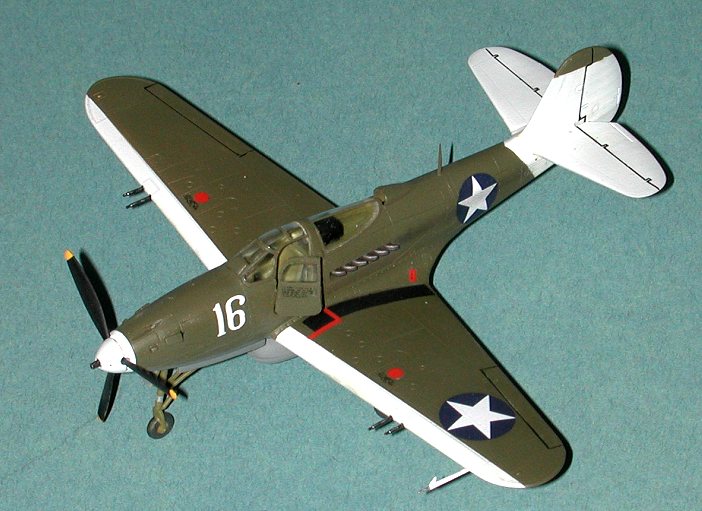
Back to the P-39's. Each of them had a large, hand-painted number on the nose. Often they were named, and they all carried individual markings on the right door, which is the side most crew entered the aircraft. Due to the muddy conditions of the fields from which they operated, the 110th generally removed the lower main gear doors to prevent mud from collecting between the wheel and the gear door. All of them were marked with the usual white wing leading edge and white tail. Judging from the photos in the reference, they were flown pretty hard and some were patched and rather ratty looking. This particular plane, 'Border Buckaroo II/Black Fury' was flown by a Lt. DeVore.
|
HISTORY & THE KIT |
Allow me to take the cheap way out and refer you to the preview of this kit for all that information.
|
CONSTRUCTION |
As with every kit I build, the first thing I do is look for subassemblies to put together. This one is particularly devoid of much of that as all that can really be pre-built is the drop tank and the interior. Well, the first thing I did was to paint some stuff. All the interior bits were painted US Interior Green and all the wheel wells, gear doors and struts were painted yellow chromate primer. Then the interior parts were glued together, except the instrument panel, and repainted. The panel was painted flat black and then drybrushed to bring out details.
 Once the interior
was done, it was glued into the fuselage. The fit is very good. The nose was
then filled with weight to prevent it from tail sitting. I then glued in the
instrument panel. Make sure that the gunsight is properly trimmed in the back or
the panel won't fit properly. I then realized that I forgot the small window and
glued that in place. Then the fuselage was glued together. Again, an easy fit.
It took a bit of filler on the seams, but nothing major. Be sure to put in the
link for the front landing gear at this time or it may not be easy to install
later. After reading some posts on Bell colors, I came to the realization that
they didn't use yellow zinc chromate primer but their interior primer. I have
read about 'Bell interior green', but just used regular old US Interior Green.
I'll let the color police sweat out the minor stuff.
Once the interior
was done, it was glued into the fuselage. The fit is very good. The nose was
then filled with weight to prevent it from tail sitting. I then glued in the
instrument panel. Make sure that the gunsight is properly trimmed in the back or
the panel won't fit properly. I then realized that I forgot the small window and
glued that in place. Then the fuselage was glued together. Again, an easy fit.
It took a bit of filler on the seams, but nothing major. Be sure to put in the
link for the front landing gear at this time or it may not be easy to install
later. After reading some posts on Bell colors, I came to the realization that
they didn't use yellow zinc chromate primer but their interior primer. I have
read about 'Bell interior green', but just used regular old US Interior Green.
I'll let the color police sweat out the minor stuff.
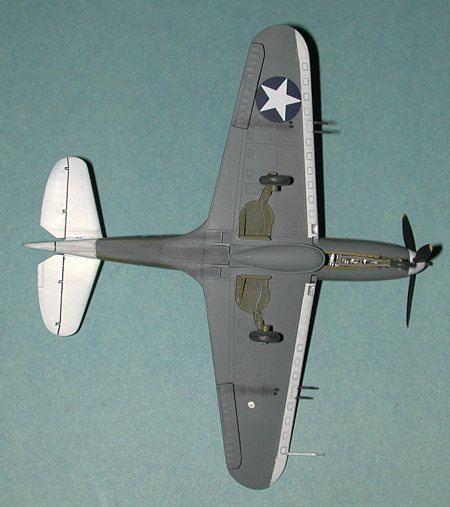
Moving to the wings, the landing light was installed and the back painted aluminum. Since I wasn't doing a P-39Q, I didn't drill out the holes for the underwing gondolas. Instead, I drilled out the leading edge gun ports. Actually, this is a better choice as the shell chutes are molded into the underside of the wings. The wings fit well. They were then glued to the fuselage. The fit on the back of the wings isn't the greatest, but isn't impossible. When the glue dried, filler was used to smooth out the back parts. Once the filler had dried and was smoothed out, the tailplanes were added. Naturally, I got the wings on a bit crooked so had to adjust the tailplanes to make everything seem level!
Next the cockpit canopy was glued on and masked. Then the tailplanes were glued in place and the underfuselage drop tank mounts were attached to their holes. The masked door was then fit in place as well as possible and it was then off to the paint shop.
|
PAINT & DECALS |
 The first part painted were the white leading edges, prop spinner, and tail. I
used Testors Model Master for this color. When dry, these areas were masked with
Tamiya tape. Then the underside was painted neutral grey using Aeromaster
enamels. The gear doors and drop tank were also painted at this time. When dry,
the upper surfaces were painted in Olive Drab, again using Aeromaster
paints.
The first part painted were the white leading edges, prop spinner, and tail. I
used Testors Model Master for this color. When dry, these areas were masked with
Tamiya tape. Then the underside was painted neutral grey using Aeromaster
enamels. The gear doors and drop tank were also painted at this time. When dry,
the upper surfaces were painted in Olive Drab, again using Aeromaster
paints.
Then the fuselage was masked at the tail and the white tail was touched up. Then the fuselage was sprayed with Future clear acrylic. Then it was returned to the work bench so that the landing gear could be glued on. Once that was done, it was time for decals.
I had
seen enough 'Airacuties' in the past few weeks to put me off ever doing that
scheme. I also didn't want to do any of the kit schemes. I dug through my decal
sheets and came up with Microscale 72-267. It has five schemes on it of which I
had already used two of them on various Revell and Heller kits. One of those left was from the 110 TRS, based in New Guinea as recounted in the introduction.
There was a nice image of the aircraft on the sheet in P-39 in Action
that was used to help with painting. Once the decals were on, the kit was
resprayed with matte clear and construction continued.
|
CONSTRUCTION CONTINUES |
 After the matte was put on, there were still a number of bits to glue in place.
First was the engine exhaust. This version used the 6 stacks per side version.
These were painted with burnt iron and then a coat or two of Rustall was put on
it to add to the effect. Next, the inner gear doors were added along with their
actuating arms. The nose gear doors were added on next. Then the wing guns were
installed. I had to drill those out more than what was originally done to get
them to fit. Finally, the pitot tube was added to the outer wing.
After the matte was put on, there were still a number of bits to glue in place.
First was the engine exhaust. This version used the 6 stacks per side version.
These were painted with burnt iron and then a coat or two of Rustall was put on
it to add to the effect. Next, the inner gear doors were added along with their
actuating arms. The nose gear doors were added on next. Then the wing guns were
installed. I had to drill those out more than what was originally done to get
them to fit. Finally, the pitot tube was added to the outer wing.
Then it was time for the wheels. The kit wheels are really toy-like. A problem when you are copying another kit as the ones in the Heller kit are equally bad. This brought a search of the spares boxes for something that looked better. After all, I'd be removing the lower gear doors so had to have something that looked better than what came in the kit. I was about to give up and buy some Macchi 202 wheels, when I found a set of Wildcat wheels from a Hasegawa kit I did years ago. They are the same diameter and look a heck of a lot better than the kit ones. Once painted, they were drilled out a bit more and fit on very nicely. Still a touch too skinny, but a major improvement.
Last touches were the installation of the drop tank and prop. Then the outer main gear doors were shortened. This was done by cutting off the lower semi-circle. I was unfortunate enough to lose one of the doors so made a replacement out of card stock. A bit of staining with pastels, a coat of semi-matte acrylic, removal of the masks and gluing the port side door open was all that was needed to complete it.
It was then set down on its landing gear and it immediately sat on its tail. Not enough nose weight. Grrrrrr. A few pieces were cut and stuffed in the open nose gear well. There was enough in there so that it now does not tail sit.
|
CONCLUSIONS |
A really very nice kit. Academy has done a good job of upgrading the Heller kit. There are a number of aftermarket decals for this kit and a couple of etched brass detail sets that can be used to really make the interior into something special. Though this kit is twice the price of the old Heller kit. It can be recommended to all who like the aircraft.
|
REFERENCES |
P-39 in Action, # 43 by Ernie McDowell, Squadron Signal Publications, 1980. ISBN 0-89747-102-4
December 2000
Copyright ModelingMadness.com. All rights reserved. No reproduction in part or in whole without express permission from the editor.
Review kit courtesy of me and my wallet!
If you would like your product reviewed fairly and quickly, please contact the editor or see other details in the Note to Contributors.
Back to Reviews Page 2024