Tamiya 1/48 P-51D Mustang
| KIT #: | 61040 |
| PRICE: | $2.50 |
| DECALS: | Four options |
| REVIEWER: | Scott Van Aken |
| NOTES: | Bagged kit. 8th Air Force boxing |
| HISTORY |
 The P-51 Mustang is the most well known US fighter of WWII. It was
originally developed for the British and powered by an Allison engine,
an engine that powered most USAAC/F in-line fighters in the first years
of the war. It wasn't until the British installed a Merlin engine that
it was transformed into a high altitude fighter. Despite this, selling
the US Army brass on a plane that wasn't built for them was a real
chore, but eventually, the prejudices against the Mustang were overcome
and the rest, as they say, is history.
The P-51 Mustang is the most well known US fighter of WWII. It was
originally developed for the British and powered by an Allison engine,
an engine that powered most USAAC/F in-line fighters in the first years
of the war. It wasn't until the British installed a Merlin engine that
it was transformed into a high altitude fighter. Despite this, selling
the US Army brass on a plane that wasn't built for them was a real
chore, but eventually, the prejudices against the Mustang were overcome
and the rest, as they say, is history. | THE KIT |
Tamiya's P-51D has been around for well over ten years and it may be nearly
20 by now. For many modelers, it is the 'go to' kit when doing a 1/48 bubbletop
Mustang, though Hasegawa's kit is also very nice. Many modelers did not like the
engraved rivet detail you will find on parts of the aircraft, but that has now
become almost a standard for new kits. As usual, Tamiya went to extant aircraft
to develop this kit and so you have the reinforced area on the upper wing
along with all the panel lines. When Mustangs were built, all the wing panel
lines were filled in except for the ammo bay hatches and the wings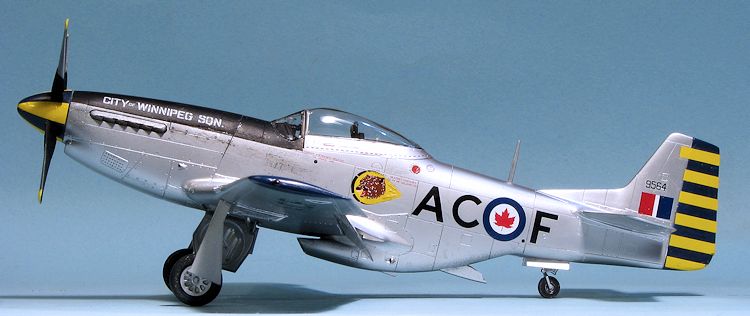 painted with
aluminum lacquer. As the aircraft aged postwar, this filler started to peel and
so when refurbished, the seam filler was stripped as was the lacquer paint. The
rivet forest on the upper wings near the wheel wells is a post war addition as
these planes were not expected to last more than about 400 flight hours. Those
still flying today have many times that number of hours on them.
painted with
aluminum lacquer. As the aircraft aged postwar, this filler started to peel and
so when refurbished, the seam filler was stripped as was the lacquer paint. The
rivet forest on the upper wings near the wheel wells is a post war addition as
these planes were not expected to last more than about 400 flight hours. Those
still flying today have many times that number of hours on them.
This is the WWII boxing so you get only drop tanks for the wing pylons and have a cuffed Hamilton Standard prop, though you do get both canopy types. You also get two exhaust styles, one with the shrouds and the other without. Flaps are separate as Mustangs were frequently seen with these deployed after the hydraulics bled off. The canopy can be posed open and there is a pilot figure. Speaking of the canopy, Tamiya molded the canopy frame separate from the actual clear part, guaranteeing that you will not have a smooth join between canopy and frame.
Markings are provided in this boxing for four planes, all of the 'done to death' schemes. The first is John Meyer's 352nd FG plane, followed by Leonard Carson's 357 FG aircraft and finally Thomas Christian's Mustang and Urban Drew's plane, both from the 361st FG.
| CONSTRUCTION |
This kit was won in an auction at the local IPMS along with several others in
the lot. The kit came with no box, no decals and the previous owner had started
painting the interior. From there I completed the
 painting and installation of
the interior bits. Fortunately, the instrument panel decal was still in the box
so I used that. I also installed a set of Eduard belts just to add some interest
to the seat. The coolant radiator was installed in the underside of the cockpit
assembly and it, along with the forward cooler, gear wells, inner gear doors,
wheels and inner gear doors were painted aluminum using Alclad II.
painting and installation of
the interior bits. Fortunately, the instrument panel decal was still in the box
so I used that. I also installed a set of Eduard belts just to add some interest
to the seat. The coolant radiator was installed in the underside of the cockpit
assembly and it, along with the forward cooler, gear wells, inner gear doors,
wheels and inner gear doors were painted aluminum using Alclad II.
I then installed the inner gear well and painted the backwall of it and the main gear wells with zinc chromate yellow to represent the main spar. The holes for the wing pylons were drilled out and the pylons installed. I then cemented the upper and lower wing together, leaving the flap area unglued to help ensure a good upper wing/fuselage join.
Back at the fuselage, I installed the cockpit assembly and the forward cooler piece after giving both coolant radiators a wash. As expected, the fit was quite good, though I still had to fill some gaps, especially on the underside. The wings were then attached and while the fit was fairly good, I noticed that there wasn't much dihedral to the wings.
 I then glued on the intakes to the ventral and nose radiator along with the
upper cowling piece. The intakes needed filler and sanding as they proved to be
a bit larger than the surrounding plastic. The tail planes were then attached. I
painted the gun sight and glued it in. I would recommend attaching this piece
before closing the fuselage halves as it was rather difficult to do later. The
windscreen was glued on and masked, followed by the canopy being attached to its
frame and masked. This was then tacked on with clear paint in preparation for
painting.
I then glued on the intakes to the ventral and nose radiator along with the
upper cowling piece. The intakes needed filler and sanding as they proved to be
a bit larger than the surrounding plastic. The tail planes were then attached. I
painted the gun sight and glued it in. I would recommend attaching this piece
before closing the fuselage halves as it was rather difficult to do later. The
windscreen was glued on and masked, followed by the canopy being attached to its
frame and masked. This was then tacked on with clear paint in preparation for
painting.
| COLORS & MARKINGS |
Unlike many Mustang modelers, I tend to shy away from
WWII subjects, though there are a plethora of nice aftermarket schemes for them.
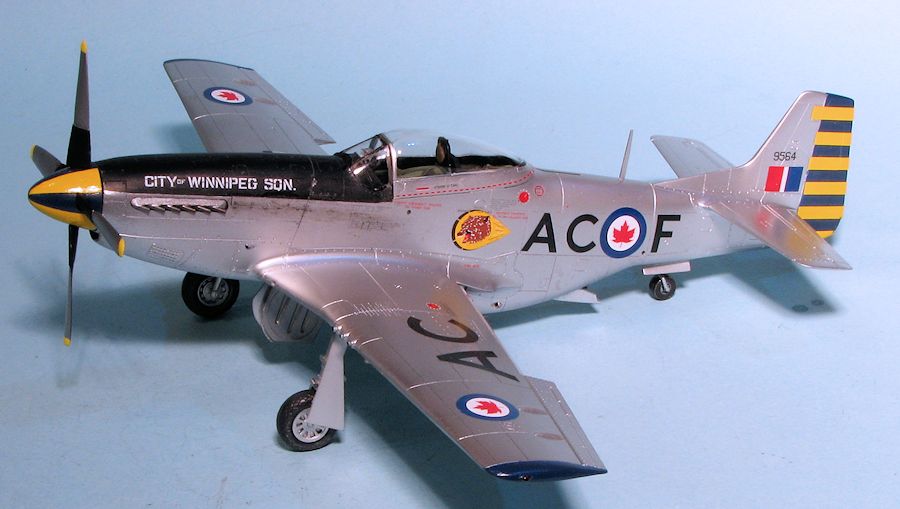
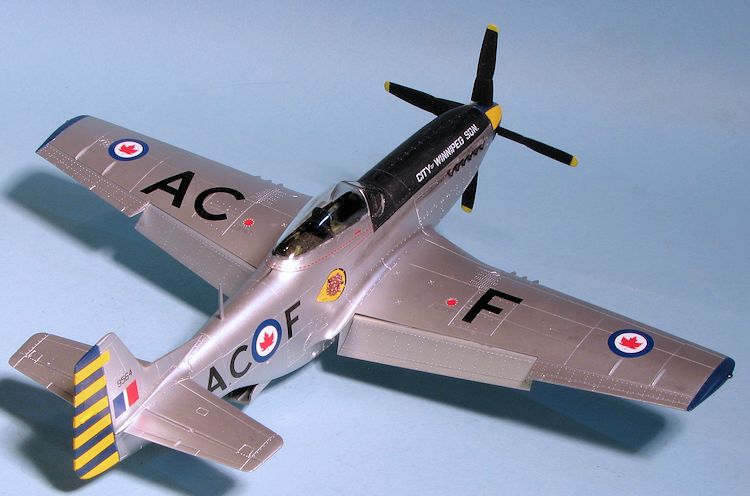
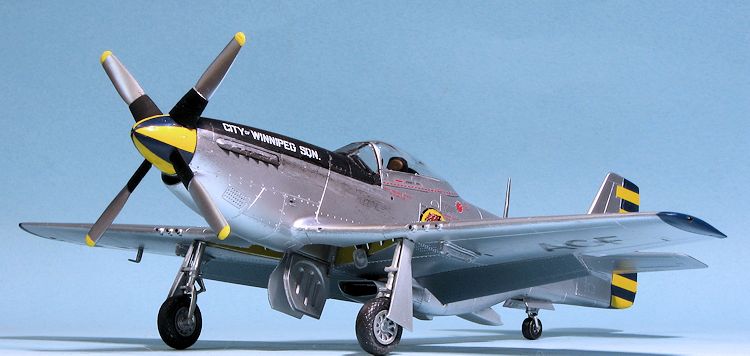
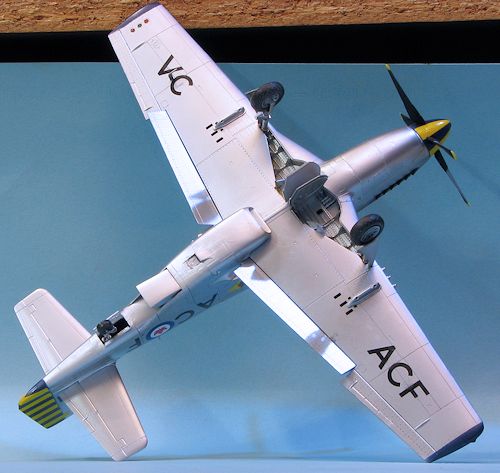
Instead, I'd rather do post war planes. In this case I decided on a Canadian
subject with 402 Squadron in the early 1950s. Leading Edge's sheet has a lot
of nice options on it and so choosing one came down to what I could do with the
stock WWII Tamiya kit. I had to pick an
 aircraft
that used the cuffed Hamilton Standard prop as the uncuffed version only comes
in the F-51D boxing. I also had to have a scheme that still had the stock radio
mast. Fortunately, there was an early option available so that is the one on
which I decided.
aircraft
that used the cuffed Hamilton Standard prop as the uncuffed version only comes
in the F-51D boxing. I also had to have a scheme that still had the stock radio
mast. Fortunately, there was an early option available so that is the one on
which I decided.
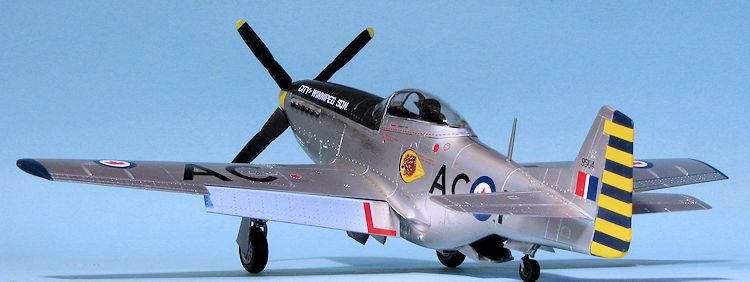
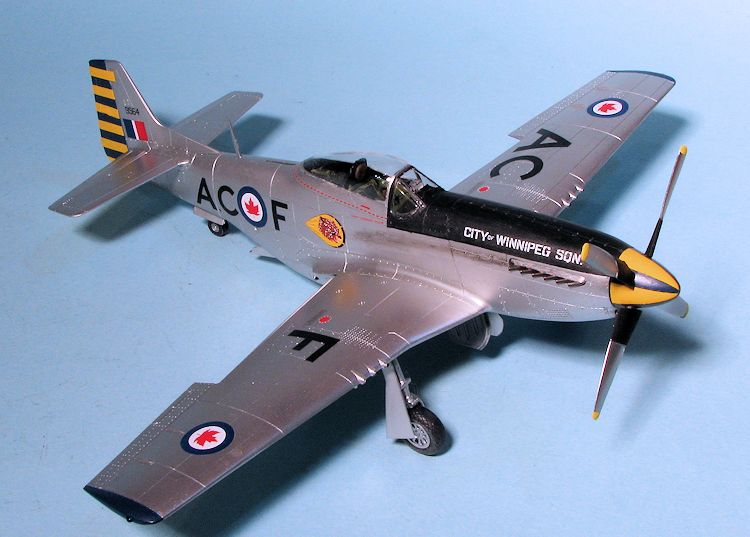
First, I sprayed the airframe with Tamiya AS-12 as this plane was an overall painted aluminum. I then masked off the wing tips and rudder to paint them a dark blue. The spinner was painted this same shade. The nose anti-glare panel was painted gloss black as I had markings that went upon this area. In hindsight, I should have primered this one as removing the tape pulled up a few small area. This meant a bit of additional work to fix them, not always the easiest when using rattle cans.
The decals are nicely done but have a rather odd trait. Usually, when a decal is ready to apply, it easily slides off the backing paper. Not these. They are a bit 'sticky' and one has to apply a bit of pressure to them to get them to initially move. Perhaps they require hot water, which I did not use. I also had some issues getting them to conform around the rear of the fin with applying the fin stripes. They do not like strong setting solutions so I used Microsol after the first applications of Mr Mark Softer showed a tendency to 'vein' when dry. The decals, printed in Canada, do need a setting solution as they will not conform on their own.
During the decaling, I glued on the main struts and the tail gear, after painting the tires with Pactra's weathered black.
| FINAL CONSTRUCTION |
 After
getting all the markings in place, I attached the main gear doors along with the
retraction struts for the inner doors. The aft radiator door was glued on as
were the radio mast and the pitot tube. The exhaust were simply pressed in place
after painting and the landing light was glued on. The last thing was the prop.
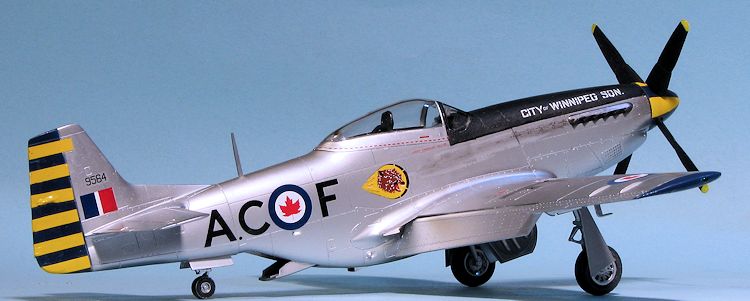
For this plane, the back of the blades and the front cuff was painted black with
the upper blades being unpainted aluminum. A rather different look to say the
least. The prop was pushed in place and the flaps attached. After a bit of
detail painting, I brush painted the upper anti-glare panel with Vallejo matte
clear and did some pastel exhaust staining for the final touches.
After
getting all the markings in place, I attached the main gear doors along with the
retraction struts for the inner doors. The aft radiator door was glued on as
were the radio mast and the pitot tube. The exhaust were simply pressed in place
after painting and the landing light was glued on. The last thing was the prop.
For this plane, the back of the blades and the front cuff was painted black with
the upper blades being unpainted aluminum. A rather different look to say the
least. The prop was pushed in place and the flaps attached. After a bit of
detail painting, I brush painted the upper anti-glare panel with Vallejo matte
clear and did some pastel exhaust staining for the final touches.| CONCLUSIONS |
 Unbeliveably,
this is only the third 1/48 Tamiya P-51D that I've built over the years. I know
folks who do this many of them in a few months, and I can see why. It is a
relatively trouble free build that anyone with basic skills can build
successfully. I tend to not do WWII schemes, despite the ton of markings out
there as most of them have been done a lot. I do, however, like to do post war
Mustangs, hence this very colorful RCAF version. The Leading Edge decals are
excellent and provide a lot of information on the aircraft so you can have an
accurate model for the shelves.
Unbeliveably,
this is only the third 1/48 Tamiya P-51D that I've built over the years. I know
folks who do this many of them in a few months, and I can see why. It is a
relatively trouble free build that anyone with basic skills can build
successfully. I tend to not do WWII schemes, despite the ton of markings out
there as most of them have been done a lot. I do, however, like to do post war
Mustangs, hence this very colorful RCAF version. The Leading Edge decals are
excellent and provide a lot of information on the aircraft so you can have an
accurate model for the shelves.
| REFERENCES |
http://en.wikipedia.org
Thanks to club auctions for this one. February 2015 Copyright ModelingMadness.com. All rights reserved. No reproduction in part or in whole without express permission from the editor.
If you would like your product reviewed fairly and fairly quickly, please contact the editor or see other details in the Note to Contributors.