| KIT #: | 48002 |
| PRICE: | $24.95 SRP when new |
| DECALS: | Four options |
| REVIEWER: | Scott Van Aken |
| NOTES: | Kit produced in 2002 |
| HISTORY |
The P-40 Warhawk was made famous by the Flying Tigers, a band of
mercenary pilots who fought for money and glory. Most of us don't like to think
of these men as such, but it is the truth. They were allegedly paid handsomely to fly and
paid a $500 bonus for every plane shot down. Not your standard
 operating policy
in a military that at the time paid pilots less than $100 a month. However, it
did ingrain the P-40 into the minds and fantasies of an air-minded public.
operating policy
in a military that at the time paid pilots less than $100 a month. However, it
did ingrain the P-40 into the minds and fantasies of an air-minded public.
It was also arguably the best aircraft in the USAAF inventory when the US entered the war. Decidedly outmatched at altitude against German planes thanks to its Allison engine, it was a match for them at lower altitudes. Though not as maneuverable as the Japanese planes, it was faster and able to take battle damage that the other could not. It also had a greater weight of fire than most lightly built Japanese opponents. It was with this aircraft that the US entered the war in the Pacific. Until the advent of the P-38, The P-40E, along with a some P-39s, were all that were available to fight the Army's Pacific war.
Fortunately, this wasn't a war of high altitude as in Europe, so the sluggish performance of the P-40 and P-39 above 15,000 feet wasn't a real problem. Even when newer planes became available, those were mostly sent to Europe so the P-40 soldiered on in China, Burma and India as well as in the Southwest Pacific. As opposition decreased, the aircraft showed its value as a fighter bomber, staying in action until almost the end of the war.
| THE KIT |
 sorts of AMT kits that
were in the works or ready to mold, but had been shelved. One of their first
offerings was a P-40E, which was released in 2002. These kits were pure AMT
molds with different instructions and superlative decals providing many
options. I was fortunate to have been provided with a number of test shots
and near production kits of this and also their long tail F and their K,
which came with a resin rear fuselage. Unfortunately, the owner of the
company had a near death accident and so due to the usual situation of a one
or two man operation losing the main guy and the very long rehab time, the
company went out of business.
sorts of AMT kits that
were in the works or ready to mold, but had been shelved. One of their first
offerings was a P-40E, which was released in 2002. These kits were pure AMT
molds with different instructions and superlative decals providing many
options. I was fortunate to have been provided with a number of test shots
and near production kits of this and also their long tail F and their K,
which came with a resin rear fuselage. Unfortunately, the owner of the
company had a near death accident and so due to the usual situation of a one
or two man operation losing the main guy and the very long rehab time, the
company went out of business. 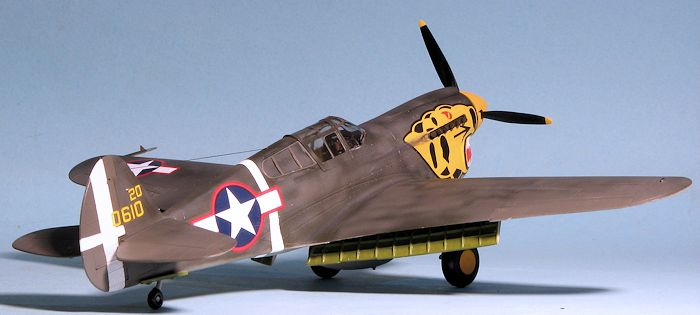 and one without a
small rear scallop. You want the latter for the E as I believe this was done
to allow the clearance for the tubular exhaust.
and one without a
small rear scallop. You want the latter for the E as I believe this was done
to allow the clearance for the tubular exhaust. | CONSTRUCTION |
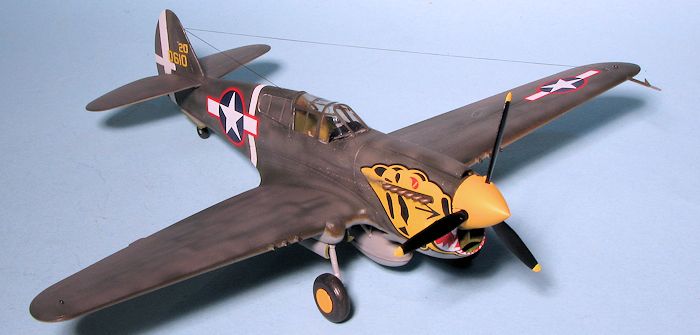
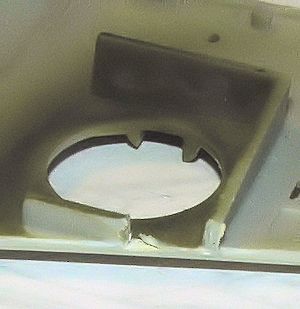 For the most part, this will be an out of the box build, but I did want to
use some resin flaps that I got with another kit. P-40s were rarely seen on
the ground with the flaps deployed, but it did happen. Thanks to the hollow
fuselage, a piece will need to be installed so one cannot look up and see
the underside of the cockpit. After the initial painting, I removed the
flaps from the lower wing piece. Unfortunately, this also meant removing
part of the wheel well wall.
For the most part, this will be an out of the box build, but I did want to
use some resin flaps that I got with another kit. P-40s were rarely seen on
the ground with the flaps deployed, but it did happen. Thanks to the hollow
fuselage, a piece will need to be installed so one cannot look up and see
the underside of the cockpit. After the initial painting, I removed the
flaps from the lower wing piece. Unfortunately, this also meant removing
part of the wheel well wall.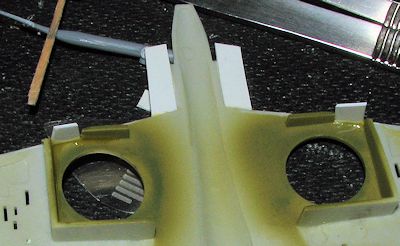 That area was then repaired
by inserting pieces of plastic card then filler and sanding. One thing I did
not realize when removing the kit flaps was that the resin replacements were
shorter in length. Obviously the resin one were designed for the Mauve kit
and not the AMT version. This meant a bit more in terms of plastic card to
take care of the oversight. I generally install repair areas that are larger
than they need to be and then trim them back as required. Once that was
done, the upper wings were glued in place.
That area was then repaired
by inserting pieces of plastic card then filler and sanding. One thing I did
not realize when removing the kit flaps was that the resin replacements were
shorter in length. Obviously the resin one were designed for the Mauve kit
and not the AMT version. This meant a bit more in terms of plastic card to
take care of the oversight. I generally install repair areas that are larger
than they need to be and then trim them back as required. Once that was
done, the upper wings were glued in place. 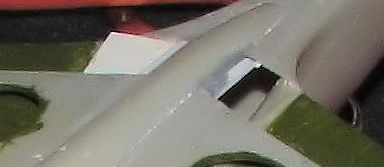 what I'd call fair as
some filler and sanding is needed. I then used a couple of pieces of card to
block the rather prominent holes you see in the flap area. Since this is
going to be a shelf model, I was not all that concerned with perfection. You
can see the bits I had to add to make up for the shorter flaps as well. Once
all that was tidied up, the tailplanes were added. One of them seems to
suffer from some sort of molding glitch on the aft section, but that is
easily sanded down.
what I'd call fair as
some filler and sanding is needed. I then used a couple of pieces of card to
block the rather prominent holes you see in the flap area. Since this is
going to be a shelf model, I was not all that concerned with perfection. You
can see the bits I had to add to make up for the shorter flaps as well. Once
all that was tidied up, the tailplanes were added. One of them seems to
suffer from some sort of molding glitch on the aft section, but that is
easily sanded down. | COLORS & MARKINGS |
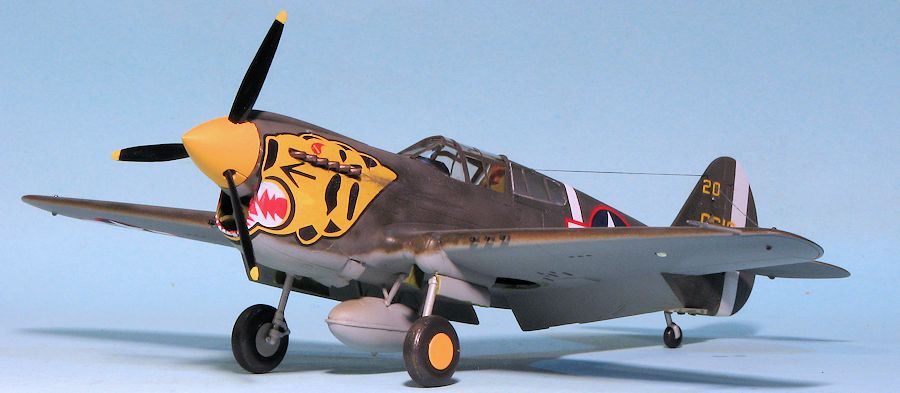
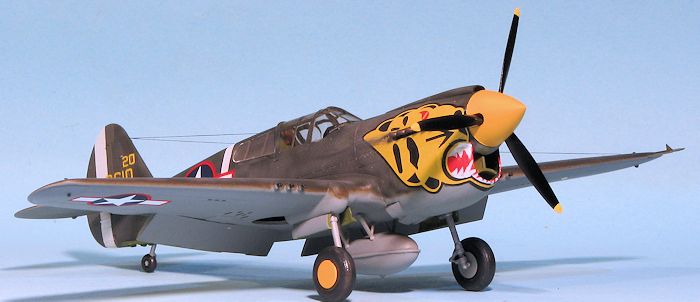
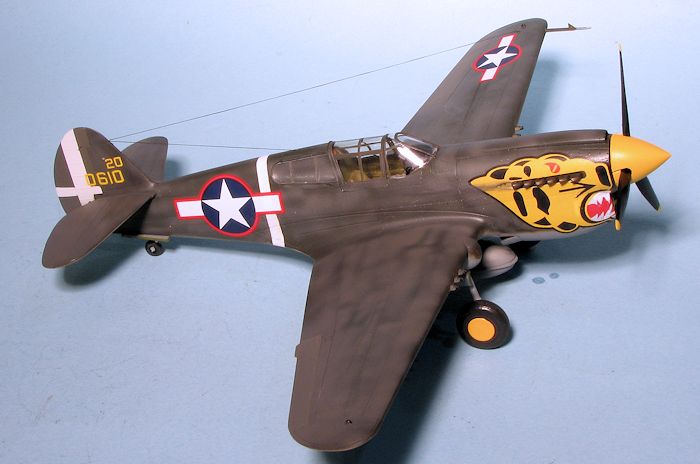 match the photo I had. So I first painted the
fuselage behind the cockpit, and the rudder along with the spinner with Tamiya X-2 white. I then masked off the rudder bits and painted the spinner
with yellow.
match the photo I had. So I first painted the
fuselage behind the cockpit, and the rudder along with the spinner with Tamiya X-2 white. I then masked off the rudder bits and painted the spinner
with yellow. 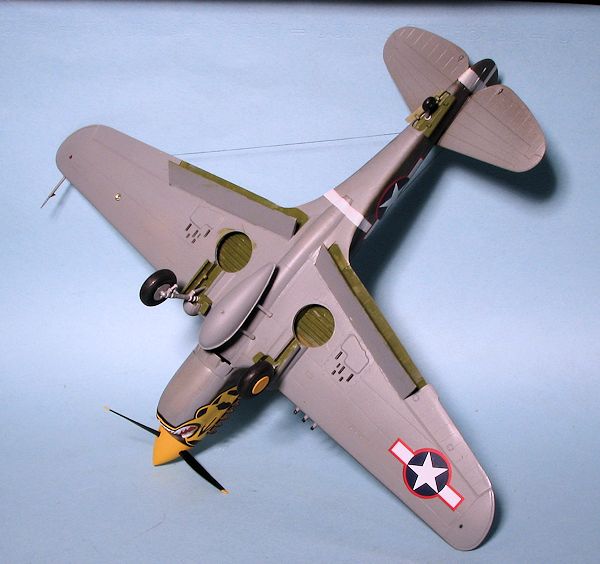 adaches by breaking up when applying
it. Eventually I got them both on and tried to touch up some of the breaks
with paint, but the colors I used did not match exactly. I also attached the
landing gear during this process to give the model something on which to
stand.
adaches by breaking up when applying
it. Eventually I got them both on and tried to touch up some of the breaks
with paint, but the colors I used did not match exactly. I also attached the
landing gear during this process to give the model something on which to
stand. | CONCLUSIONS |
 It was nice
to revisit an old friend. Were it not for a group build, who knows how long this
would have languished, unbuilt. The AMT/AMtech P-40s do have issues. The guns
should be slightly below the leading edge of the wings, the landing gear don't
have enough retraction struts and there are none for the gear doors. The fit of
the engine cowlings could be better and the interior is pretty barren by today's
standards along with some other fit issues. Those who want a good 1/48 Alison
P-40 will want to head for the Hasegawa kit or even the older Mauve version
(itself quite similar to the AMT/AMtech kit in terms of vintage). Still, if you
are building for yourself or just want a shelf model, then this will fill the
bill and can usually be found for a very reasonable price from vendors at shows
or swap meets.
It was nice
to revisit an old friend. Were it not for a group build, who knows how long this
would have languished, unbuilt. The AMT/AMtech P-40s do have issues. The guns
should be slightly below the leading edge of the wings, the landing gear don't
have enough retraction struts and there are none for the gear doors. The fit of
the engine cowlings could be better and the interior is pretty barren by today's
standards along with some other fit issues. Those who want a good 1/48 Alison
P-40 will want to head for the Hasegawa kit or even the older Mauve version
(itself quite similar to the AMT/AMtech kit in terms of vintage). Still, if you
are building for yourself or just want a shelf model, then this will fill the
bill and can usually be found for a very reasonable price from vendors at shows
or swap meets.
May 2015
Thanks to the long lamented AMtech for the test shot.
If you would like your product reviewed fairly and quickly, please contact the editor or see other details in the Note to Contributors.