| KIT #: | 5487 |
| PRICE: | A few dollars at a swap meet |
| DECALS: | One option |
| REVIEWER: | Scott Van Aken |
| NOTES: | 1993 boxing |
| HISTORY |
All P-47s built up until the P-47D-25 had a pointed windscreen and did not have
good visibility to the rear.
The British then came up with a much better solution, devising an all-round
vision "bubble canopy" for the Hawker Typhoon. USAAF officials liked the bubble
canopy, and quickly adapted it to American fighters, including the P-51 and the
Thunderbolt. The first P-47 with a bubble canopy was a modified P-47D-5
completed in the summer of 1943 and redesignated XP-47K. Another older
P-47D was modified to
 provide an
internal fuel capacity of 370 U.S. gal (1,402 l) and given the designation
XP-47L. The bubble canopy and increased fuel capacity were then rolled into
production together, resulting in the block 25 P-47D (rather than a new variant
designation). First deliveries to combat groups began in May 1944.
provide an
internal fuel capacity of 370 U.S. gal (1,402 l) and given the designation
XP-47L. The bubble canopy and increased fuel capacity were then rolled into
production together, resulting in the block 25 P-47D (rather than a new variant
designation). First deliveries to combat groups began in May 1944.
It was followed by similar bubble-top variants, including the P-47D-26, D-27, D-28 and D-30. Improvements added in this series included engine refinements, more internal fuel capacity, and the addition of dive recovery flaps. Cutting down the rear fuselage to accommodate the bubble canopy produced yaw instability, and the P-47D-40 introduced a dorsal fin extension in the form of a narrow triangle running from the vertical tailplane to the radio aerial. The fin fillet was retrofitted in the field to earlier P-47D bubble-top variants. The P-47D-40 also featured provisions for 10 "zero length" stub launchers for 5 in (127 mm) High velocity aircraft rockets (HVARs), as well as the new K-14 computing gunsight. This was a license-built copy of the British Ferranti GGS Mark IID computing gyroscopic sight which allowed the pilot to dial in target wingspan and range, and would then move the gunsight reticle to compensate for the required deflection.
The bubbletop P-47s were nicknamed "Superbolts" by combat pilots in the field.
| THE KIT |
 As one expects from Monogram airplane kits, the detailing is really quite
good. The exterior detailing is of the raised panel line school, and thanks
to the silver plastic, those who must re-engrave their kits will find it easy
as there is a 'ghost' of the panel lines in the plastic once the lines have
been smoothed down. The cockpit tub is nicely done with a seat molded
in place. All one has to add is the control stick and the instrument panel,
which has the rudder pedals molded in place. The seat has belt detail molded
in, though one is supposed to use the enclosed pilot figure.
As one expects from Monogram airplane kits, the detailing is really quite
good. The exterior detailing is of the raised panel line school, and thanks
to the silver plastic, those who must re-engrave their kits will find it easy
as there is a 'ghost' of the panel lines in the plastic once the lines have
been smoothed down. The cockpit tub is nicely done with a seat molded
in place. All one has to add is the control stick and the instrument panel,
which has the rudder pedals molded in place. The seat has belt detail molded
in, though one is supposed to use the enclosed pilot figure.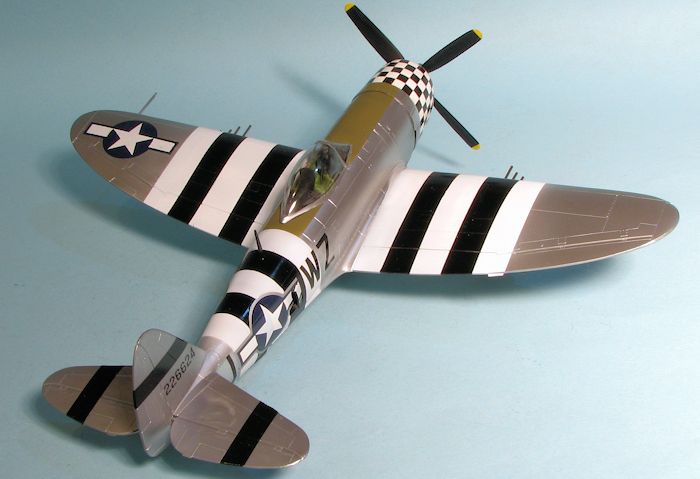 Wings are two pieces per side with the gun barrels, pitot tube and wing
racks molded in place. The wheel wells are properly deep. The kit includes
two bombs for the bomb racks and a large 'squished' centerline fuel tank.
The windscreen and canopy are separate items so one can pose the canopy open
to see the interior. The kit comes with a Hamilton Standard prop which
somewhat limits the markings one can do. I'm not sure just what versions
used this prop, but I'm sure one of you knows. My kit came with no instructions and while this boxing is supposed
to have a photo etch fret, that was not included, hence the cheap price.
There is a decal sheet for the box art plane which may well be from the 56
FG. I'll leave this and the dash version to the experts as I know just
enough to get into trouble.
Wings are two pieces per side with the gun barrels, pitot tube and wing
racks molded in place. The wheel wells are properly deep. The kit includes
two bombs for the bomb racks and a large 'squished' centerline fuel tank.
The windscreen and canopy are separate items so one can pose the canopy open
to see the interior. The kit comes with a Hamilton Standard prop which
somewhat limits the markings one can do. I'm not sure just what versions
used this prop, but I'm sure one of you knows. My kit came with no instructions and while this boxing is supposed
to have a photo etch fret, that was not included, hence the cheap price.
There is a decal sheet for the box art plane which may well be from the 56
FG. I'll leave this and the dash version to the experts as I know just
enough to get into trouble.
| CONSTRUCTION |
 supposed to be something exotic like bronze green, but I didn't
have any on hand. I also cleaned up the gear legs and painted those
aluminum. The engine is a single insert molded into one piece with the
intake. I painted the upper section aluminum and the lower section dark
aluminum along with the interior of the cowling (which was probably
unpainted). I then did detail painting on the engine and the interior bits.
supposed to be something exotic like bronze green, but I didn't
have any on hand. I also cleaned up the gear legs and painted those
aluminum. The engine is a single insert molded into one piece with the
intake. I painted the upper section aluminum and the lower section dark
aluminum along with the interior of the cowling (which was probably
unpainted). I then did detail painting on the engine and the interior bits.
 After replacing lost detail on the fuselage, I then drilled out the holes in
the leading edge of the wing for the replacement barrels. I could tell right
away that they were not going to be in a straight line! The tailplanes were
then cemented in place. This was followed by the wing. I needed filler on
the underside.
After replacing lost detail on the fuselage, I then drilled out the holes in
the leading edge of the wing for the replacement barrels. I could tell right
away that they were not going to be in a straight line! The tailplanes were
then cemented in place. This was followed by the wing. I needed filler on
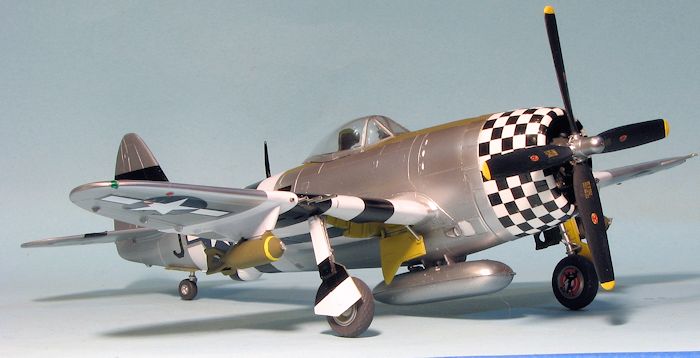
the underside.| COLORS & MARKINGS |
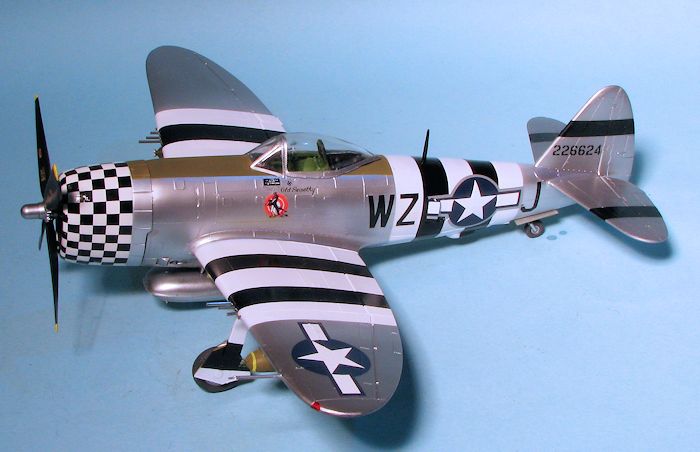 the
stripes on the gear doors took some estimates as the two outer doors are
molded together and in the extended position, but I think I at least got it
close. The upper fuselage was then painted olive drab. Again, masking was
required for the airframe and the cowling as the cowl flaps are in aluminum,
even if the rest of the cowling was painted white.
the
stripes on the gear doors took some estimates as the two outer doors are
molded together and in the extended position, but I think I at least got it
close. The upper fuselage was then painted olive drab. Again, masking was
required for the airframe and the cowling as the cowl flaps are in aluminum,
even if the rest of the cowling was painted white. | FINAL CONSTRUCTION |
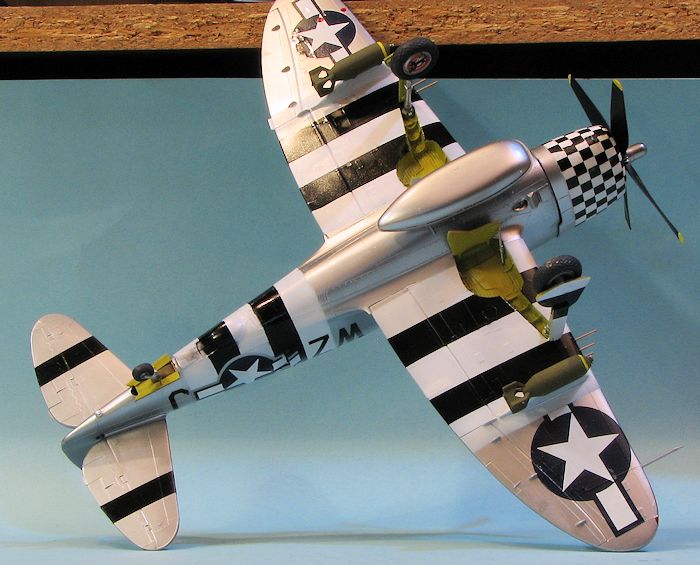 There was
not that much in terms of assembly to do for the final bits. I did not clear
coat the decals, though perhaps I should. I had to make the gun barrels so
cut sections of stainless steel tubing and inserted them in the holes. These
needed a #56 drill bit to make them large enough to fit. As mentioned
earlier, I'm not good at keeping things lined up so these are a tad off.
Other things that needed glued on were the inner and outer gear doors along
with the inner door retraction struts and the main wheels. I then installed
the engine into the cowling after giving it a wash using AK Interactive's
fine engine washes. I also used their clear paint to do formation lights and
the ID lights under the wing.
There was
not that much in terms of assembly to do for the final bits. I did not clear
coat the decals, though perhaps I should. I had to make the gun barrels so
cut sections of stainless steel tubing and inserted them in the holes. These
needed a #56 drill bit to make them large enough to fit. As mentioned
earlier, I'm not good at keeping things lined up so these are a tad off.
Other things that needed glued on were the inner and outer gear doors along
with the inner door retraction struts and the main wheels. I then installed
the engine into the cowling after giving it a wash using AK Interactive's
fine engine washes. I also used their clear paint to do formation lights and
the ID lights under the wing. | CONCLUSIONS |
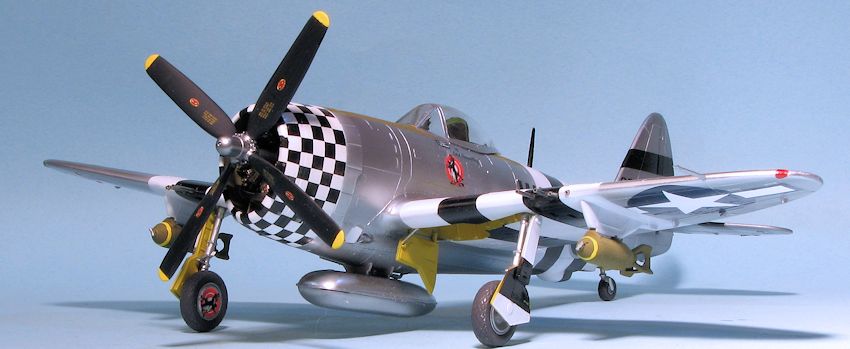
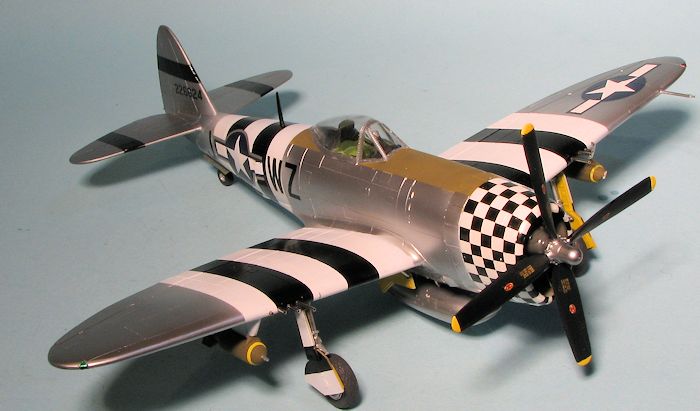
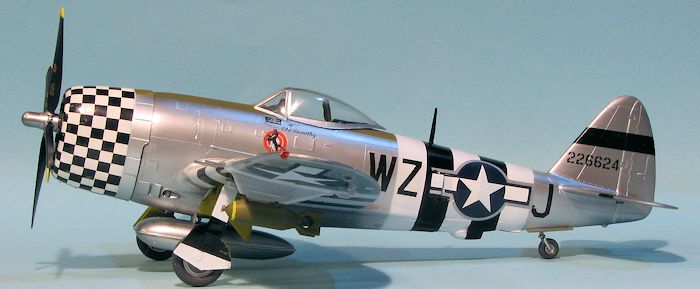
I am not sure when the last time this kit was reissued, but I'll bet it won't be long before we see it again. It is not a difficult build and while the detail level isn't up to modern standards, it still has a lot going for it considering the kit is nearly 50 years old. Probably the only real down side is it only coming with a Hamilton Standard prop, though that can be rectified by aftermarket. These can be found for little money from vendors at shows and swap meets, so finding one should be easy enough. It makes into a nice model that will look good gracing your display shelf. Though I'm not much of a Thunderbolt fan, I've built three of them in this scale over the last year.
| REFERENCES |
http://en.wikipedia.org/wiki/Republic_P-47_Thunderbolt
December 2014
Thanks to me for picking this one up.
If you would like your product reviewed fairly and quickly, please contact the editor or see other details in the Note to Contributors.