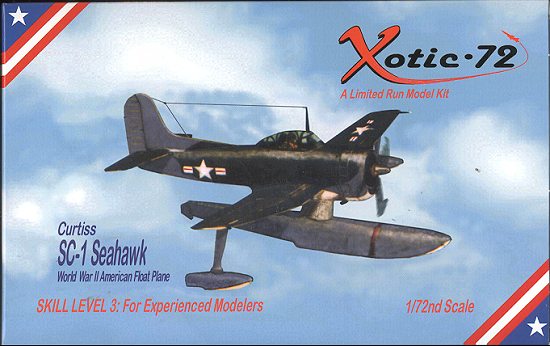
Xotic 72 1/72 SC-1 Seahawk
|
KIT # |
AU 2015 |
|
PRICE: |
$9.95 |
|
DECALS: |
Two aircraft |
|
REVIEWER: |
|
|
NOTES: |
Short run with vac canopy |
|
BACKGROUND |
Please visit the preview for a short historical background and a look at what is in the box.
|
CONSTRUCTION |
In case you have not already realized it, this is not exactly a new kit, even for short run ones. Aviation USK released this initially about 7 or so years ago when short run kits were not quite as refined as they are today. In all respects, this is quite similar to what MPM was producing in its first years of existence. The kit itself required clean up of all its parts prior to use and I can guarantee that I used filler on all the joins. I tell you this now so I don't have to repeat it with every step. I should also point out that it is clearly marked on the box that this kit is for experienced builders and it is.
 I started construction with the wings and floats. After removing
them from the sprues, I then sanded down all the mating surfaces, removed the
flash and cut off or sanded down any ejector pin towers. Weight was then added
to the front of the float as these planes tend to be a bit tail heavy. I
probably didn't add enough.....
I started construction with the wings and floats. After removing
them from the sprues, I then sanded down all the mating surfaces, removed the
flash and cut off or sanded down any ejector pin towers. Weight was then added
to the front of the float as these planes tend to be a bit tail heavy. I
probably didn't add enough.....
During the lulls in sanding and filling for the floats and wings, I started on the fuselage and interior. The buzz word on these kits is 'test fit'. You need to test fit every part and assembly prior to adding glue or you'll probably be in for a surprise somewhere along the way. I first installed the engine firewall to make sure it fit properly. Then the interior floor, control stick and back wall were glued together and then glued into the fuselage. The seat and armor plate will be installed just prior to gluing the fuselage together. The next item glued in was the instrument panel. It fit, but not as well as I'd have liked. I used superglue to fill in a few of the gaps around the panel.
With that done, the engine was glued in place as was the separate lower intake piece. The fit of this last part wasn't what I'd hoped, but it did go in with the help of some plastic-softening glue! The fuselage halves were glued together and actually fit rather well. Only area that had a big step was the lower engine cowling. It may have been self-induced, but vigorous sanding took care of it and most of the other lumps and bumps on the seam lines. Yes, I used filler as well, but that is to be expected with these kits.
 Next task was to attach the wing. Again, it needed help from
sanding and filler, but an acceptable join was achieved. Tailplane is a single
piece and fit rather well. The fin/rudder, however needed much help in the
forward section where it blended into the fuselage. However, the results were
quite acceptable once things were properly smoothed out.
Next task was to attach the wing. Again, it needed help from
sanding and filler, but an acceptable join was achieved. Tailplane is a single
piece and fit rather well. The fin/rudder, however needed much help in the
forward section where it blended into the fuselage. However, the results were
quite acceptable once things were properly smoothed out.
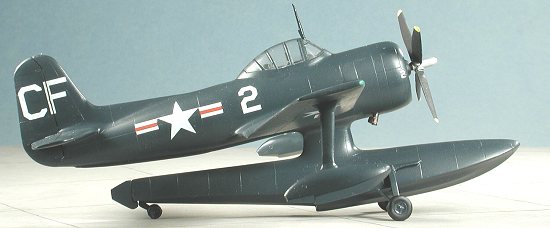
Next job was to attach the float. It was here that I made the obligatory screw up. The mating surface of the float itself is a tad larger than the fuselage mount. It also is not a flat plate but an open construct made from the two float halves. A smart builder (not me) would have put in a piece of plastic card to get a flat surface. I didn't do that and did much fiddling and eyeballing things to attach the float. End result is that after I let everything dry, the float is a bit askew to one side. SIGH! Well, I wept silently for a few moments and then got down to smoothing out the float/fuselage join. Then I worked on the canopy. Once I got it cut out and looking pretty good in terms of fit, I stopped and headed for a bit of painting. You see, I didn't have much to show in the cockpit. The best way to not show stuff on model planes is to paint it flat black. I talked myself into thinking that this was about the time period when interior green was gauche and basic black was in. The interior and engine areas were liberally sprayed with matte black and when dry, aluminum was drybrushed on them to bring out some detail.
 When all that
dried, I masked and then attached the canopy, using my favorite superglue,
Acrabond. It sticks like an ex-girlfriend you are trying to avoid. However, the
edges just looked tacky. Grabbing my putty, I filled in along the bottom of the
canopy and smoothed things out. Personally, I think the clear parts of the
windscreen don't go low enough, but I've little reference material on this plane
so went with what was in the kit. With that on and done, the wing floats were
glued in place and later smoothed out.
When all that
dried, I masked and then attached the canopy, using my favorite superglue,
Acrabond. It sticks like an ex-girlfriend you are trying to avoid. However, the
edges just looked tacky. Grabbing my putty, I filled in along the bottom of the
canopy and smoothed things out. Personally, I think the clear parts of the
windscreen don't go low enough, but I've little reference material on this plane
so went with what was in the kit. With that on and done, the wing floats were
glued in place and later smoothed out.
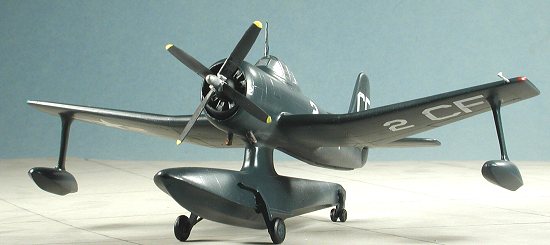
At the same time, I glued on the beaching gear. The rear part has dual wheels and they are quite difficult to get properly aligned. All of the wheels needed to have the axle attachment holed drilled out considerably to get them to fit. I also took this time to clean up the prop and to drill/trim it to fit on the engine shaft. A hole was drilled for the pitot tube, the rudder was attached, the exhaust pipes glued on and it was time to head for the paint shop.
|
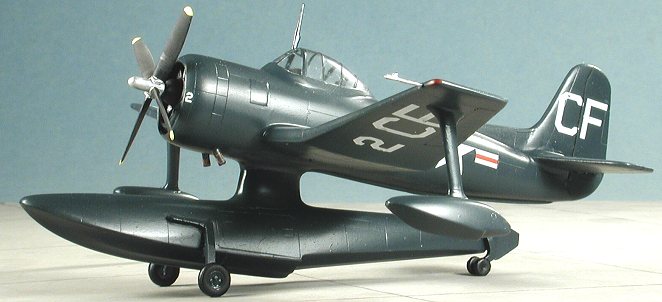
CAMOUFLAGE & MARKINGS |
X-otic 72 offers two marking options for this kit. One is a test plane at NATC
Pax River in the older three color camouflage. The insignia themselves are
post-1947 when the red bar was added so it makes for an interesting choice. The
other is for an active duty plane from VCS-15 aboard the USS Topeka in 1947.
This one was overall sea blue. 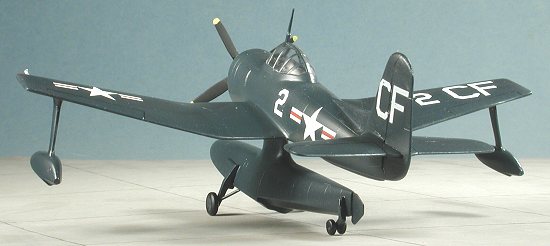 Naturally, I chose the active duty plane and
mostly because of the single color! Yeah, I'm lazy. I used Aeromaster gloss sea
blue enamel and gave it several good coats. For some odd reason, I've never
gotten this paint to fully dry in less than about 5 days. Not sure what the
reason is, but there you have it. Since it is gloss, it makes a great surface
for the decals. These were quite opaque and also a bit on the brittle side if
handled too roughly. They also didn't seem to like setting solutions too well
and gave me a bit of trouble on that front. However, work they did. A couple of
omissions that I should mention. One is that there is no serial number decal.
That item is pretty well standard on USN planes. There is also no red stripe for
the prop warning as shown on the box art. None is shown in the decal placement
guide either. I'd check references to see if one is needed. Minor items, to be
sure, but I do think they need mentioned. Once dry,
the kit was sprayed with a semi-gloss to seal in the decals. A few months at sea
will take the shine off most gloss paints, especially those of the late 40s.
Naturally, I chose the active duty plane and
mostly because of the single color! Yeah, I'm lazy. I used Aeromaster gloss sea
blue enamel and gave it several good coats. For some odd reason, I've never
gotten this paint to fully dry in less than about 5 days. Not sure what the
reason is, but there you have it. Since it is gloss, it makes a great surface
for the decals. These were quite opaque and also a bit on the brittle side if
handled too roughly. They also didn't seem to like setting solutions too well
and gave me a bit of trouble on that front. However, work they did. A couple of
omissions that I should mention. One is that there is no serial number decal.
That item is pretty well standard on USN planes. There is also no red stripe for
the prop warning as shown on the box art. None is shown in the decal placement
guide either. I'd check references to see if one is needed. Minor items, to be
sure, but I do think they need mentioned. Once dry,
the kit was sprayed with a semi-gloss to seal in the decals. A few months at sea
will take the shine off most gloss paints, especially those of the late 40s.
|
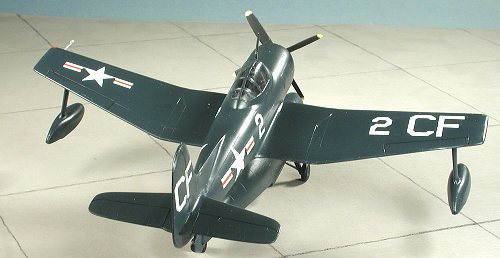
FINAL CONSTRUCTION |
 Really this consisted of some final painting (I did the tires in black for I
thought the usual dark grey would be too light), removal of the masking from the
canopy, and the attachment of the radio mast. I would have thought this plane to
be armed, but there wasn't anything in the instructions about guns so I didn't
drill any holes in the wing for them or anything like that. The last step was to
drybrush the engine with aluminum, attach the prop and use some pastels
for exhaust stains. I blew off doing an antenna wire.
Really this consisted of some final painting (I did the tires in black for I
thought the usual dark grey would be too light), removal of the masking from the
canopy, and the attachment of the radio mast. I would have thought this plane to
be armed, but there wasn't anything in the instructions about guns so I didn't
drill any holes in the wing for them or anything like that. The last step was to
drybrush the engine with aluminum, attach the prop and use some pastels
for exhaust stains. I blew off doing an antenna wire.
|
CONCLUSIONS |
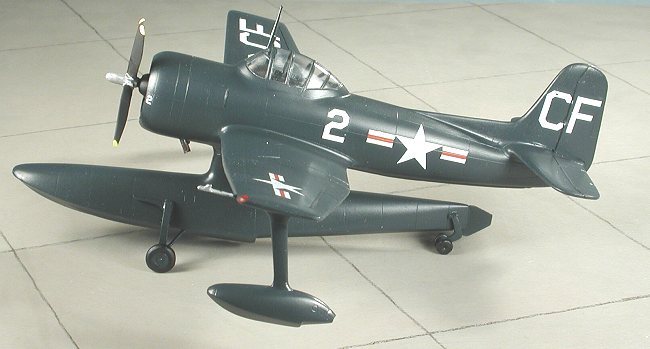
This is very much a short run kit. However, it is not impossible to build and is a good one for a rather new person to the world of short run to do for a first model. Yes, it requires modeling skill, but if all we did were shake and bake kits, then we wouldn't have any reason to exercise these skills. The end result is quite pleasing and it does make a very nice and interesting addition to one's collection.
#1257 in a series
January 2003
Though out of production, it can still be found if one looks.
Copyright ModelingMadness.com. All rights reserved. No reproduction in any form without express permission from the editor.
If you would like your product reviewed fairly and fairly quickly, please contact the editor or see other details in the Note to Contributors.